TL;DR:
- The first-time homebuyer inspection is a visual evaluation of major home systems conducted before closing, helping buyers identify issues and negotiate repairs. Attending the inspection in person and focusing on safety hazards and major defects increases the value of this process. Proper preparation, timely scheduling, and effective use of the report can save buyers thousands of dollars and ensure informed ownership decisions.
The first-time homebuyer inspection process is a professional, visual evaluation of a property’s major systems and components, conducted by a certified inspector before closing. 86% of home inspections uncover at least one issue, and buyers who negotiate based on those findings save an average of $14,000. That savings potential alone makes the $343–$500 inspection fee one of the best-spent dollars in any real estate transaction. This guide walks you through every phase of the home buying inspection process, from scheduling to negotiation, so you know exactly what to expect at inspection and how to use the results.
What are the key steps in the first time homebuyer inspection process?
The home inspection is not a pass/fail test. Think of it as a diagnostic health check-up that informs your buying decision rather than approving or rejecting the property. Understanding the sequence of steps keeps you in control at every stage.
Step 1: Schedule immediately after offer acceptance
Inspections typically occur 7–10 days after offer acceptance. Your contract’s inspection contingency period sets a hard deadline, so book your inspector within 24 hours of going under contract. Waiting even two days can cost you scheduling options, especially in busy spring markets across Memphis and West Tennessee.
Step 2: Prepare before the inspector arrives
Review all seller disclosures before the inspection date. Note anything the seller flagged, such as a past roof repair or a plumbing replacement, and ask your inspector to pay close attention to those areas. Confirm that all utilities are active, including gas, water, and electricity, because an inspector cannot evaluate systems that are shut off.
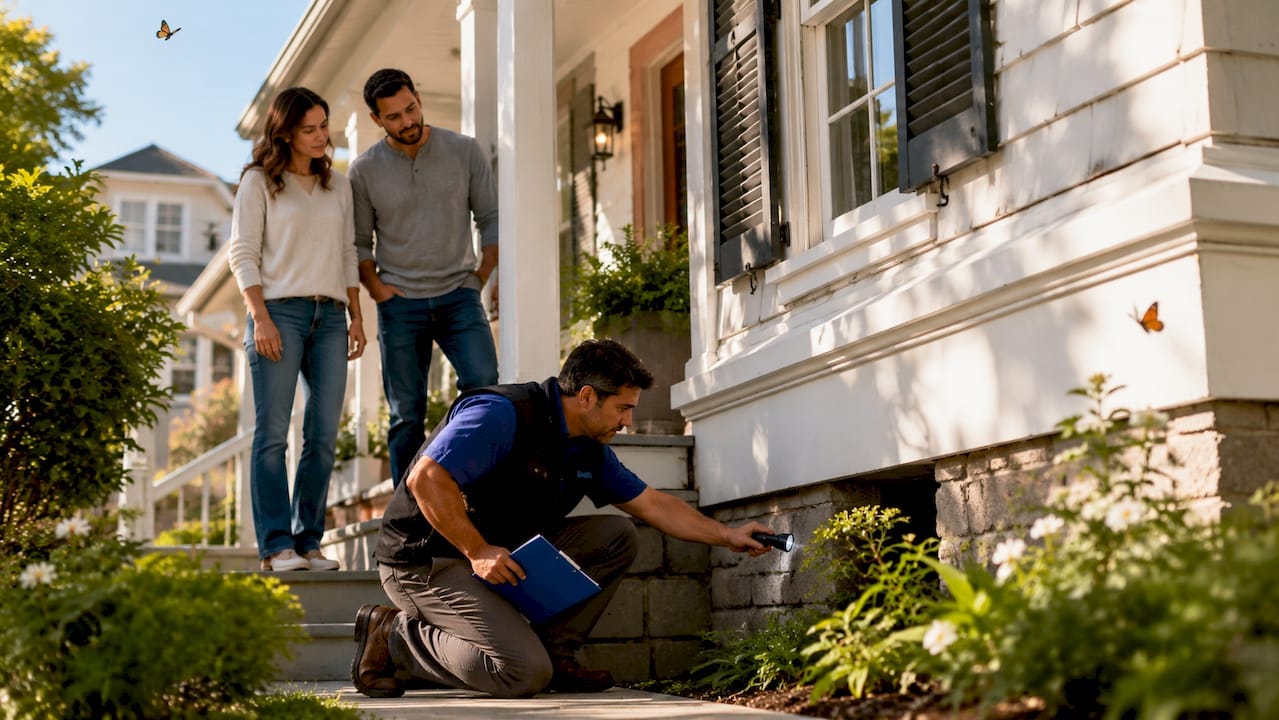
Step 3: Attend the full onsite inspection
A standard inspection covers more than 300 items and takes 2–4 hours for an average-sized home. Walk with the inspector the entire time. You will see conditions firsthand that photographs in a report cannot fully convey. Some inspectors now use digital reporting software to deliver findings the same day, which compresses your decision timeline significantly.
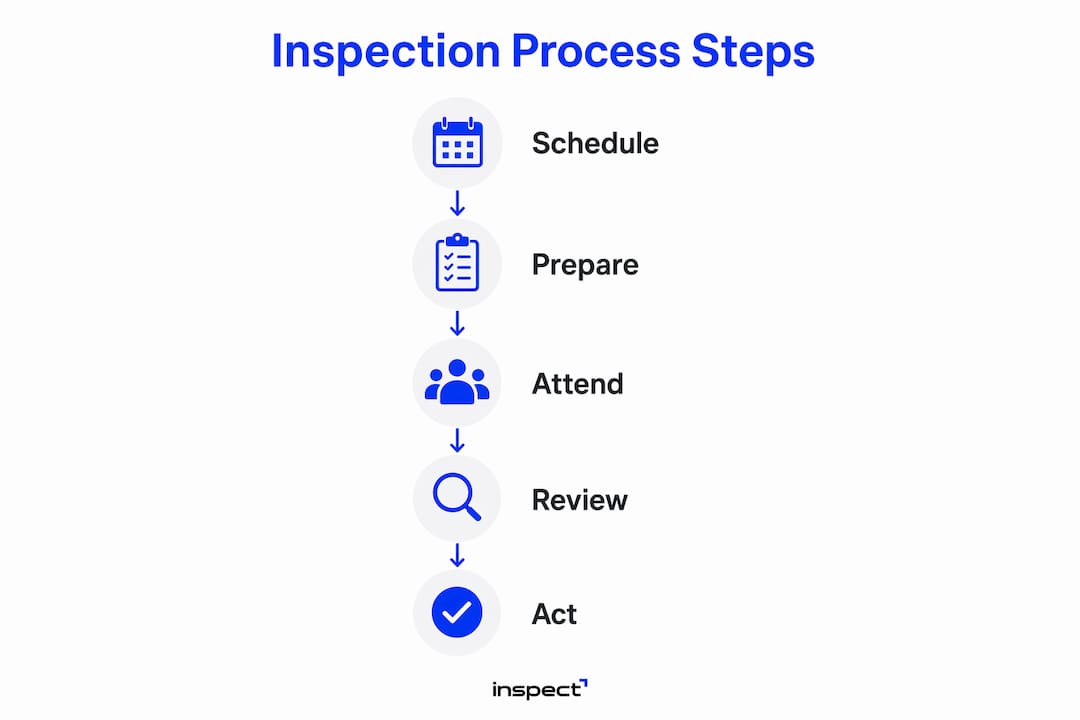
Step 4: Review the report within 24–48 hours
Reports are typically delivered within 24–48 hours of the inspection. Read the summary page first. It highlights the most significant findings and gives you a fast read on where the real concerns are before you work through the full document.
Step 5: Act before your contingency expires
Once you have the report, get contractor quotes on any major defects within your contingency window. Use those quotes to negotiate a price reduction, a repair credit, or actual repairs before closing. Missing this window means you lose your leverage entirely.
Pro Tip: Ask your real estate attorney to confirm your exact contingency deadline the same day you receive the report. Inspectors deliver findings fast, but negotiation still takes time.
| Phase | What happens |
|---|---|
| Scheduling | Book within 24 hours of offer acceptance; inspection occurs 7–10 days later |
| Onsite inspection | Inspector evaluates 300+ items over 2–4 hours |
| Report delivery | Written report arrives within 24–48 hours, sometimes same day |
| Negotiation | Request repairs, credits, or price reductions before contingency expires |
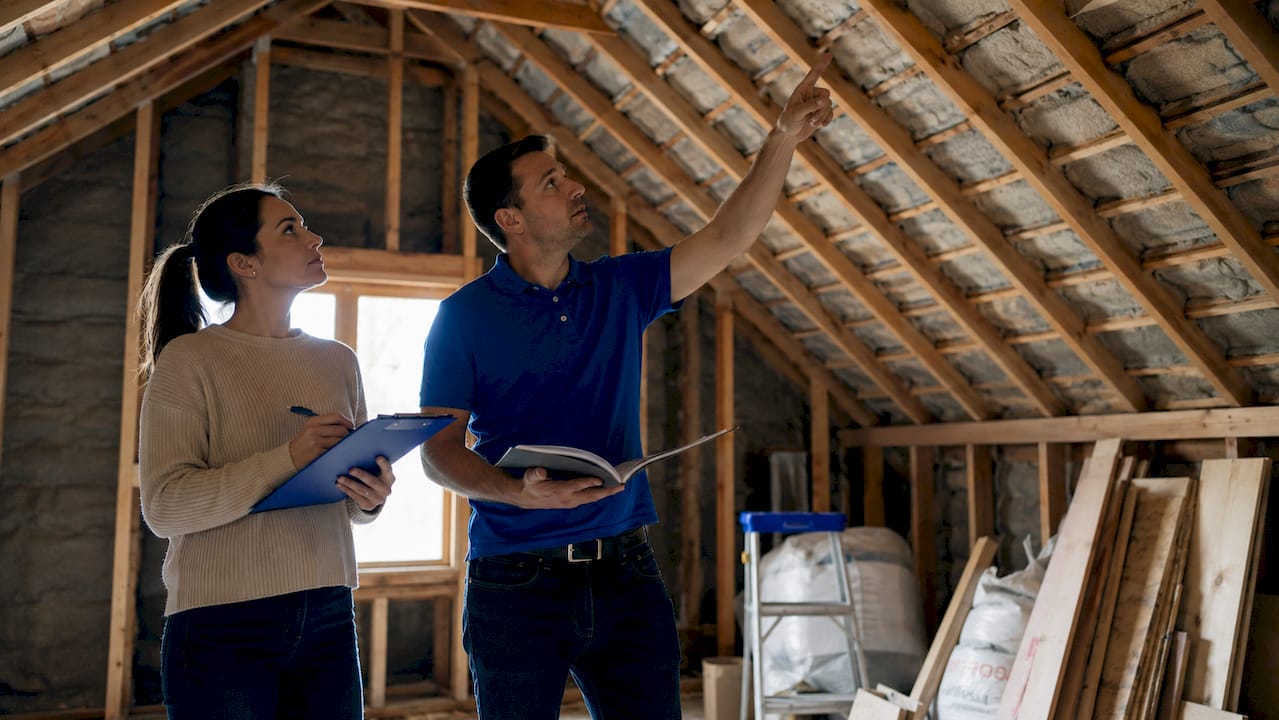
Which home systems and components are inspected in detail?
A standard home inspection covers the roof, foundation, structural components, electrical system, plumbing, HVAC, windows, doors, attic, and visible insulation. Each of these systems carries its own risk profile, and experienced inspectors know which ones to scrutinize most carefully based on the home’s age and construction type.
The most common defects found in residential inspections are roof problems at 19.7%, electrical problems at 18.7%, and window defects at 18.4%. Those three categories alone account for more than half of all significant findings. In older Memphis-area homes, knob-and-tube wiring and aging HVAC units are frequent discoveries that carry real safety and cost implications.
How inspectors classify what they find
Inspectors categorize findings into three severity levels:
- Safety hazards: Conditions requiring immediate attention because they pose a risk to occupants. Examples include exposed electrical wiring, missing smoke detectors, or a cracked heat exchanger in a furnace.
- Major defects: Significant issues that affect the home’s function or value and require substantial repair. A failing roof, foundation cracks with active movement, or a non-functional HVAC unit fall here.
- Maintenance items: Routine upkeep needs that do not threaten safety or structure. Caulking around a tub, a dripping faucet, or a dirty HVAC filter are typical examples.
Focus your negotiations on safety hazards and major defects. Maintenance items are expected in any lived-in home and rarely justify a price reduction on their own.
Add-on inspections worth considering
A general inspection does not cover every risk. Depending on the property’s age, location, and condition, you may want to add specialized evaluations. Inspection add-ons like sewer scopes, radon testing, and mold testing range from $150 to $600 each. A sewer scope is particularly valuable for homes built before 1980, where clay or cast-iron lines are common and root intrusion is a real risk.
| Add-on inspection | Typical cost | When to consider it |
|---|---|---|
| Sewer scope | $150–$300 | Homes built before 1980 or with large trees near the sewer line |
| Radon testing | $150–$200 | Any home, especially in areas with known radon risk |
| Mold testing | $300–$600 | Visible staining, musty odors, or past water intrusion |
How should first-time homebuyers prepare for and participate in the inspection?
Preparation before the inspection day directly affects the quality of information you walk away with. A few deliberate steps make the difference between a productive inspection and a rushed one.
Hire an independent, certified inspector
Hiring an independent certified inspector who works for you, not the agent or seller, protects against conflicts of interest. Look for inspectors certified by the American Society of Home Inspectors (ASHI) or the International Association of Certified Home Inspectors (InterNACHI). Both organizations require documented training, continuing education, and adherence to a published standards of practice. Upchurchinspection employs inspectors whose qualifications exceed state licensing minimums, which matters when you are evaluating a $300,000 or $400,000 purchase.
What to do before the inspector arrives
- Confirm all utilities are active: gas, water, electricity, and any pilot lights.
- Verify that the attic hatch, crawl space access, electrical panel, and water heater are unobstructed.
- Review seller disclosures and flag any disclosed repairs for the inspector’s attention.
- Arrange for pets to be secured or removed so the inspector can move freely through every room.
Attending the inspection in person allows you to see issues firsthand, ask questions in real time, and understand how the home’s systems function. The written report captures findings, but it cannot replicate the experience of standing in a crawl space and seeing active moisture with your own eyes.
Pro Tip: Bring a notepad and write down verbal comments the inspector makes while walking through the property. Those off-the-cuff observations often carry more practical weight than the formal report language.
Request a homeowner orientation
Ask for a homeowner orientation at the end of the inspection. A good inspector will show you where the main water shut-off, electrical panel, and gas shut-off are located. Knowing those locations before you move in is not optional knowledge. It is the kind of information that prevents a burst pipe from becoming a flooded basement. You can also ask about the questions to ask your inspector to get the most out of the walkthrough.
How to interpret the home inspection report and use it to negotiate effectively?
Most first-time buyers open the inspection report and feel a wave of anxiety. A 40-page document full of flagged items looks alarming. It rarely is. Understanding how to read the report correctly changes how you respond to it.
Start with the summary, not page one
The summary page lists only the findings the inspector considers most significant. Start there. It gives you a prioritized view of what actually matters before you read through every maintenance note and cosmetic observation in the full report.
Focus negotiations on what costs real money
Safety hazards and major defects are your negotiating leverage. A roof with two years of life left, a failed HVAC unit, or a foundation crack with visible movement are the kinds of findings that justify a price reduction or a repair credit. A scratched door or a missing outlet cover plate is not. Mixing minor items into your repair request weakens your position and signals to the seller that you are not distinguishing between real problems and routine wear.
Here is a practical approach to building your negotiation strategy:
- Pull every safety hazard and major defect from the report.
- Get at least two contractor quotes for each significant item.
- Calculate a realistic repair total and request either a credit or a price reduction equal to that amount.
- Decide in advance what your walk-away threshold is if the seller refuses to negotiate.
- Confirm your contingency deadline and submit your repair request with time to spare.
Inspectors write reports conservatively to limit liability. The written language often sounds more alarming than the actual condition warrants. Ask your inspector directly: “How worried would you be about this if it were your house?” That question consistently produces a clearer risk assessment than the formal report language alone. You can also review examples of inspection reports to understand what typical findings look like before you receive your own.
What common mistakes should first-time homebuyers avoid during the inspection?
The inspection process has predictable failure points. Most of them come from either skipping steps or misreading what the report is telling you.
- Waiving the inspection to win a bid. This is the single most costly mistake a first-time buyer can make. No competitive market advantage is worth absorbing unknown structural, electrical, or plumbing defects without any information.
- Not attending in person. Buyers who rely solely on the written report miss the verbal context, the visual conditions, and the inspector’s real-time judgment calls.
- Using an inspector with a conflict of interest. An inspector referred exclusively through your agent may face subtle pressure to keep deals together. Verify credentials independently and check reviews outside of agent referral networks.
- Ignoring inaccessible areas. If an area is marked inaccessible due to blockage or a locked door, demand access or a re-inspection before your contingency expires. Skipping that follow-up is how buyers inherit hidden problems.
- Over-focusing on cosmetic issues. Peeling paint and dated fixtures are visible and easy to fixate on. They are also cheap to address. A 20-year-old HVAC system or a compromised crawl space vapor barrier deserves far more of your attention.
“The inspection report is not a list of reasons to panic. It is a list of things you now know. Use that knowledge.”
Key takeaways
The first-time homebuyer inspection process is most effective when you attend in person, focus on safety hazards and major defects, and use the findings to negotiate before your contingency expires.
| Point | Details |
|---|---|
| Schedule immediately | Book your inspector within 24 hours of offer acceptance to protect your contingency window. |
| Attend in person | Seeing conditions firsthand gives you context that the written report alone cannot provide. |
| Prioritize severity | Focus negotiations on safety hazards and major defects, not cosmetic or maintenance items. |
| Ask verbal questions | Ask the inspector “how worried would you be?” to get practical risk context beyond report language. |
| Act before the deadline | Get contractor quotes and submit repair requests before your contingency period expires. |
What I’ve learned after years of watching first-time buyers go through this
Most first-time buyers walk into an inspection expecting one of two outcomes: the house passes or it fails. Neither of those is how inspections work, and that misunderstanding causes real problems.
I have watched buyers walk away from solid homes because a 40-page report looked overwhelming. I have also watched buyers dismiss serious findings because the inspector’s language seemed measured rather than urgent. Both reactions come from the same place: not knowing how to read what you are actually looking at.
The report is conservative by design. Inspectors write to document conditions accurately and limit liability. That means a finding described as “recommend evaluation by a licensed electrician” might be a $150 fix or a $4,000 panel replacement. The written report cannot tell you which one. That is why you ask. That is why you show up. The buyers who get the most out of an inspection are the ones who treat it as a conversation, not a document delivery.
One thing I tell every first-time buyer: the importance of home inspections is not just about finding problems. It is about understanding the property you are about to own. Knowing where your shut-offs are, understanding the age of your HVAC, and recognizing which issues need immediate attention versus which ones can wait two years changes how you manage the home from day one. That knowledge has real dollar value, and it starts at the inspection.
— Holly
How Upchurchinspection supports first-time homebuyers in the Mid-South
Upchurchinspection serves homebuyers across the Mid-South with residential inspections that go beyond basic checklists. Our inspectors hold certifications that exceed state licensing requirements, and we deliver detailed digital reports that clearly separate safety hazards, major defects, and maintenance items so you know exactly where to focus. We cover all major systems including roof, foundation, electrical, plumbing, and HVAC, and we offer add-on services like sewer scopes and radon testing when the property warrants them. If you want to understand the full role of inspections in real estate transactions and how they protect your investment, start there. Schedule your inspection early and give yourself the time to act on what we find.
FAQ
How much does a first-time homebuyer inspection cost?
A standard home inspection costs between $343 and $500 for most residential properties. Buyers who negotiate based on inspection findings save an average of $14,000, making the fee a high-return investment.
What does a home inspector actually check?
Inspectors evaluate more than 300 items covering the roof, foundation, electrical system, plumbing, HVAC, windows, doors, attic, and visible insulation. The most common defects found are roof problems at 19.7%, electrical issues at 18.7%, and window defects at 18.4%.
Can I skip the home inspection to make my offer more competitive?
Waiving the inspection removes your ability to identify safety hazards, major defects, and costly repairs before closing. No competitive advantage justifies absorbing unknown structural or system defects without any information.
How long does a home inspection take?
A standard inspection of an average-sized home takes 2–4 hours. Reports are typically delivered within 24–48 hours, though some inspectors using digital software deliver findings the same day.
What should I do if the inspector marks an area as inaccessible?
Demand access or schedule a re-inspection before your contingency period expires. Ignoring inaccessible areas is one of the most common mistakes first-time buyers make and can result in inheriting hidden defects after closing.