
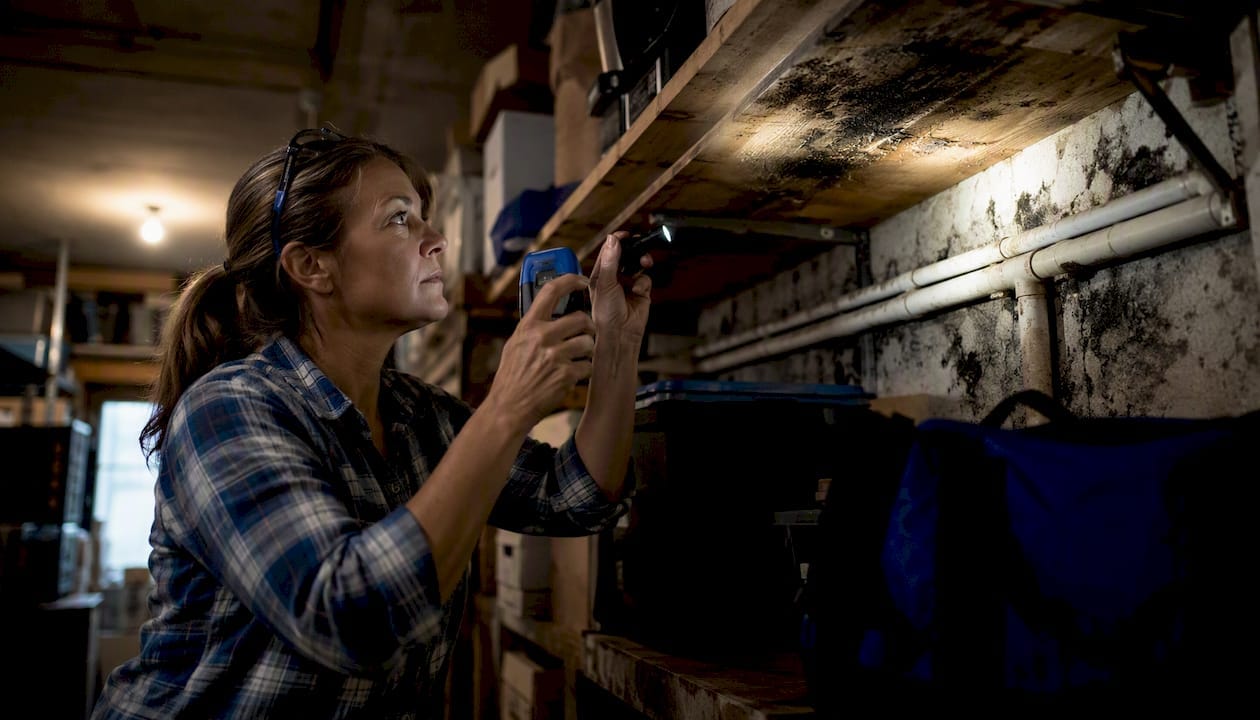
If your attic is sweltering in July, showing moisture stains on the roof sheathing, or growing mold along the rafters, you almost certainly have an attic ventilation problem — and the first thing to check is whether your soffit intakes are open and unobstructed. Most of the serious damage we see in Memphis and West Tennessee homes traces back to blocked intake air at the eaves, not a missing ridge vent.
Start with these three checks before calling anyone:
- Look at your soffits from outside. Are the vent slots visible and clear, or are they painted over, clogged with debris, or missing entirely?
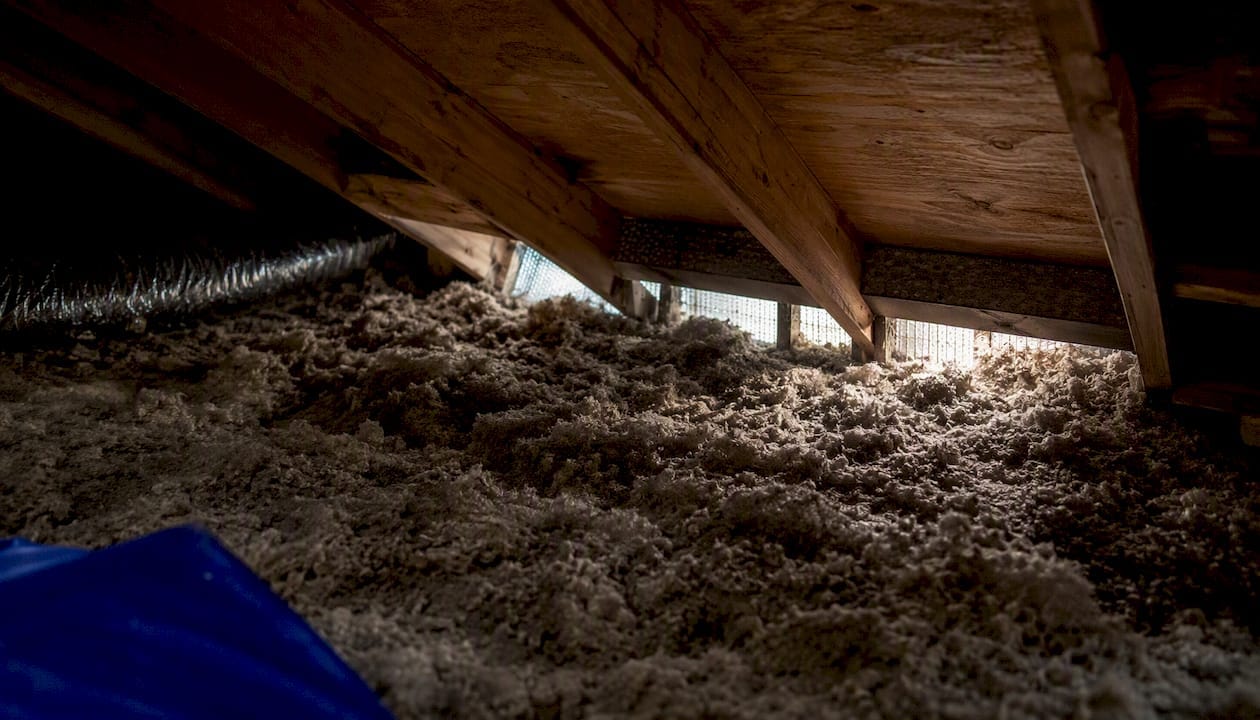
- Go into the attic and look toward the eaves. Can you see daylight at the soffit line, or is insulation pushed all the way to the edge blocking the airway?
- Check the roof sheathing for staining or soft spots. Dark streaks, frost residue in winter, or any soft wood near the ridge or eaves signals moisture accumulation.
If you find blocked soffits or moisture staining, do not add more exhaust vents before fixing the intake side. Adding exhaust without intake makes the pressure imbalance worse, not better.
Pro Tip: Before scheduling any contractor work, photograph what you find: the soffit vent slots, the insulation at the eave, and any staining on the sheathing. Those photos give an inspector or contractor a starting point and help you get accurate quotes.
Attic ventilation problems are almost always a system failure, not a single missing vent. The intake, the exhaust, and the ceiling air barrier all have to work together — fix one without the others, and you may spend money without solving the problem.
Table of Contents
- What poor attic ventilation looks like — the signs to watch for
- Why attic ventilation matters — and what it cannot fix
- Common causes of attic ventilation problems
- How to diagnose your attic ventilation problem: inspection checklist
- Practical code and design guidance: vent area rules and balancing intake vs. exhaust
- Practical fixes and trade-offs: what to install, what to seal, and where trade-offs matter
- Typical costs and timeline for common repairs and upgrades
- When to call a professional inspector or contractor
- Field notes from an inspector — common on-site findings homeowners miss
What poor attic ventilation looks like — the signs to watch for
The symptoms of inadequate attic airflow range from obvious to easy to miss, and some of them mimic other problems entirely.
High-priority signs that point directly to ventilation failure:
- Extreme attic heat in summer. An attic running 30°F or more above outdoor temperature on a hot day suggests restricted airflow. Some heat gain is normal; a 150°F attic on a 95°F Memphis afternoon is not.
- Moisture stains or frost on roof sheathing. In winter, frost forming on the underside of the roof deck is a reliable sign that warm, humid air from the living space is reaching the attic and condensing. Staining without active frost still indicates past moisture events.
- Visible mold on rafters, sheathing, or insulation. Mold growth in the attic is a moisture problem first and a ventilation problem second. The CDC notes that mold requires sustained moisture to establish — ventilation alone rarely eliminates it once it is present.
- Ice dams at the eaves. Ice dams form when heat escaping through the ceiling warms the roof deck unevenly, melting snow that refreezes at the cold eave. Poor ventilation and poor insulation both contribute.
- Curling, cupping, or prematurely aging shingles. Shingles on a poorly ventilated roof can age faster, though the magnitude of the effect is debated (more on that in the next section).
- Upstairs rooms that are consistently harder to cool or heat than the rest of the house. This often reflects heat radiating from an overheated attic into the top-floor ceiling, or conditioned air being pulled into the attic through ceiling bypasses.
- Musty odors in the attic or upper floors. A musty smell without visible mold usually means mold is present somewhere out of sight — behind insulation, on the back of sheathing, or in a corner you have not reached.
Distinguishing ventilation problems from other issues:
Roof leaks and attic moisture staining look similar but have different patterns. A roof leak typically leaves a defined water trail from a penetration point (flashing, pipe boot, or valley). Condensation from poor ventilation tends to produce diffuse staining across broad areas of sheathing, often heaviest near the ridge or at the eave line. HVAC duct leakage in the attic can also deposit moisture and cause staining near duct runs — check whether staining follows duct paths before assuming it is a ventilation issue.
Severity flags:
Wet rot in the rafters or sheathing, active mold covering more than a few square feet, or any structural sagging in the roof deck are urgent conditions. Schedule a professional inspection before doing any DIY work in those spaces. Musty odors, minor staining, and blocked soffits are maintenance-level issues you can investigate yourself.
Pro Tip: Shine a flashlight across the underside of the roof sheathing at a low angle. Staining shows up clearly in raking light even when it is not obvious from below.
Why attic ventilation matters — and what it cannot fix
ARMA’s guidance is direct on this point: ventilation’s primary job is moisture management. Keeping the roof sheathing and framing dry prevents rot, mold, and structural deterioration. The secondary effects on shingle temperature and energy costs are real but more limited than most homeowners expect.
| What ventilation does well | What ventilation cannot fix |
|---|---|
| Purges humid air before it condenses on cold sheathing | Air leaks from the living space through the ceiling plane |
| Reduces heat buildup in summer, moderating attic temperature | Inadequate insulation at the attic floor |
| Helps prevent ice dams by keeping the roof deck uniformly cold | Mold that is already established (requires remediation) |
| Extends shingle service life modestly in most climates | Duct leakage depositing moisture in the attic |
| Meets code requirements for occupied residential structures | Structural damage already caused by rot or prolonged moisture |
The shingle temperature question deserves a plain answer. Research from the Florida Solar Energy Center found an average temperature difference of roughly 2°F between vented and unvented assemblies, with peak differences up to about 9°F. The GreenBuildingAdvisor review of that literature notes that observed shingle life impacts in peer-reviewed studies are typically 1–2 years. Roofing contractors in some regions report larger reductions from zero ventilation, but the building science data does not support the dramatic shingle-life claims you will sometimes see in contractor marketing.
The more important point, emphasized by building scientist Joseph Lstiburek, is that a correctly designed airtight attic can outperform a poorly vented, leaky one. Ventilation purges moisture-laden air, but if that air is entering the attic through ceiling bypasses faster than vents can exhaust it, adding more vents accomplishes little. Sealing the ceiling plane — recessed lights, attic hatches, plumbing penetrations — often matters more than vent area.
Pro Tip: Think of attic ventilation as the exhaust side of a two-part system. The intake (soffits) and the sealed ceiling below are equally important. Fixing only the exhaust without addressing the other two is like patching one hole in a leaking bucket.
Common causes of attic ventilation problems
Most attic airflow issues we find in the field come down to a short list of recurring failures. Knowing which one applies to your house points you toward the right fix.
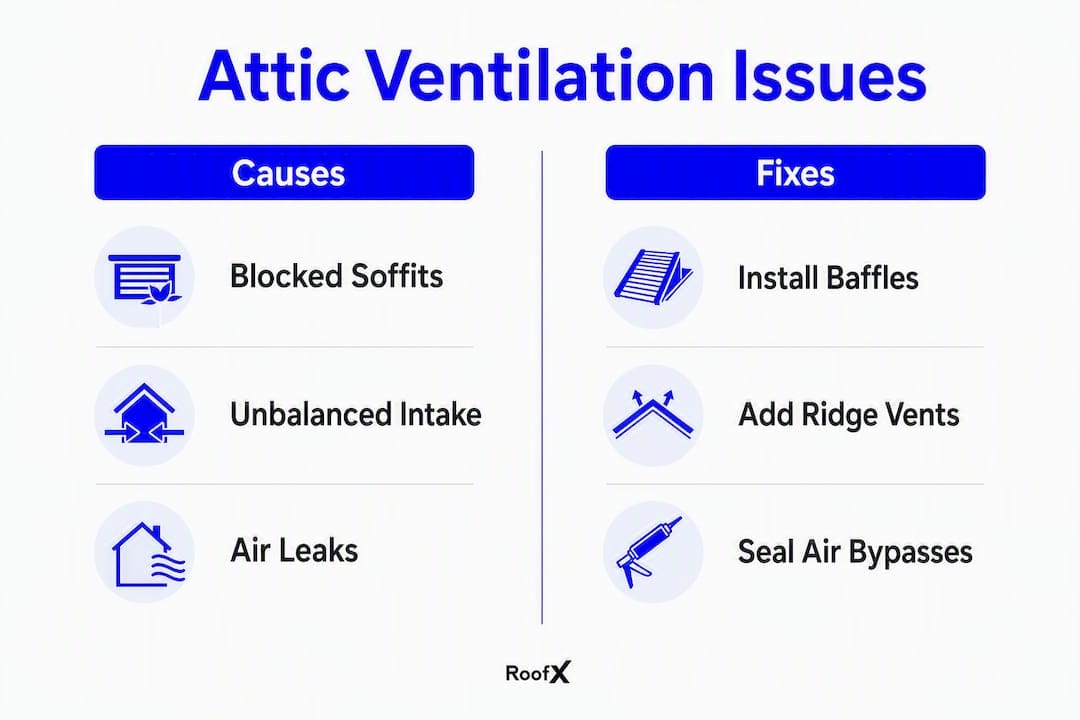
Blocked soffit or eave intake. This is the most common cause we see in older Mid-South homes. Insulation installed during a retrofit gets pushed all the way to the eave, sealing off the air channel. Without rafter baffles to hold the insulation back and maintain a clear path, the intake is effectively closed. Building America’s measure guidelines are explicit: continuous soffit vents require an unobstructed air gap over the insulation at every rafter bay.
Missing or unbalanced intake vs. exhaust. A ridge vent installed on a house with no functional soffit vents does almost nothing. The ridge vent needs a pressure differential to draw air — without low intake, there is no stack effect to drive flow. The IRC 2024 (R806) requires that 40–50% of the required net free vent area (NFVA) be located at the intake (eave or low on the roof). When that balance is missing, the system underperforms regardless of how much exhaust area is present.
Short-circuiting from mixed exhaust types. Mixing ridge vents with gable vents, box vents, or turbines on the same attic is a common installation error. Inspection records consistently show that when two exhaust vent types share an attic, air tends to flow from one exhaust to the other rather than from soffit to ridge. The result is a dead zone in the middle of the attic where air barely moves.
Air leaks from the conditioned space. Recessed light cans, attic hatches without weatherstripping, plumbing stacks, and HVAC chases all allow warm, humid air from the living space to bypass the insulation and enter the attic. This is the primary source of winter condensation in most homes — not outdoor humidity, but indoor humidity migrating upward.
Improperly installed insulation. Blown-in insulation that covers soffit baffles, or batt insulation installed without an air gap at the eave, blocks the intake airway and creates cold spots that accelerate condensation. This is also the most common DIY mistake we see: homeowners add insulation for energy savings and inadvertently close off the ventilation path.
Pro Tip: If you have a ridge vent and still have moisture problems, check the soffit intake before assuming the ridge vent is defective. Nine times out of ten, the ridge vent is fine — the soffits are blocked.
How to diagnose your attic ventilation problem: inspection checklist
A careful attic walk takes about 30–45 minutes and tells you most of what you need to know. Do it safely.
Pre-inspection preparation
- Wear an N95 respirator (fiberglass particles and mold spores are both present in problem attics), safety glasses, and long sleeves.
- Use a stable ladder rated for your weight. Never step on insulation — you cannot see the framing below it.
- Bring a good flashlight or headlamp, a moisture meter if you have one, and your phone for photos.
- Turn off attic lighting circuits before touching any wiring.
Step-by-step attic walk checklist
- Check soffit intake from inside. At the eave, look for daylight coming through the soffit vent slots. No daylight means the intake is blocked.
- Inspect rafter baffles. Are baffles present at each rafter bay where insulation meets the eave? Missing baffles are a primary cause of blocked intake.
- Examine insulation depth and placement. Is insulation pushed against the roof sheathing at the eave? That closes the air channel.
- Look at the roof sheathing. Scan for dark staining, soft spots, or frost residue. Note whether staining is diffuse (condensation) or follows a line from a penetration (leak).
- Check for mold on rafters and sheathing. Black, green, or white fuzzy growth on wood surfaces requires professional remediation, not just more ventilation.
- Locate and identify all exhaust vents. Are they ridge vents, box vents, gable vents, turbines, or a mix? Mixed types on the same attic suggest short-circuiting.
- Check the attic hatch or access door. Is it insulated? Does it have weatherstripping? An unsealed hatch is a major air bypass.
- Look for open penetrations. Recessed lights, plumbing stacks, HVAC chases — any gap in the ceiling plane is a moisture pathway.
Simple diagnostic tools and tests
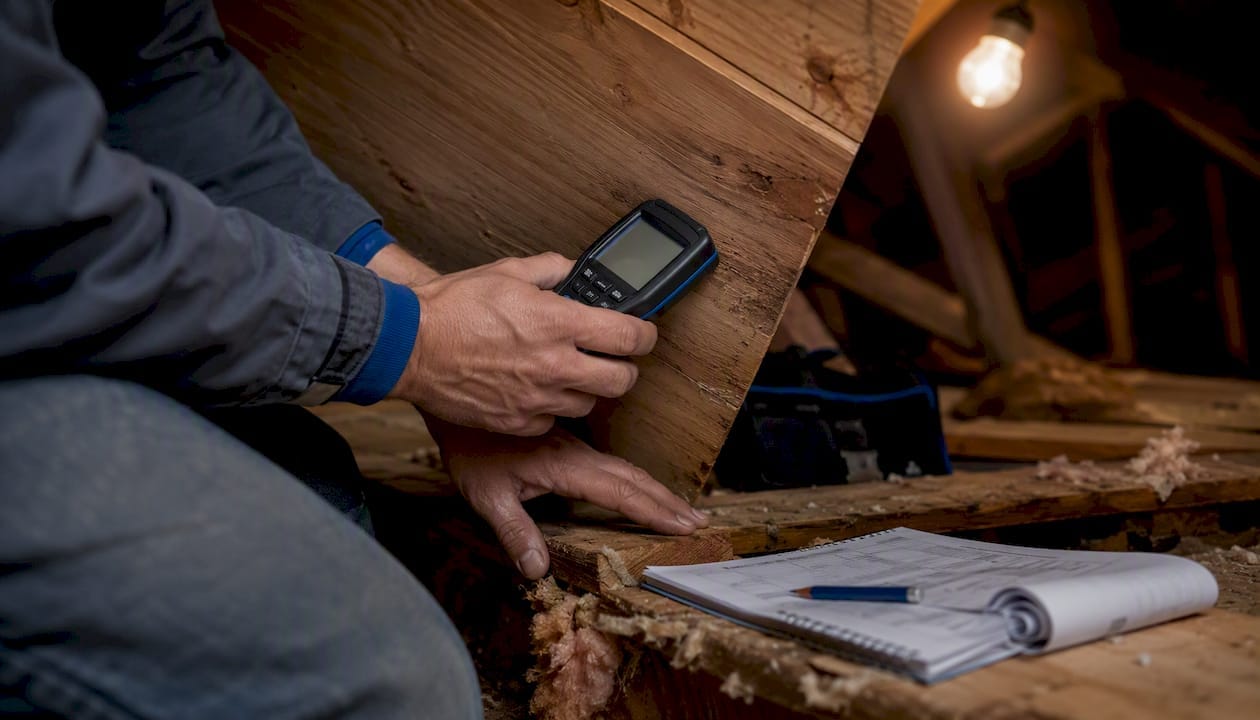
A moisture meter pressed against the roof sheathing gives you a reading in seconds. Wood above 19% moisture content is at risk for mold and decay. A thermal imaging camera (available for rent at many tool rental shops, or included in a professional inspection) shows temperature differentials that reveal blocked airways, missing insulation, and air leak locations. A smoke pencil or incense stick held near a soffit vent on a calm day shows whether air is actually moving through the vent.
Calculating your required NFVA: Measure your attic floor area in square feet. Divide by 300 to get the minimum net free vent area in square feet when intake and exhaust are balanced and a Class II vapor retarder is present. If those conditions are not met, divide by 150 instead. Then check your vent packaging for the labeled NFVA (not the nominal size) — IRC 2024 guidance is clear that screens and louvers reduce NFVA significantly below the package dimensions. A 16×8-inch soffit vent may have a nominal area of 128 square inches but an NFVA of only 55–75 square inches after screen reduction.
Pro Tip: Thermal imaging is most useful in early morning in summer (when the attic is still warm from the previous day) or during heating season. Those are the conditions where temperature differentials between blocked and unblocked areas are sharpest.
Practical code and design guidance: vent area rules and balancing intake vs. exhaust
The two numbers that govern attic ventilation in most U.S. jurisdictions come from IRC 2024 Section R806:
| Condition | Required NFVA ratio |
|---|---|
| Balanced intake/exhaust (40–50% at intake) with Class II vapor retarder | 1 sq ft NFVA per 300 sq ft of attic floor |
| All other configurations | 1 sq ft NFVA per 150 sq ft of attic floor |
The 1:300 ratio is the standard most builders target. The 1:150 ratio applies when you cannot meet the balance requirement or when a Class II vapor retarder is not present — it is a penalty ratio, not a design target.
Why intake placement matters: Stack effect drives passive ventilation. Cool air enters low (at the soffit), warms as it moves across the attic floor, and exits high (at the ridge). If intake is located too high on the roof, or if gable vents substitute for soffit vents, the low-to-high pressure gradient weakens and airflow drops. Soffit vents at the eave are the most effective intake location for this reason.
A worked example: A 1,500 sq ft attic floor with balanced intake and a Class II vapor retarder needs 5 sq ft of net free vent area to meet code (1:300 ratio). Of this, 40–50% should be at the intake (soffit). If your soffit vents have an NFVA of 55 sq in each, you need at least 7 vents on the intake side to provide 2–2.5 sq ft total (since 40–50% of 5 sq ft is 2–2.5 sq ft; 7 vents × 55 sq in = 385 sq in ≈ 2.7 sq ft). A continuous soffit vent rated at 9 sq in per linear foot would need about 32 linear feet to provide the same intake area.
Reading vent packaging: The package label lists net free area, but confirm it is the NFVA after screen reduction, not the rough opening size. Some manufacturers list both; others list only the nominal dimension. When in doubt, use the smaller number.
Pro Tip: When adding soffit vents, space them evenly along the eave rather than clustering them at one end. Uneven distribution creates dead zones in the attic even when the total NFVA is technically sufficient.
Practical fixes and trade-offs: what to install, what to seal, and where trade-offs matter
Fixes map directly to causes. Matching the right repair to the actual problem saves money and avoids making things worse.
Blocked soffit intake: Install rafter baffles (also called vent chutes) at every rafter bay where insulation contacts the eave. Baffles hold insulation back and maintain a clear air channel from the soffit to the open attic. This is a DIY-accessible repair in most attics with standard rafter framing.
Insufficient exhaust: Add a continuous ridge vent if the roof geometry allows it. Continuous ridge vents outperform box vents and turbines for most residential applications because they distribute exhaust evenly across the full ridge length. Cutting the ridge slot requires roofing experience — this is contractor work unless you are comfortable on a roof with a circular saw.
Air leaks through the ceiling plane: Seal attic bypasses with fire-rated caulk or spray foam. Recessed light cans can be covered with airtight covers from the attic side. The attic hatch should have rigid foam insulation glued to its back and weatherstripping on the frame. This work is often more cost-effective than any vent addition and directly addresses the moisture source. Attic insulation and air sealing together produce the most reliable improvement in both moisture control and energy performance.
Mixed exhaust vents causing short-circuiting: The correct fix is to eliminate the secondary exhaust type, not add more of it. If you have a ridge vent and gable vents, block the gable vents or convert them to intake-only use. Leaving both active allows air to short-circuit between them.
Powered attic fans: Energy.gov and Building America both flag a consistent problem with powered attic ventilators: when the attic is not perfectly sealed from the living space (and most are not), a powered fan can depressurize the attic and pull conditioned air upward through ceiling bypasses. The result is higher energy costs and no reliable improvement in moisture control. Powered fans have a narrow legitimate use case — attics with no practical path for passive ridge-to-soffit ventilation — and even then, they require careful installation to avoid depressurization. For most homes, passive balanced ventilation is the better solution.
Scope guidance: Installing baffles, sealing bypasses, and adding soffit vents are reasonable DIY projects for a mechanically capable homeowner. Cutting a ridge slot, applying spray foam to convert to an unvented conditioned attic assembly per IRC R806.5, or any work involving structural members requires a licensed contractor.
Pro Tip: Seal first, then vent. Air sealing the ceiling plane before adding ventilation prevents the new vents from simply drawing more conditioned air into the attic.
Typical costs and timeline for common repairs and upgrades
Cost ranges for attic ventilation work vary significantly based on attic access, roof pitch, existing vent configuration, and regional labor rates. These are ballpark figures for planning purposes, not quotes.
- Rafter baffles (DIY materials): $50–$200 for a typical house, depending on the number of rafter bays. Labor to install runs $300–$800 if contracted.
- Adding soffit vents: $15–$40 per vent for materials; $200–$600 for a contractor to cut and install a full set on a standard house.
- Continuous ridge vent installation: $400–$1,200 installed, depending on ridge length and whether the existing ridge cap needs removal. Homes with complex rooflines cost more.
- Attic air sealing (bypasses, hatch, penetrations): $500–$2,500 depending on the number of penetrations and attic accessibility. This is often the highest-value repair per dollar spent.
- Insulation corrections (repositioning or adding): $800–$3,000 depending on attic size and whether existing insulation must be moved or supplemented.
- Mold remediation (if present): Costs vary widely based on affected area and material type. Minor surface mold on sheathing may run $500–$1,500; extensive remediation with structural involvement can reach $5,000 or more.
Timeline: Installing baffles and sealing bypasses in an accessible attic takes a skilled DIYer a full day. A contractor doing soffit vents and a ridge vent typically completes the work in one day for a standard house. Insulation corrections combined with air sealing may run two to three days. Any work requiring roofing tear-off or structural repair extends the timeline.
Getting useful quotes: Require contractors to specify the NFVA they are adding, the number and type of vents, and whether they will seal bypasses as part of the scope. A quote that says only “add ridge vent” without addressing intake or air sealing is incomplete. An inspection report with documented NFVA calculations and identified bypass locations gives you a scope document that contractors can bid against directly.
Pro Tip: Get at least two bids and ask each contractor to walk you through their intake/exhaust balance calculation. A contractor who cannot explain the 1:300 ratio or does not ask about your soffit vent situation is not the right person for this job.
When to call a professional inspector or contractor
Some conditions require professional evaluation before any repair work begins. Attempting DIY fixes in these situations risks missing the real problem or creating a safety hazard.
Call a professional when you find:
- Visible mold covering more than a small isolated area, or any mold on structural members. Mold remediation requires containment and proper disposal — not just bleach and a brush.
- Soft, spongy, or discolored wood in the rafters or sheathing. This is rot, and it requires a structural assessment before any ventilation work.
- Recurring ice dams despite previous repairs. Ice dams that return after fixes usually indicate an air sealing problem that requires diagnostic tools to locate.
- Evidence of active water intrusion (wet insulation, dripping, or fresh staining after rain) that you cannot trace to a clear source.
- HVAC equipment or ductwork located in the attic, especially if ducts appear to be leaking or disconnected. Attic duct leakage interacts with ventilation in ways that require professional diagnosis.
- Any attic with a complex roof assembly: cathedral ceilings, low-slope sections, dormers, or a previous unvented conversion attempt.
What a qualified inspector provides: A thorough ventilation inspection includes thermal imaging to map temperature differentials, moisture meter readings at multiple sheathing locations, a documented NFVA calculation compared against the applicable code ratio, and a prioritized repair list with scope descriptions. Blower door testing combined with thermal imaging is the most reliable method for locating ceiling bypasses that are not visible to the naked eye.
Using the inspection report: A detailed inspection report gives you a scope document you can hand to contractors for competitive bids. It also tells you which repairs are urgent (active moisture, structural risk) versus which are maintenance items that can be scheduled over time.
Pro Tip: Ask your inspector whether thermal imaging is included or available as an add-on. For attic moisture and air sealing diagnostics, it is worth the additional cost.
Field notes from an inspector — common on-site findings homeowners miss
We see the same patterns repeatedly across Memphis and West Tennessee homes, and a few of them consistently surprise homeowners.
The most common finding is a ridge vent installed during a re-roof with no corresponding soffit intake. The roofer did the right thing adding the ridge vent, but the soffits were either never cut through or were blocked by insulation pushed to the eave during a previous energy upgrade. The homeowner paid for ventilation and got almost none of it. Confirming soffit intake is the first thing we check on any attic with moisture complaints.
The second pattern is mixed exhaust vents on the same attic. We regularly find homes with a ridge vent, two box vents left over from a previous roof, and a gable vent on each end. The gable vents and box vents short-circuit the ridge vent, pulling air laterally across the attic rather than drawing it up from the soffits. The fix is straightforward — block the secondary exhaust types — but it requires knowing that the problem exists.
Air sealing is where the real leverage is in most homes we inspect. Homeowners focus on vent area because it is visible and measurable. But a house with 20 open recessed light cans in the top-floor ceiling is pumping warm, humid air into the attic continuously during heating season. No amount of ridge vent area compensates for that. When we use thermal imaging to map attic moisture and air movement, the ceiling bypasses show up clearly — and they are almost always the primary driver of condensation problems.
The ventilation system is only as good as the ceiling below it. We have inspected attics with textbook-perfect vent ratios that still had mold on the sheathing because the ceiling plane was full of bypasses. Fix the air barrier first, then evaluate whether the venting is adequate.
Pro Tip: Before your inspection, pull back a small section of insulation near the eave in two or three locations and photograph what you find. If there are no baffles and insulation is against the sheathing, that is the first thing to tell your inspector. It saves time and focuses the diagnostic.
Seasonal maintenance checklist to keep attic ventilation working
Attic ventilation does not require much ongoing attention, but a quick check twice a year prevents small problems from becoming expensive ones.
Spring (after heating season):
- Inspect soffit vent slots from outside for debris, wasp nests, or paint buildup. Clear any obstructions.
- Go into the attic and check for new moisture staining or mold that developed over winter. Early spring is when winter condensation damage becomes visible.
- Confirm rafter baffles are still in place and that insulation has not shifted to block the eave airway.
- Check the attic hatch weatherstripping and insulation. Replace if compressed or missing.
Fall (before heating season):
- Clear leaves and debris from soffit vents and ridge vent caps before they compact and restrict airflow.
- Check for any new roof penetrations (satellite dishes, HVAC lines, plumbing additions) that may have created unsealed bypasses.
- If your region sees ice dams, verify that the attic floor insulation is at the correct depth and that there are no obvious heat sources (recessed lights, unsealed chases) that could warm the roof deck unevenly.
Most of this is safely DIY. If you find mold, soft wood, or active moisture during a maintenance check, that is a professional inspection situation, not a maintenance task.
Pro Tip: Set a phone reminder for the first weekend of April and the first weekend of October. A 20-minute attic check on those dates catches the vast majority of developing problems before they require expensive repairs.
Key takeaways
Blocked soffit intake is the single most common cause of attic ventilation failure, and sealing ceiling bypasses typically delivers more moisture control than adding exhaust vents.
| Point | Details |
|---|---|
| Check intake first | Blocked or missing soffit vents are the leading cause of poor attic airflow — confirm daylight is visible at the eave before adding any exhaust. |
| Seal before you vent | Air sealing ceiling bypasses (recessed lights, hatches, penetrations) controls moisture more reliably than increasing vent area in most homes. |
| Use the 1:300 rule | IRC R806 requires 1 sq ft of NFVA per 300 sq ft of attic floor when intake/exhaust is balanced; 1:150 applies when it is not. |
| Avoid mixed exhaust types | Combining ridge vents with gable vents or box vents causes short-circuiting and reduces effective airflow across the attic. |
| Upchurchinspection for diagnostics | Upchurchinspection provides thermal imaging, moisture readings, and NFVA calculations to identify the actual cause before any repair work begins. |
Inspector perspective — what we see most in the Mid-South
The Mid-South climate creates a specific combination of problems that does not show up in generic ventilation guides written for drier regions. Memphis and West Tennessee summers are hot and humid, which means the attic is fighting both heat load and moisture load simultaneously. Winters are mild enough that homeowners sometimes skip the fall maintenance check — and then wonder why they have frost on the sheathing in January.
The most common retrofit mistake we see in older Mid-South homes is blown-in insulation added without baffles. The insulation contractor did the energy upgrade correctly from their perspective, but nobody addressed the eave airway. The result is an attic that is better insulated but worse ventilated, and within a few years the sheathing starts showing moisture damage. The fix requires going back in and installing baffles — work that should have been done at the time of the insulation job.
When the inspection findings point to air sealing as the primary issue rather than vent area, that changes the contractor conversation entirely. A roofing contractor cannot fix a ceiling bypass problem. You need an insulation contractor or a building performance contractor who works from the attic floor, not the roof. Getting the diagnosis right before hiring anyone is what prevents spending money on the wrong repair.
Upchurchinspection can help you diagnose and prioritize
Identifying the actual cause of an attic ventilation problem before spending money on repairs is exactly what a professional inspection is for. Upchurchinspection provides ventilation-focused inspections that include thermal imaging, moisture meter readings at the roof sheathing, a documented NFVA calculation against the applicable IRC ratio, and a prioritized repair list with scope descriptions clear enough to use for contractor bids.
For homeowners, that report tells you whether the problem is intake, exhaust, air sealing, insulation, or some combination — and in what order to address them. For property managers overseeing multiple units, it provides the documentation needed to plan and budget repairs systematically rather than reacting to damage after it appears. Learn more about inspection benefits for property owners or review the property manager inspection guide to understand how scheduled inspections fit into a maintenance program. Schedule your inspection with Upchurchinspection at upchurchinspection.com.
Authoritative sources and references for further reading
| Source | What it covers |
|---|---|
| IRC 2024, Section R806 — Roof Ventilation | The governing U.S. code for attic vent area ratios (1:300 and 1:150), intake distribution requirements, and the unvented conditioned attic option under R806.5. |
| ARMA — Considerations in Attic Ventilation | Industry guidance from the Asphalt Roofing Manufacturers Association on moisture management as ventilation’s primary function and limits of ventilation for shingle performance. |
| Building America / DOE — Power Attic Fan Guidance | DOE and Building America research on depressurization risks from powered attic ventilators and recommendations for passive ventilation strategies. |
| Building America Measure Guideline — Attic Air Sealing | Practical guidance on soffit vent and rafter baffle requirements, air sealing methods, and the interaction between insulation and ventilation paths. |
| FSEC Literature Review — Attic Ventilation and Energy | Florida Solar Energy Center review of research on attic ventilation’s effects on cooling energy use, moisture, and shingle temperatures — the source for the ~2°F average temperature difference finding. |
| GreenBuildingAdvisor — Insulated Rooflines and Shingle Temperatures | Analysis of peer-reviewed research on shingle temperature differentials between vented and unvented assemblies and realistic shingle life impacts. |
| Inspectapedia — Roof Ventilation Design and Common Problems | Field-level reference for common installation errors including mixed exhaust types, missing baffles, and blocked eave airways, with remediation guidance. |
| CDC — Mold Information | Public health guidance on mold growth conditions, health risks, and the requirement for moisture control (not just ventilation) to prevent and remediate mold. |
| IRC 2024 NFVA Guidance Summary — JASPector | Practical summary of net free area calculation requirements, screen/louver reduction factors, and blower door/thermal imaging recommendations for diagnostics. |


