
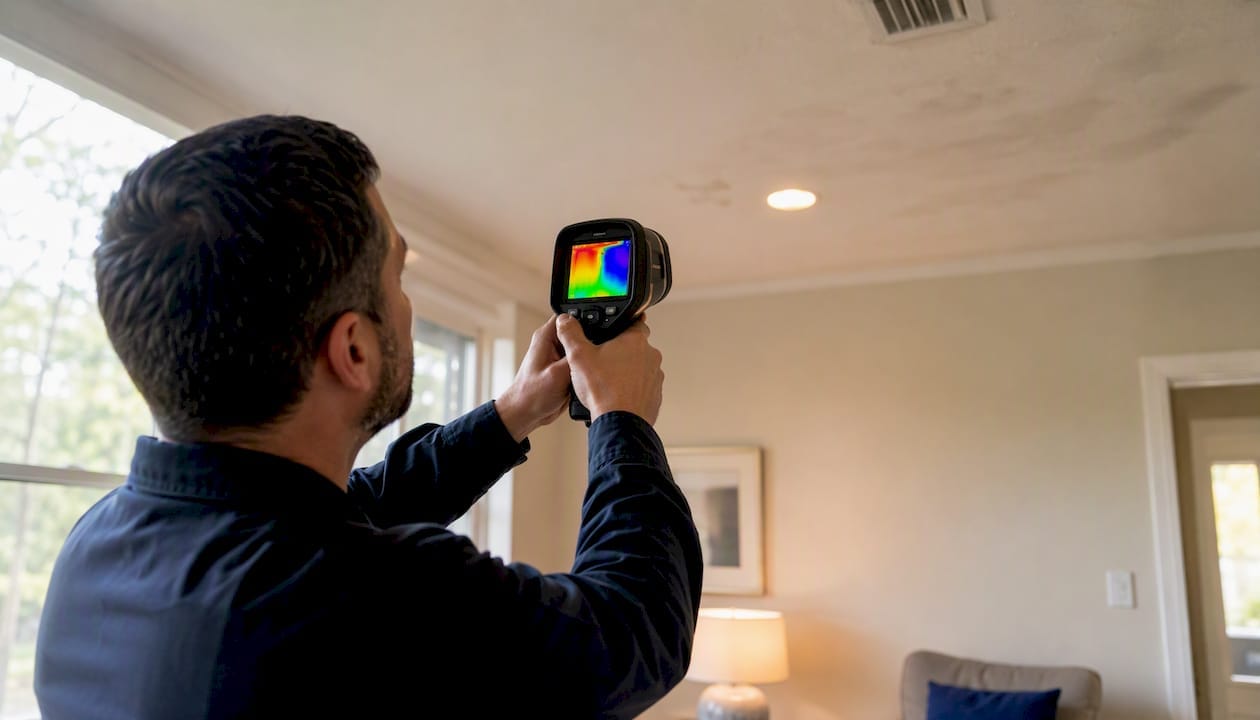
A thermal imaging inspection uses an infrared camera to map surface temperature differences on a home’s walls, ceilings, floors, and electrical components, without touching or opening anything. It’s a non-invasive add-on, not a replacement for a standard inspection. The one-sentence verdict: it’s worth adding at purchase time on older homes, when you’re chasing a known leak or cold spot, or when you want an energy audit, but it’s optional for a home with no known issues and no budget for it.
What it commonly flags:
- Cooler patches that suggest hidden moisture behind drywall or under flooring
- Insulation gaps in attics and exterior walls where heat is escaping
- Hot spots at electrical panels or outlets that point to a loose connection or overload
The catch: it only reads surface temperature. It doesn’t see through the wall, and it doesn’t measure how much moisture is actually there.
Key Takeaways
A thermal imaging inspection maps surface temperature to flag likely moisture, insulation, and electrical issues, but every anomaly needs verification before it becomes a diagnosis.
| Point | Details |
|---|---|
| It’s a screening tool, not proof | Thermograms show surface temperature anomalies that require a moisture meter or visual check to confirm. |
| Interior scans are more reliable | Wind and sunlight interfere with exterior readings, so interior surveys generally give clearer results. |
| Delta-T makes or breaks the scan | A meaningful indoor/outdoor temperature difference, often 10 to 20°F, is needed for anomalies to show clearly. |
| Ask about camera specs and training | Lower NETD, higher resolution, and credentials like InterNACHI Infrared Certified® signal a more reliable scan. |
| Add it strategically, not automatically | It pays off most on older homes, known leak complaints, and electrical troubleshooting through Upchurch Inspection’s thermal imaging add-on. |
Table of Contents
- What Is a Thermal Imaging Inspection, Really?
- How Does Thermal Imaging Work?
- What Does Thermal Imaging Find in a House?
- What Equipment Do Inspectors Use?
- Interior or Exterior Scan, and How Do You Prep the House?
- What Thermal Imaging Can’t Tell You
- When Should You Hire a Thermal Imaging Inspection?
- What Does a Thermal Imaging Inspection Cost?
- What Happens During a Thermal Imaging Inspection?
- What We’ve Learned Running Thermal Scans in the Field
- Where This Information Comes From
- Thermal Imaging Inspection for Homebuyers: What Actually Matters
- A Practical Next Step If You’re Weighing This Add-On
- Frequently Asked Questions
- Sources
What Is a Thermal Imaging Inspection, Really?
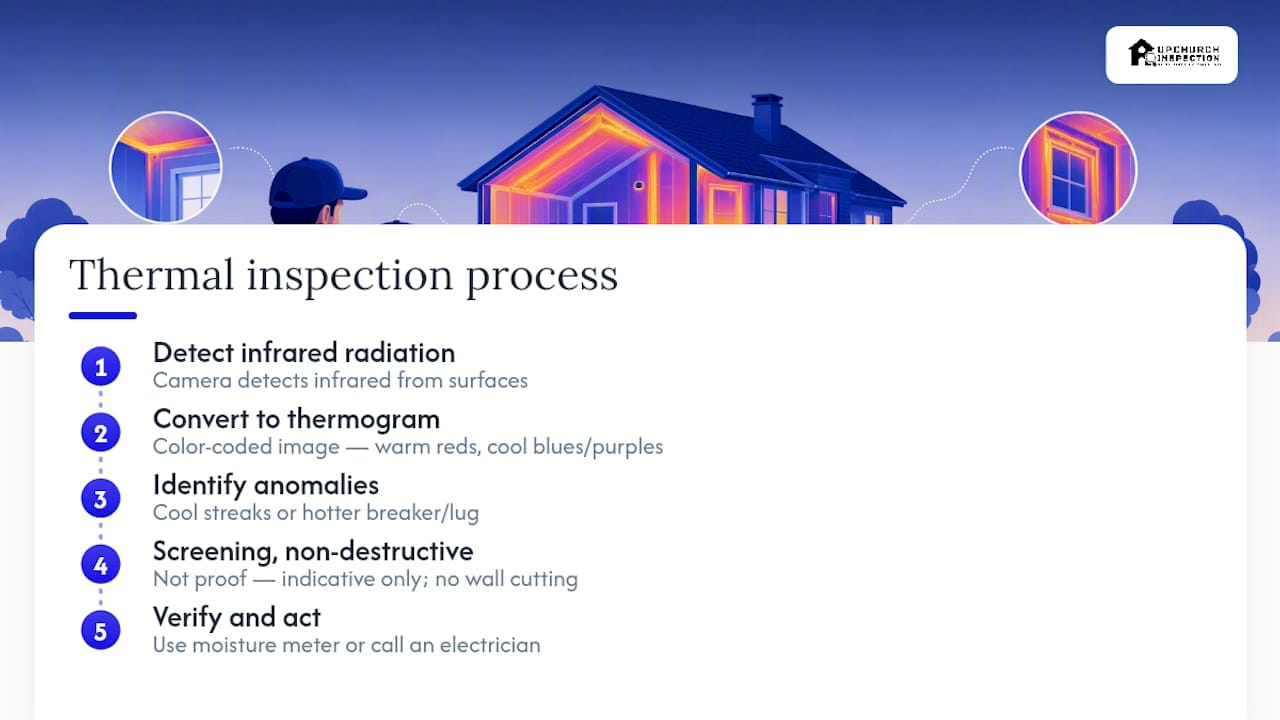
Infrared thermography is the technical term, and it’s worth knowing because you’ll see it on inspector certifications and equipment spec sheets. The camera detects infrared radiation coming off a surface and converts it into a thermogram, a color-coded image where warmer areas show up in reds and oranges and cooler areas show up in blues and purples. It’s a screening tool. Nothing about it is destructive, and nothing about it requires cutting into a wall.
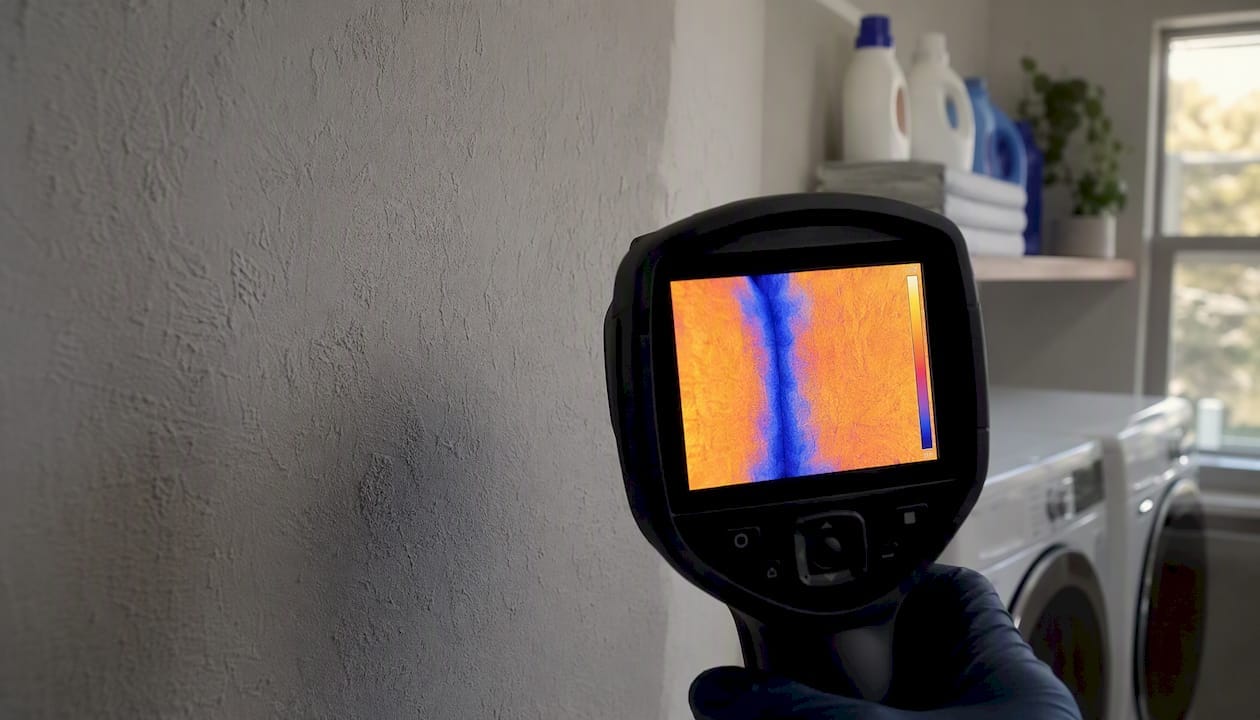
Here’s how that plays out on a real house. Say there’s a cooler streak running down an interior wall below a second-floor bathroom. On the thermogram, it reads several degrees cooler than the surrounding drywall. That’s not proof of a leak by itself, but it’s exactly the kind of anomaly that sends us to a moisture meter to confirm whether water is actually present.
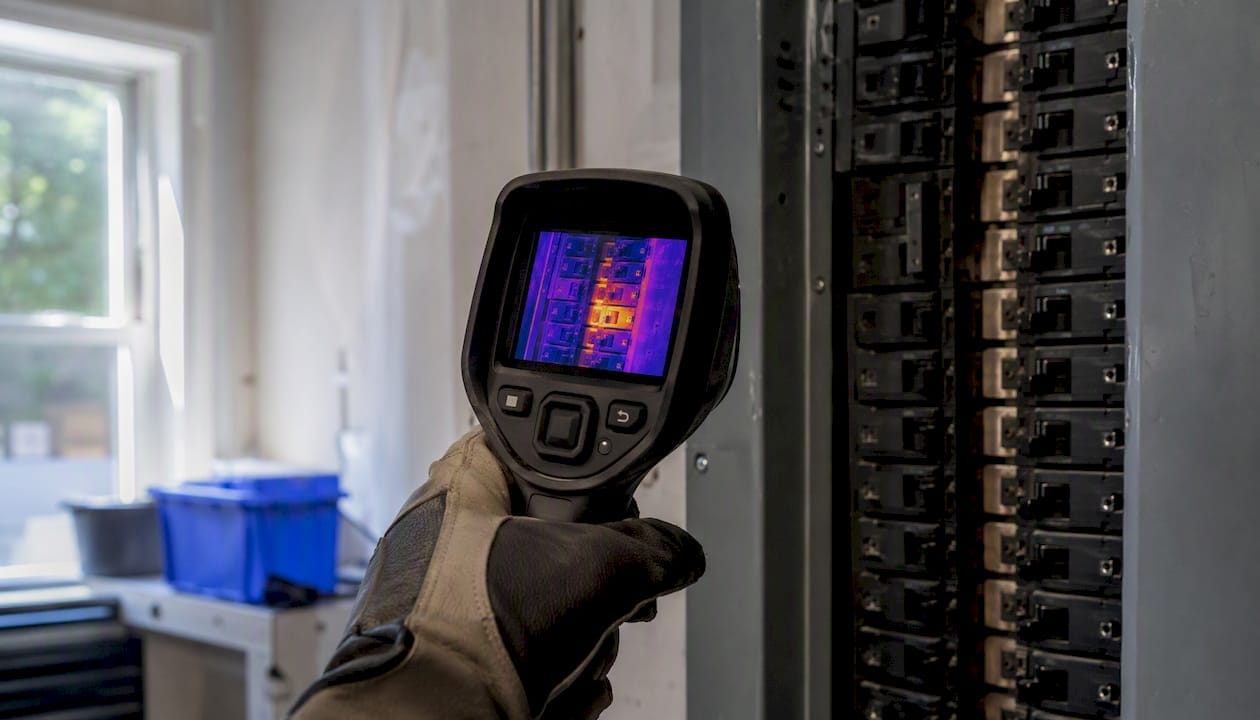
Same logic applies at the electrical panel. A breaker or lug that’s running noticeably hotter than its neighbors on the thermogram usually means a loose connection, corrosion, or a circuit carrying more load than it should. That’s not cosmetic. That’s a call to an electrician before it becomes a fire risk.
How Does Thermal Imaging Work?
The short version: the camera detects infrared energy radiating off a surface and converts it into a false-color image showing relative temperature, called a thermogram. No lasers, no radiation exposure, nothing invasive. It’s reading heat the same way your hand can feel a cold spot on a wall, just with far more precision and in a format you can document.
A few terms worth knowing if you’re evaluating a camera or an inspector’s equipment:
- Thermal sensitivity (NETD): how small a temperature difference the camera can detect. Lower NETD means finer detail and fewer missed anomalies.
- Resolution: the number of pixels in the thermal sensor. More pixels means a sharper, more interpretable image.
- Field of view: how much of a wall, ceiling, or panel the camera captures in one shot.
- Emissivity: how efficiently a material radiates heat. Shiny metal and matte drywall don’t read the same way, and a good operator adjusts for that.
- Temperature span/scale: the range the camera displays, which changes how contrast shows up in the image.
The process is straightforward: a surface emits infrared energy, the sensor picks it up, the camera’s processor converts that signal into a thermogram, and the inspector interprets the image against what’s normal for that type of surface and condition. The part homeowners need to sit with is that last word, “surface.” The camera never looks inside the wall cavity. It only reads what’s radiating off the material you can see, which is why interpretation matters as much as the equipment.
What Does Thermal Imaging Find in a House?
This is where the tool earns its keep on a residential inspection. The core applications, in order of how often they come up on a typical job:
- Hidden moisture and water intrusion: wet materials usually read cooler than dry ones nearby, flagging likely leak paths around windows, plumbing chases, or roof penetrations.
- Missing or settled insulation: attic and wall cavities without adequate insulation show up as warmer streaks in winter or cooler streaks in summer, often in a telltale stud-bay pattern.
- Air leaks and energy loss: gaps around window frames, door thresholds, and recessed lighting show as thermal bridging, a direct line to wasted heating and cooling dollars.
- Electrical hot spots: overloaded circuits, loose lugs, or failing breakers show up as localized heat at the panel or at outlets and switches.
- HVAC distribution problems: uneven duct temperatures or a cold supply run can point to a disconnected duct or a failing component.
- Radiant floor and visible plumbing runs: where accessible, temperature patterns can reveal a leaking supply line or an uneven heating loop.
Every one of these findings needs a follow-up step. Moisture candidates get a moisture meter. Electrical hot spots get an electrician’s evaluation. Duct anomalies often mean a call to an HVAC tech, and issues like dirty coils or low refrigerant can produce similar-looking thermal signatures that only a trained eye and the right follow-up test can tell apart. Insulation gaps we flag can also be worth checking against current tax credit programs if you’re planning upgrades anyway.
What Equipment Do Inspectors Use?
Not all thermal cameras are built the same, and the gap between a $200 phone attachment and a professional inspection-grade camera is bigger than most homeowners expect. Device choice directly affects how much detail shows up and how much you can trust what you’re looking at.
- Smartphone thermal attachments: entry-level, useful for a quick check but limited resolution and higher NETD, meaning subtle differences get lost.
- Handheld thermal cameras: mid-range units used by many home inspectors, offering decent resolution and reasonable sensitivity for most residential screening.
- Professional inspection-grade cameras: higher pixel count and lower NETD, which means more reliable detail on subtle temperature gradients, the kind that separate a real moisture lead from noise.
- Spot radiometers and line scanners: single-point or line-based tools that read temperature at a specific location rather than producing a full image, useful for quick checks but not for scanning a whole wall or ceiling.
Pro Tip: Ask the inspector to show you raw thermograms and the temperature scale before you hire them. If they can’t pull one up on the spot, that tells you something about how much they actually rely on the equipment versus a checklist.
Interior or Exterior Scan, and How Do You Prep the House?
Interior scans are almost always the more reliable choice for building envelope and insulation issues, as explained in how new interior doors impact energy efficiency in older homes How New Interior Doors Improve Energy Efficiency in Older Portland Homes | One Day Doors & Closets. The Department of Energy notes that exterior surveys are more prone to interference from wind and direct sunlight, which can mask or exaggerate temperature differences that have nothing to do with what’s happening inside the wall. Exterior scans still have a place, mostly for roof inspections or spotting large-scale envelope failures, but they’re a secondary tool on most residential jobs.
Getting a useful scan takes some setup on your end. A meaningful temperature differential between inside and outside, often cited around 10 to 20 degrees Fahrenheit, is what makes anomalies show up clearly on the thermogram. Without that delta-T, the camera has almost nothing to work with.
Before the inspector arrives:
- Run the HVAC as directed, either on or off depending on the season and the scan’s purpose
- Move furniture away from exterior walls so the camera has a clear line of sight
- Open or close vents as instructed to normalize airflow patterns
- Remove heavy curtains and blinds from windows being scanned
- Mention any recent roof work, sun exposure, or interior remodeling that could skew the reading
What Thermal Imaging Can’t Tell You
An infrared camera identifies a temperature anomaly. It does not diagnose the cause. That distinction gets lost in marketing copy for cheap thermal gadgets, and it’s the single biggest source of confusion homeowners run into.
Here’s what the camera genuinely cannot do:
- See through drywall, siding, or roofing material. It reads only the surface.
- Measure how much moisture is present or how deep it goes.
- Ignore reflective surfaces or direct sunlight, both of which produce false readings that look like real anomalies.
- Work without a usable delta-T. On a mild spring day with no temperature difference inside and out, the camera has little to show.
- Detect problems buried deep in a wall cavity or below a slab if the surface temperature hasn’t been affected.
- Tell the difference between an air leak and a moisture problem when both produce a similar cool signature. That call comes down to operator judgment and follow-up testing.
A thermogram is a lead, not a verdict. On more than one job, what looked like an obvious moisture stain on the thermal image turned out to be an air leak around a poorly sealed outlet box, cool air infiltrating and dropping the surface temperature with no water involved at all.
Pro Tip: Never accept a thermal finding as a diagnosis on its own. Any credible inspector pairs an IR anomaly with a moisture meter reading, a visual check, or a targeted invasive test before calling it a leak, a mold risk, or a structural problem.
When Should You Hire a Thermal Imaging Inspection?
Add the scan when you’re buying an older home with an unknown maintenance history, when you’re chasing a specific complaint like a cold spot or a musty smell, when you’re doing an energy audit, or when you’re troubleshooting an electrical panel that’s been tripping breakers. Skip it, or treat it as optional, on a newer home with no known issues and a tight inspection budget.
Picking the right person to run the camera matters more than the camera itself. Ask these questions before you book:
- What training or certification do they hold, such as InterNACHI Infrared Certified® or an ASNT industrial level?
- What camera model are they using, and what’s its NETD and resolution?
- Do they carry a moisture meter and use it to verify IR findings on-site?
- Can they show sample report thermograms with the raw images and temperature scale intact?
- What’s their insurance coverage and stated limits of liability for the scan?
Watch for a few red flags. Anyone who claims a thermal image “proves” moisture without running a moisture meter is overselling the tool. Anyone relying only on a smartphone attachment for anything beyond a quick spot check is under-equipped for a complex job. And if an inspector won’t show you a raw image with the scale visible, ask why. For most buyers weighing whether to add this to a standard inspection, choosing the right specialized inspection for the situation matters more than chasing every available add-on.
What Does a Thermal Imaging Inspection Cost?
When you’re at purchase time or chasing a specific, known problem, the marginal cost of a scan is usually small next to what it can save you in repair surprises. When the weather won’t cooperate, no usable delta-T, mild temperatures, direct sun on every wall, the value of the scan drops fast regardless of price.
A few things move the price:
- Home size: larger square footage means more time behind the camera.
- Scope: a whole-home energy scan costs more than a single targeted area, like one suspected leak location.
- Travel and region: rural properties or longer drive times can add to the fee.
- Inspector expertise and camera quality: a certified thermographer running a professional-grade camera charges more than a general inspector with a phone attachment, and usually delivers a more reliable result.
- Timing and season: scans scheduled for a season with a strong indoor/outdoor temperature gap tend to produce clearer, more actionable results.
As a rule of thumb: pay for the scan when you’re closing on an older home, dealing with a documented moisture complaint, or troubleshooting a panel that’s already shown warning signs. Treat it as optional on a newer, well-maintained home with no red flags during the walkthrough.
What Happens During a Thermal Imaging Inspection?
The process follows a consistent sequence, whether it’s a stand-alone scan or an add-on to a full inspection.
- A short pre-scan conversation about known issues, recent weather, and what you want checked.
- An exterior walkthrough, if conditions allow, followed by an interior sweep room by room.
- A dedicated scan of the electrical panel and accessible outlets and switches.
- HVAC supply and return checks, plus attic and roof deck scanning where accessible.
- Spot verification with a moisture meter or visual inspection on any anomaly the camera flags.
- Documentation of the findings into a written report.
A solid report should include:
- Thermogram images with the temperature scale visible, not cropped out
- A short, plain-language interpretation of what each anomaly likely means
- Recommended next steps, whether that’s a moisture meter follow-up, a plumber, or an electrician
- A clear limitations statement explaining what the scan did and didn’t rule out
What We’ve Learned Running Thermal Scans in the Field
On one older home, a homeowner assumed a ceiling stain was old and dried out. The thermal scan told a different story, a cool streak tracking well beyond the visible stain toward a roof valley, which pointed to an active, slow leak rather than a cosmetic remnant from a past repair. That changed the whole conversation with the seller, from “cosmetic touch-up” to “get a roofer up there before closing.”
We also see the opposite plenty: a homeowner convinced a cool patch on a bedroom wall meant a plumbing leak, when the moisture meter came back bone dry and the cause turned out to be a missing stud-bay of insulation letting cold air through. Same-looking thermogram, completely different fix. That’s the part homeowners underestimate, that a thermal image alone can’t separate a $150 insulation patch from a $5,000 plumbing repair. It’s why the moisture meter or the electrician follow-up isn’t optional paperwork, it’s the step that actually tells you what you’re dealing with.
Pro Tip: When we hand a client a thermogram, we always say plainly what we’re confident about and what we’re not. If a finding needs more testing, we say so directly instead of dressing it up as a definite answer.
Where This Information Comes From
The technical guidance here draws on established sources any homeowner can check further:
- The American Society of Home Inspectors explains device sensitivity and the need for moisture-meter verification.
- The National Home Inspection Authority breaks down delta-T requirements and certification differences.
- Upchurch Inspection’s own thermal imaging resource covers what the process looks like on a real Mid-South home inspection.
Thermal Imaging Inspection for Homebuyers: What Actually Matters
Most of what gets written about thermal imaging oversells the camera and undersells the operator. The equipment is genuinely good at what it does, catching temperature anomalies the naked eye would never notice, but the value of a scan comes down almost entirely to who’s holding the camera and whether they know when to stop trusting the image and start reaching for a moisture meter.
The conventional advice tells homeowners to “get a thermal scan” as if it’s a box to check, like radon testing. It’s not that simple. A scan run under the wrong conditions, no delta-T, direct sun on the walls, gives you a report full of noise dressed up as findings. That’s arguably worse than skipping the scan, because it hands you false confidence in either direction.
If you take one thing from this: prioritize the inspector’s training and their willingness to verify findings over the camera’s marketing specs. A mid-range camera in the hands of someone who knows building science and always follows up with a moisture meter beats a top-tier camera used as a checklist item. Judgment is the product here, not the pixel count.
A Practical Next Step If You’re Weighing This Add-On
If you’re deciding whether to bolt thermal imaging onto a purchase inspection, you don’t need to shop around for a separate specialist and coordinate two appointments. Upchurchinspection runs thermal imaging as part of its standard residential inspection service across Tennessee, Arkansas, Mississippi, Missouri, and Kentucky, with inspectors trained to interpret thermograms and follow up with moisture meters on-site rather than handing you a stack of colorful images and no explanation.
That matters because the gap between a useful scan and a wasted one comes down to exactly what this article covered: delta-T conditions, camera specs, and an operator who verifies before concluding. You get all three built into one appointment instead of piecing it together yourself.
If you’re closing on an older home, chasing a known cold spot, or just want the electrical panel checked before you sign anything, schedule an inspection and ask to add the thermal scan when you book.
Frequently Asked Questions
What is thermal imaging inspection used for in a home?
It’s used to find likely moisture intrusion, insulation gaps, air leaks, and overheating electrical connections by mapping surface temperature differences with an infrared camera.
How does thermal imaging work in a home inspection?
An infrared camera detects heat radiating from a surface and converts it into a color-coded thermogram, showing relative warm and cool areas that an inspector interprets against known building patterns.
Can thermal imaging see inside walls?
No. It only reads surface temperature. A cooler or warmer patch on a wall suggests something is happening behind it, but confirming what requires a moisture meter or a targeted invasive check.
Is a thermal imaging inspection worth the cost?
It’s usually worth it at purchase time on an older home, when troubleshooting a specific complaint, or during an energy audit. It’s less useful on a newer home with no known issues or when weather conditions won’t allow a clear temperature differential.
How long does a thermal imaging inspection take?
A targeted scan of a specific area can take under an hour. A whole-home scan added to a full inspection typically adds one to two hours, depending on square footage and the number of anomalies that need spot verification.


