
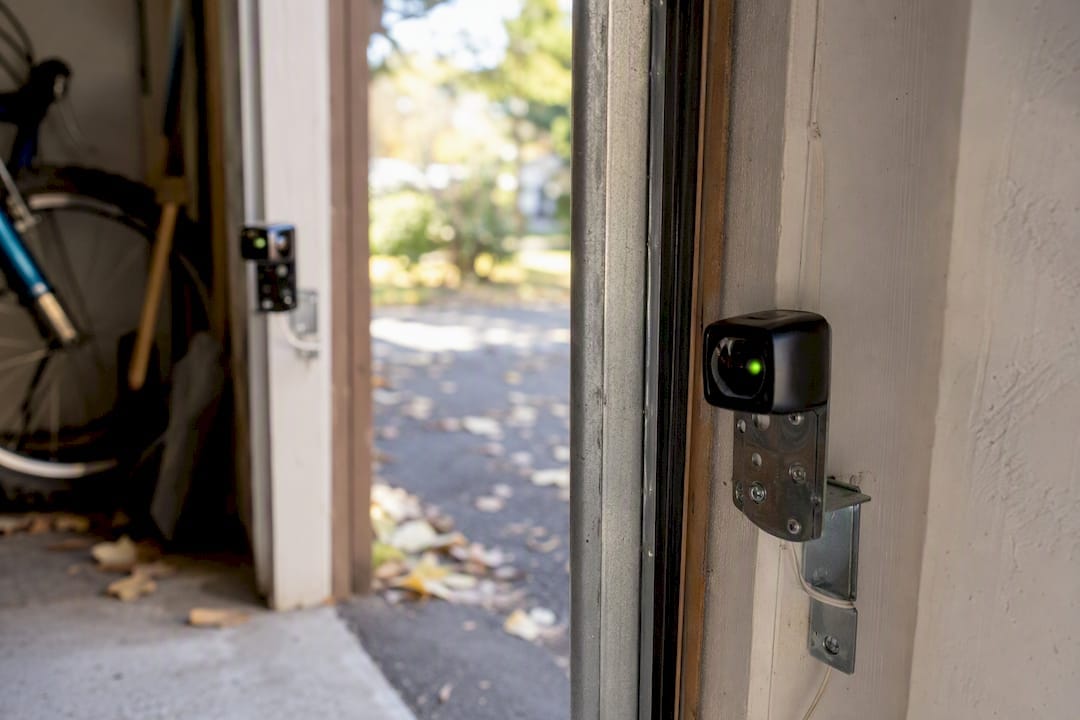
If your garage door safety sensors are blinking, dirty, or knocked out of alignment, clean the lenses and re-aim them before you touch anything else. That fixes most sensor complaints in under ten minutes. If the LED stays dark with power confirmed, or you’ve got chewed wiring, water intrusion, or the door refuses to close no matter what you try, stop troubleshooting and call a technician. These sensors are the last line of defense against a 200+ pound door closing on a kid, a pet, or your bumper.
Two checks you can run right now: First, look at both sensor eyes. A steady light on both usually means alignment is good. Second, wave a broom handle through the beam while the door closes. If it doesn’t reverse immediately, that’s a safety failure, not a maintenance quirk.
Never defeat or bypass these sensors for everyday use. A manual override belongs only to a genuine emergency, and you should re-enable the sensor the same day.
Pro Tip: Run a full sensor test on the first of every month. Steady light means aligned and working. Blinking usually signals misalignment or a dirty lens. No light at all means a power or wiring problem.
Key Takeaways
Garage door safety sensors prevent entrapment injuries only when they’re aligned correctly, mounted at or below six inches, and tested monthly for both beam interruption and force reversal.
| Point | Details |
|---|---|
| Test monthly, always | Run the photo-eye test and the 2×4 force-reversal test on the same day each month. |
| Match the mounting height | Keep sensor lenses between four and six inches off the floor, per DASMA guidance. |
| Choose OEM or universal by model | Use OEM kits for proprietary monitored harnesses, universal kits for standard two-wire setups. |
| Never bypass for convenience | Manual override is for emergencies only, not for a sensor that keeps nuisance-tripping. |
| Escalate wiring and damage issues | Chewed wiring, water damage, or failed reversal tests mean it’s time to call a technician. |
Where to Read More on Sensor Rules and Repairs
For the regulatory language itself, read 16 C.F.R. part 1211 and the CPSC’s compliance FAQ. For placement specs, DASMA’s technical data sheet on photoelectric sensor height is the industry reference. For step-by-step DIY repair, Today’s Homeowner’s troubleshooting guide is worth bookmarking alongside your own test log.
Table of Contents
- Which Garage Door Sensor Should You Buy?
- What Should You Check Before You Buy or Call a Technician?
- How Do You Troubleshoot Garage Door Sensors Yourself?
- How Do You Test Sensors and What Do the Standards Actually Require?
- How Do You Replace and Install Garage Door Sensors?
- The Sensor Problem Most Homeowners Get Backwards
- Frequently Asked Questions
- Sources
Which Garage Door Sensor Should You Buy?
Most homeowners overthink this decision. If your opener still runs and only the sensor pair has failed, buy the exact match. If you’re not sure what you have, or the sensors are older than the opener itself, a universal kit almost always does the job for less money.
OEM replacement kits (LiftMaster, Chamberlain, and Craftsman all sell dedicated sensor pairs) are your safest bet when you know your opener’s model number. They plug into the existing harness with no guesswork on wiring color codes. Chamberlain’s replacement sensors are stocked at Home Depot and priced predictably, which makes them an easy grab for a Saturday fix. The tradeoff is cost. You’re paying a brand premium for a part that, mechanically, isn’t that different from a universal one.
Universal replacement sensor kits work with most residential openers built in the last 20 years and cost noticeably less. Amazon and Lowe’s both carry several of these, and for a straightforward two wire hookup, they perform just as reliably as the OEM version. The catch: read the compatibility notes carefully, because a handful of proprietary opener systems (some newer Chamberlain and LiftMaster models with monitored wiring harnesses) won’t accept a generic sensor without an adapter.
Weatherproof or wireless upgrade kits make sense if your garage sits exposed to blowing rain, road salt, or direct sun that’s degraded the housing. Overhead Door Parts and specialty retailers carry sealed units built for that exposure. They cost more upfront but save you from replacing corroded sensors every couple of years.
| Best For | Price Range | Wired/Wireless | DIY Install | Weatherproofing | Warranty | UL 325 Compliant |
|---|---|---|---|---|---|---|
| Exact opener match | $$ | Wired | Easy | Standard | Manufacturer, 1+ yr | Yes |
| Budget/most openers | $ | Wired | Easy | Standard | Varies, often a few months | Check listing |
| Exposed/coastal garages | $$$ | Wired or wireless | Moderate | High (IP-rated) | Manufacturer, 1+ yr | Yes |
- Buy OEM when you know the exact model and want zero wiring guesswork.
- Buy universal when you’re on a budget and your opener isn’t a proprietary monitored system.
- Buy weatherproof when your garage takes direct weather or you’ve replaced sensors more than once in five years.
What Should You Check Before You Buy or Call a Technician?
A wrong sensor purchase wastes a trip and a return shipping label. Before you order anything, confirm your opener’s model number (usually on a sticker inside the motor housing), whether it uses a simple two-wire connection or a prewired harness, the bracket style your current sensors use, and whether your opener requires monitored entrapment protection—which some newer commercial-grade residential units do.
When you’re talking to a parts counter or a technician, ask directly:
- “Is this compatible with my exact model number, not just my brand?”
- “Does the kit include mounting brackets and wiring, or do I need to buy those separately?”
- “Is this part UL 325 listed or compliant with 16 C.F.R. part 1211?”
Watch for red flags. A listing with no UL or compliance language, a seller who can’t confirm compatibility beyond “fits most openers,” or a technician who casually offers to “just bypass the sensor for now” should all make you walk away. That last one is the biggest one I see in the field, and it’s the one that gets people hurt.
How Do You Troubleshoot Garage Door Sensors Yourself?
Most sensor problems are mechanical, not electrical, and you can usually run this whole sequence in under 15 minutes.
- Check the power supply. Make sure the opener itself is getting power and hasn’t tripped a breaker or GFCI outlet nearby.
- Read the LED lights on both sensor eyes. Steady means aligned. Blinking means misaligned or obstructed. Dark means no power or a wiring break.
- Clean both lenses with a dry cloth. Dust, cobwebs, and lawn debris block the infrared beam more often than people expect.
- Realign the sensors by loosening the wing nuts slightly and adjusting until both LEDs go steady, then retighten.
- Inspect the wiring along the full run for pinches, chew marks, or moisture staining, especially where it runs near the floor.
- Test with an obstruction, like a piece of 2×4, to confirm the door reverses instead of continuing to close.
Before touching anything, disconnect power at the outlet or breaker, use a stable ladder, and never work near the torsion springs or lift cables. That’s a separate, higher-risk repair category entirely.
Pro Tip: Nine times out of ten when I see recurring misalignment on an inspection, it’s because someone bumped the sensor bracket with a bike, a trash can, or a stored ladder. If your sensors keep drifting out of alignment on their own, check what’s stored near them before assuming the hardware is bad.
A temporary manual bypass exists for genuine emergencies only, like getting a car out during a power outage. Using it as a workaround for a misaligned sensor removes your entrapment protection entirely, and that’s exactly the scenario these devices exist to prevent.
How Do You Test Sensors and What Do the Standards Actually Require?
Run two tests monthly. First, the photo-eye test: close the door and pass an object through the beam. It should reverse immediately. Second, the force-reversal test: place a 2×4 flat on the ground where the door closes. The door should hit it and reverse within about two seconds rather than continuing to press down.
In plain terms, 16 C.F.R. part 1211 requires entrapment protection devices to pass specific endurance and operation tests and to show a visual indicator confirming proper alignment. That’s what your sensor’s LED is actually doing. The regulation also requires the opener to monitor sensor function every close cycle and respond to a fault instead of closing blind. DASMA’s technical guidance puts a number on placement too: sensors should sit no higher than six inches off the garage floor, because that’s the height that catches a toddler or a pet, not just a car bumper.
- Steady LED on both sensors: normal operation.
- Blinking LED: misalignment or obstruction, fixable in minutes.
- No LED at all: power or wiring issue, deeper troubleshooting needed.
- Door won’t close and keeps reversing with no obstruction present: possible sensor or opener board fault.
Pro Tip: Keep a simple log with the date of each monthly test, the pass/fail result, and the part number of your sensors. If you ever need warranty service or a home inspector asks about safety systems during a sale, that log speaks louder than your memory.
How Do You Replace and Install Garage Door Sensors?
You’ll need a stepladder, a Phillips screwdriver, a wire stripper, and a multimeter if you want to confirm voltage before you start. Most replacements take 15 to 45 minutes depending on whether your wiring is a straightforward two-conductor cable or a proprietary harness.
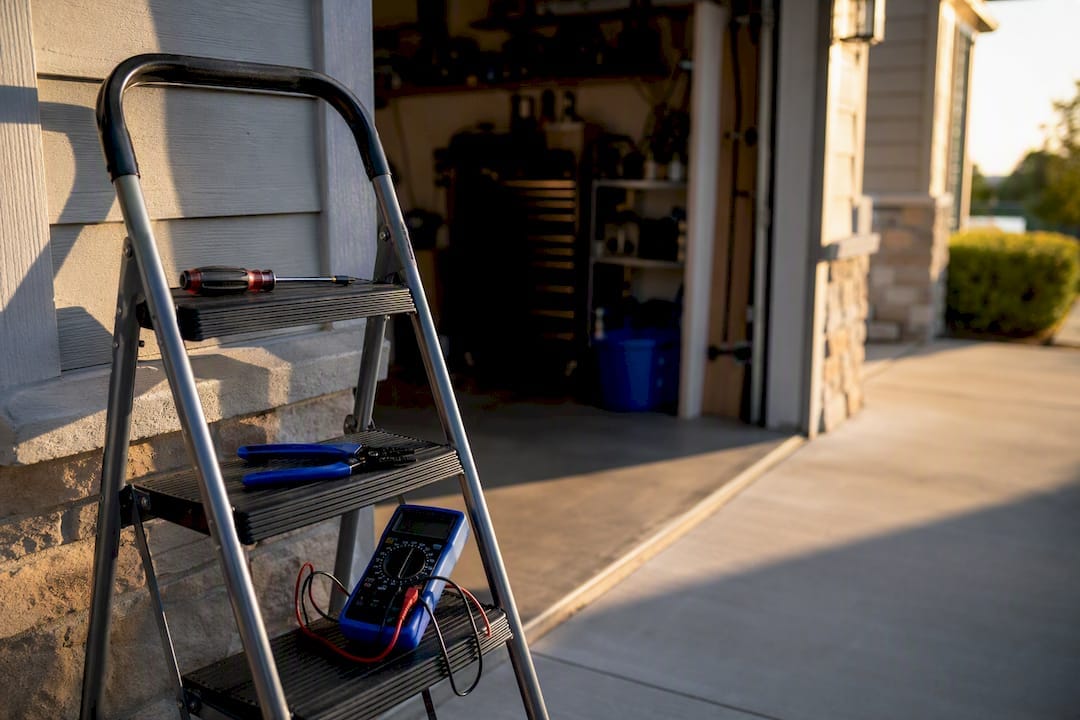
Look for the two-wire cable running from each sensor back to the opener’s terminal block. On most LiftMaster and Chamberlain units, the terminals are clearly labeled, and colors are consistent within a brand but not always across brands, so don’t assume. If your opener uses a monitored, proprietary harness, you’re generally locked into an OEM kit rather than a universal one.
Mount the sensors low to the floor, keeping the lens path perpendicular to the door’s direction of travel. Even a slight downward tilt from a bumped bracket can throw off alignment enough to cause nuisance faults.
- Cut power at the outlet or breaker before touching any wiring.
- Never work on torsion springs or lift cables during a sensor job. Different skill set, different risk level.
- If wiring is chewed, corroded, or shows moisture damage, call an electrician or technician rather than splicing it yourself. Our electrical safety inspection guide covers what damaged wiring can signal beyond just the garage.
Pro Tip: If you’re replacing sensors on a garage attached to a fire-rated wall assembly between the house and garage, take the opportunity to glance at the door hardware too. Failing self-closing hinges are a separate but common issue we flag on garage fire door inspections.
What Do Sensors Cost and How Long Does the Job Take?
Basic OEM sensor pairs typically run $30 or more. Universal kits often come in cheaper. Weatherproof or wireless options cost more upfront but hold up longer in exposed garages. A pro service call, including diagnosis and parts, usually runs a flat rate for the visit plus parts. DIY installs finish in under an hour; scheduled technician visits are typically 30 to 60 minutes on-site. Cheaper isn’t always better if the kit skips UL 325 compliance or offers no warranty.
When Should You Call a Technician Instead of DIY?
Call a pro if you find chewed or frayed wiring, water-damaged sensor housings, an opener that won’t operate at all post-replacement, an inconsistent force-reversal test, cracked mounting brackets, or a door that’s mis-tracking. Ask about cost, warranty on parts and labor, insurance, and whether they test to 1211 requirements.
What Do Inspectors Actually See on These Sensors?
On inspections, recurring misalignment from stored items, sensors mounted too high “to avoid nuisance triggers,” and neglected wiring from prior owners are the patterns that separate a cosmetic note from a safety-critical one in my reports.
The Sensor Problem Most Homeowners Get Backwards
Here’s what surprises people: the most common sensor “failure” I document isn’t a broken part. It’s a working sensor that someone deliberately mounted too high, usually because a previous owner got tired of the door reversing when the family dog wandered through the beam. That instinct, raising the sensor to stop nuisance reversals, defeats the entire purpose of the device. DASMA’s own guidance exists specifically because a beam mounted above six inches misses toddlers and small pets, the exact population entrapment protection was designed for.
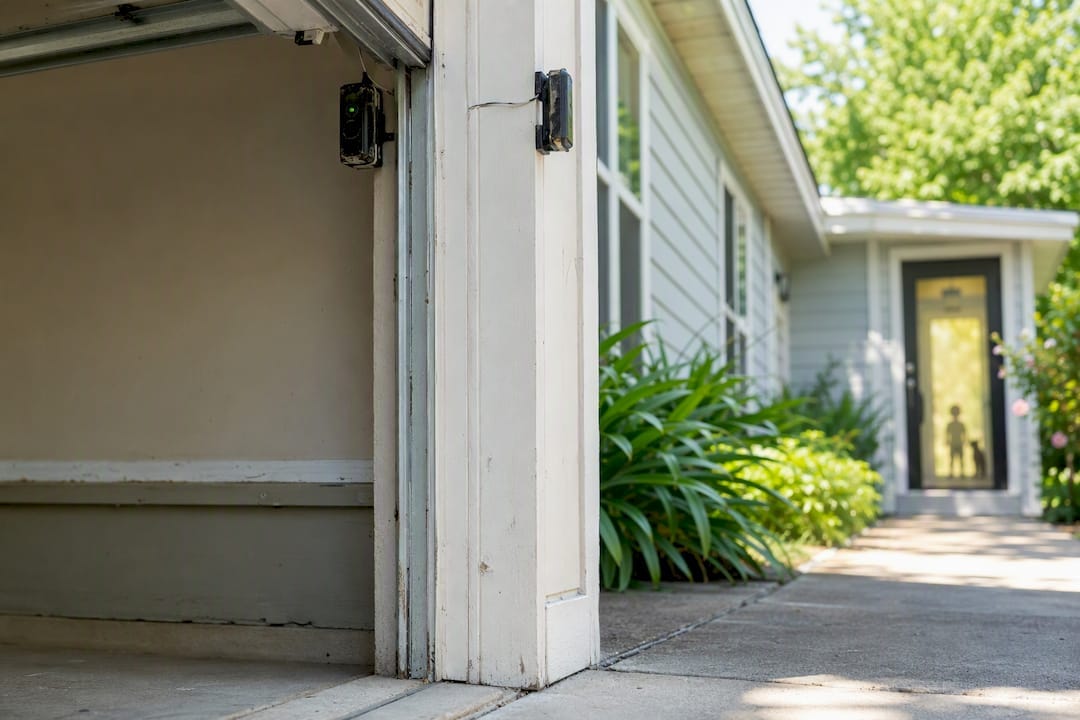
The second pattern I’d flag for anyone buying replacement sensors: don’t assume a cheap universal kit and a pricier OEM kit differ meaningfully in the sensor itself. What actually differs is documentation, warranty support, and whether the listing bothers to mention UL 325 compliance at all. A $15 sensor with no compliance claim isn’t automatically dangerous, but it’s also not something I’d want installed on a rental property where you can’t verify what a tenant is storing six inches off the garage floor.
If you manage multiple properties, the real lesson from garage door sensors is bigger than the sensor itself, and staying current with modern gate automation trends for safer properties can help enhance security and safety. It’s a preview of how deferred, invisible maintenance accumulates. Nobody notices a misaligned sensor until it’s tested, which is exactly why so few of them get tested. That same logic applies to half the systems in a building, and it’s why a scheduled walkthrough catches things a homeowner’s memory won’t. If you’d rather have someone else run that checklist on a regular cycle, Upchurchinspection’s property inspection services cover garage safety systems as part of a broader look at the property, and our property manager inspection guide breaks down what a recurring maintenance inspection plan should actually include.
A Closer Look at Sensor Wear Patterns Worth Remembering
Alignment isn’t a one-time setup. Vibration, seasonal temperature swings, and impact from stored bikes or lawn equipment knock sensors out of true more often than any electrical fault does. Treat the monthly test like changing a smoke detector battery: routine, not reactive.
Frequently Asked Questions
How do garage door sensors work?
Two sensor eyes send and receive a modulated infrared beam across the bottom of the door opening. If something breaks that beam while the door is closing, the opener reverses the door instead of letting it continue down.
Why does my garage door sensor light blink instead of staying solid?
A blinking LED almost always means misalignment or an obstruction, not electrical failure. Clean the lens and re-aim the bracket until the light goes steady.
Can I install garage door safety sensors myself?
Yes, for most standard two-wire setups, a DIY installation takes 15 to 45 minutes with basic tools. Proprietary monitored harnesses on some newer openers may require an OEM kit and closer attention to wiring.
What is UL 325 and why does it matter for sensors?
It’s the safety standard governing garage door operators and entrapment protection devices, including endurance and sensitivity testing for sensors. Buying UL 325 compliant parts means the sensor has passed testing tied to federal entrapment protection requirements.
Is it safe to bypass a garage door sensor temporarily?
Only in a genuine emergency, and only for as long as it takes to get a vehicle out. Re-enable the sensor the same day, since bypassing it removes your entrapment protection entirely.
Sources
- 16 CFR § 1211.10 – Requirements for all entrapment protection devices. | Electronic Code of Federal Regulations (e-CFR) | US Law | LII
- Automatic residential garage door operators – CPSC FAQ
- TDS 364 Installation Location of Photoelectric Sensors on Residential Garage Doors | DASMA
- Garage door sensor troubleshooting and replacement guide | Today’s Homeowner


