
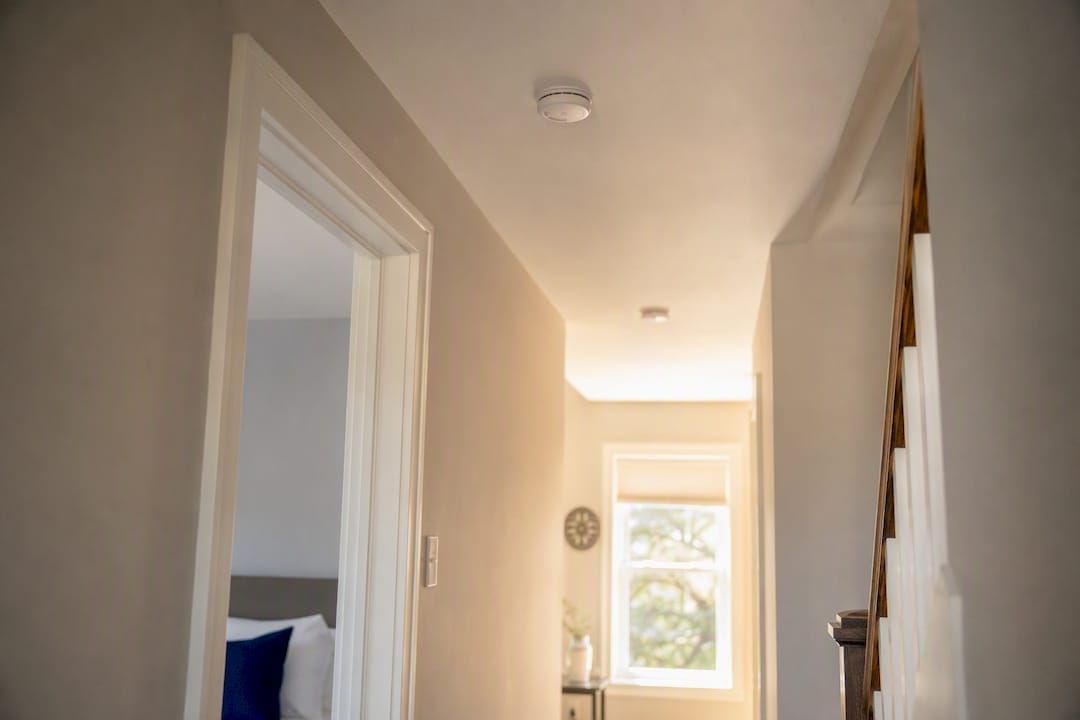
Put a working smoke alarm inside every sleeping room, outside each sleeping area, and on every level of your home, including the basement. That’s the NFPA 72 baseline, and it’s what we check first on every inspection. Mount them on the ceiling when you can. If you’re wall-mounting, keep the unit 4 to 12 inches down from the ceiling. Skip the kitchen, skip the spot right under an air vent, and skip anywhere near a ceiling fan.
Before you read another word, go test your alarms. Press the button. If any unit is silent, missing, or older than 10 years, that’s your starting point.
- Inside every bedroom
- In the hallway or common area outside sleeping rooms
- On every level, basement included
- Nothing directly above the stove or within 10 feet of it
- Nothing within 3 feet of an HVAC register or ceiling fan blade
Key Takeaways
Correct smoke detector placement follows three fixed rules: inside every sleeping room, outside each sleeping area, and on every level, with mounting and clearance details determining whether those alarms actually work when needed.
| Point | Details |
|---|---|
| Follow the three-zone rule | Place alarms inside bedrooms, outside sleeping areas, and on every level including the basement. |
| Mount on the ceiling when possible | If wall-mounted, keep the unit 4 to 12 inches down from the ceiling line. |
| Respect the kitchen exclusion zone | Keep standard alarms 10 feet from cooking appliances; use photoelectric units at 6 to 10 feet. |
| Choose dual-sensor coverage | Combine photoelectric and ionization detection, or use dual-sensor units, for broader fire-type coverage. |
| Get placement verified professionally | Upchurch Inspection documents alarm placement, mounting, and interconnect function during residential inspections. |
Table of Contents
- Where Smoke Detector Placement Rules Actually Come From
- Ceiling Height, Wall Mounting, and Keeping Detectors Clear of Vents and Fans
- Nuisance Zones: Kitchens, Bathrooms, and Where Not to Mount an Alarm
- Ionization vs. Photoelectric: Which Sensor Actually Belongs in Your Home
- Power Supply, Interconnection, and Keeping Alarms Working Year-Round
- What We See Wrong on Inspections, and When to Call Someone
- A Field Note From Holly
- What Upchurch Inspection Checks on Smoke Alarm Placement
- Frequently Asked Questions
- Sources
Where Smoke Detector Placement Rules Actually Come From
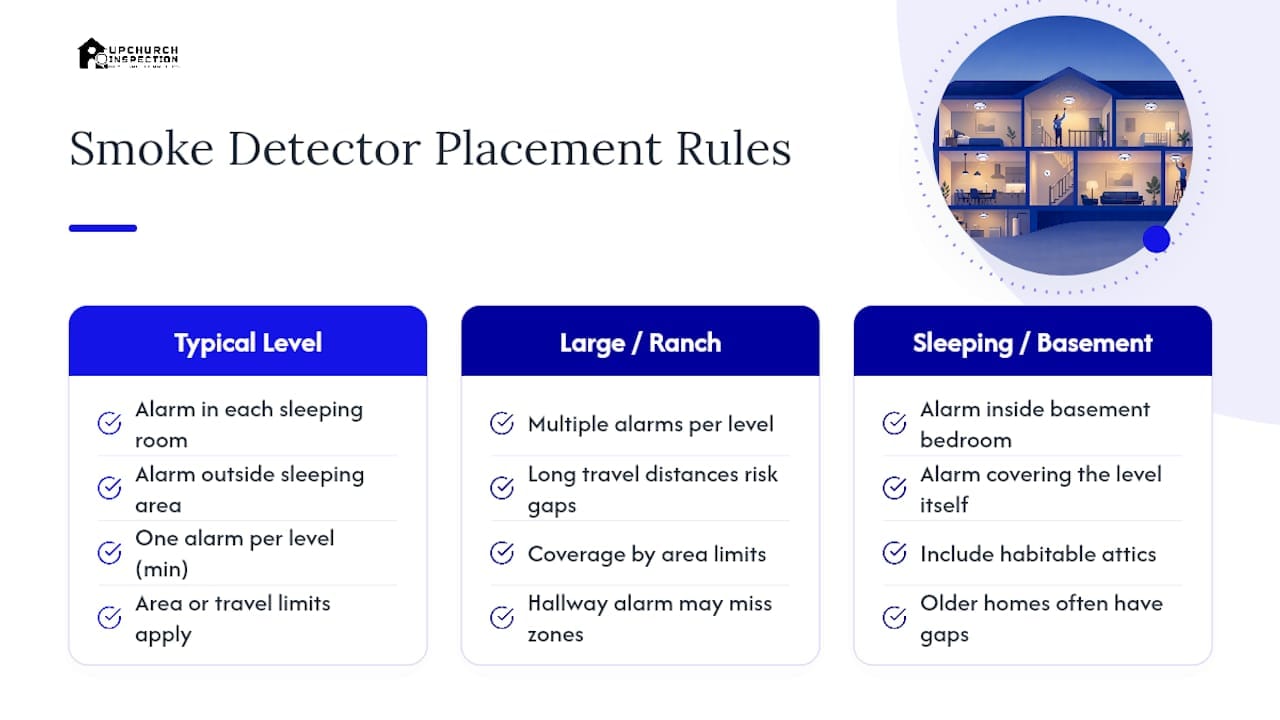
Homeowners often assume smoke alarm placement is a matter of common sense. It isn’t. It’s written into NFPA 72, the National Fire Alarm and Signaling Code, and most of it gets pulled directly into the International Residential Code that Tennessee, Arkansas, and Mississippi jurisdictions build their local amendments from. The core requirement is simple: an alarm inside every sleeping room, one outside each separate sleeping area, and at least one on every level of the dwelling, including basements and habitable attics.
That last part trips people up. A finished basement with a guest bedroom needs its own alarm inside that room, plus coverage for the level itself. A lot of older Memphis homes we inspect were built or finished out before that basement rule got enforced consistently, so we find gaps constantly.
Size matters too. When a level’s interior floor area is larger, one alarm per level usually isn’t enough. The code guidance behind this uses tighter coverage requirements based on travel distance or area covered per alarm, whichever provides better protection. A long ranch-style floor plan with bedrooms at opposite ends of the house is the classic case where a single hallway alarm leaves half the house unprotected.
One caveat worth repeating: local jurisdictions sometimes amend these requirements, and enforcement on existing homes varies. If you’re renovating or adding a bedroom, check with your local building authority rather than assuming the national minimum is what your city actually requires.
Ceiling Height, Wall Mounting, and Keeping Detectors Clear of Vents and Fans
Smoke rises and spreads across the ceiling in what’s called a ceiling jet, a thin, fast-moving layer that reaches a ceiling-mounted alarm faster than one mounted lower on a wall. That’s why ceiling mounting is the default recommendation, not just a preference.
When ceiling mounting isn’t practical, wall placement works, but the tolerance is tight. Here’s how to get it right:
- Measure down from the ceiling to the top edge of the alarm. It needs to land between 4 and 12 inches.
- On a peaked or sloped ceiling, install the alarm within 12 inches of the highest point, measured horizontally.
- Keep at least 36 inches of clearance from any HVAC supply register.
- Keep at least 36 inches of horizontal distance from ceiling fan blade tips.
- At the top of a stairway, place the alarm on the ceiling of the upper level, not down in the stairwell itself, where heat and smoke behave differently.
Pro Tip: If you’ve got vaulted ceilings in a great room, don’t just eyeball the peak. Dead air pockets form near the apex, and an alarm mounted too close to the corner where two slopes meet can sit in one. Split the difference and use a tape measure, not a guess.
Nuisance Zones: Kitchens, Bathrooms, and Where Not to Mount an Alarm
More alarms get disabled from cooking nuisance trips than from almost any other single cause we see in the field. Homeowners get tired of the beeping every time they sear a steak, so they pull the battery, and then it stays pulled. That’s the real safety problem, not the alarm itself.
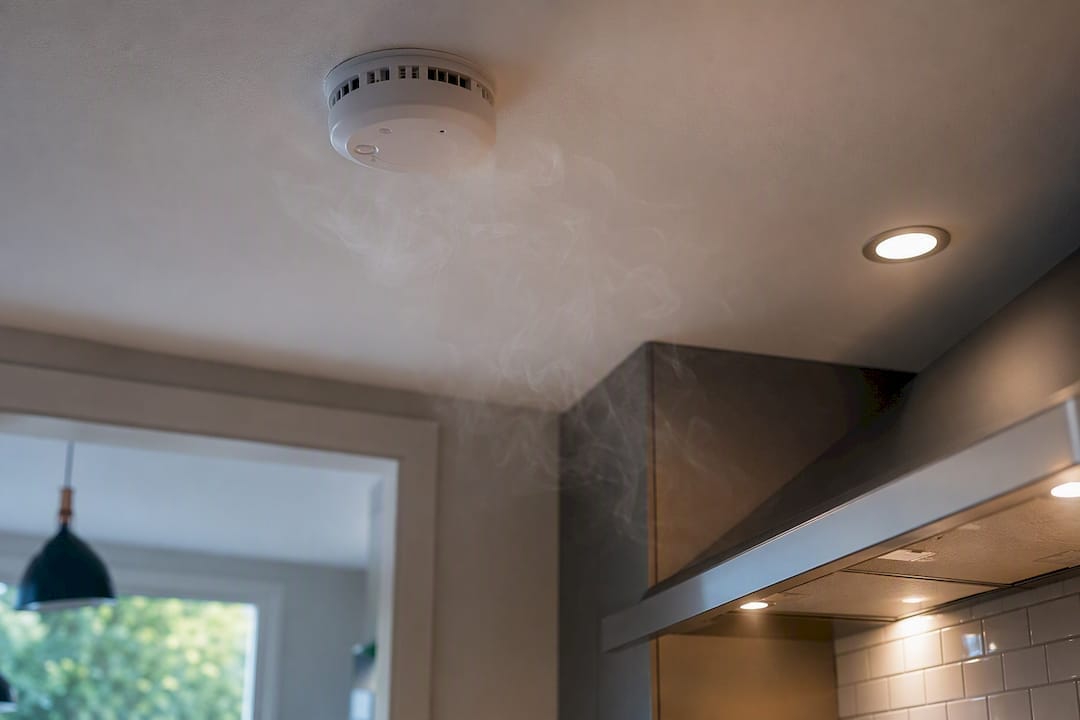
Code guidance addresses this directly. Alarms shouldn’t sit within a 10 foot horizontal flow path of a stationary cooking appliance. Between 6 and 10 feet, you can install one conditionally, but only if it’s photoelectric or specifically listed as nuisance resistant. Inside that 10 foot zone entirely, don’t put a standard smoke alarm at all.
A few other spots to avoid:
- Directly above a shower or tub, or within 3 feet of the door, where steam sets off false alarms
- Unfinished attics or garages without climate control, unless the unit is listed for that environment
- Dusty, unfinished mechanical rooms, where particulates cause chronic nuisance trips
If nuisance trips are a recurring problem, the fix usually isn’t moving the alarm father than code allows. It’s switching to a photoelectric or dual-sensor unit, which the Consumer Product Safety Commission specifically recommends near kitchens because it’s far less reactive to cooking smoke and steam than an ionization-only alarm.
Ionization vs. Photoelectric: Which Sensor Actually Belongs in Your Home
Ionization alarms react fast to flaming fires, the kind with visible flame and little smoke, like a grease fire that flares quickly. Photoelectric alarms react faster to smoldering fires, the slow, smoky kind that can start from a cigarette in upholstery or an electrical short inside a wall. Each technology has a blind spot the other one covers.
That’s why dual-sensor alarms, or a deliberate mix of both types across the house, give you more reliable coverage than betting on one technology alone. Here’s how we’d lay it out in a typical home:
- Bedrooms and hallways: dual-sensor or photoelectric units
- Near (but outside the exclusion zone of) the kitchen: photoelectric or listed nuisance-resistant only
- Basements and any level with a furnace, water heater, or attached garage: a combination smoke/CO alarm, since fuel-burning appliances and vehicle exhaust introduce carbon monoxide risk on top of fire risk
If you’re weighing CO placement alongside smoke alarm coverage, our breakdown on carbon monoxide alarm placement covers the height and proximity rules for those units specifically.
Power Supply, Interconnection, and Keeping Alarms Working Year-Round
Most homes built or majorly renovated in the last couple decades are required to have hardwired alarms with battery backup as the primary power source, which means the alarm keeps working through a power outage without you having to remember it. Where rewiring isn’t practical, a listed wireless interconnect system is an acceptable alternative under current code.
Interconnection is the part homeowners underestimate most. When one alarm senses smoke, every interconnected alarm sounds, not just the one nearest the fire. That’s the difference between waking up because the kitchen alarm went off two rooms away, or not waking up at all.
- Test every alarm monthly using the test button.
- Replace batteries on the manufacturer’s schedule, typically annually for standard 9-volt units.
- Replace the entire alarm at 10 years from the manufacture date stamped on the back, regardless of how it’s performing.
- Never paint over an alarm or let drywall dust cake the sensor.
Pro Tip: Check the manufacture date, not the install date. We regularly find “new-looking” alarms in listing inspections that are pushing 13 or 14 years old because nobody tracked when they actually went in.
What We See Wrong on Inspections, and When to Call Someone
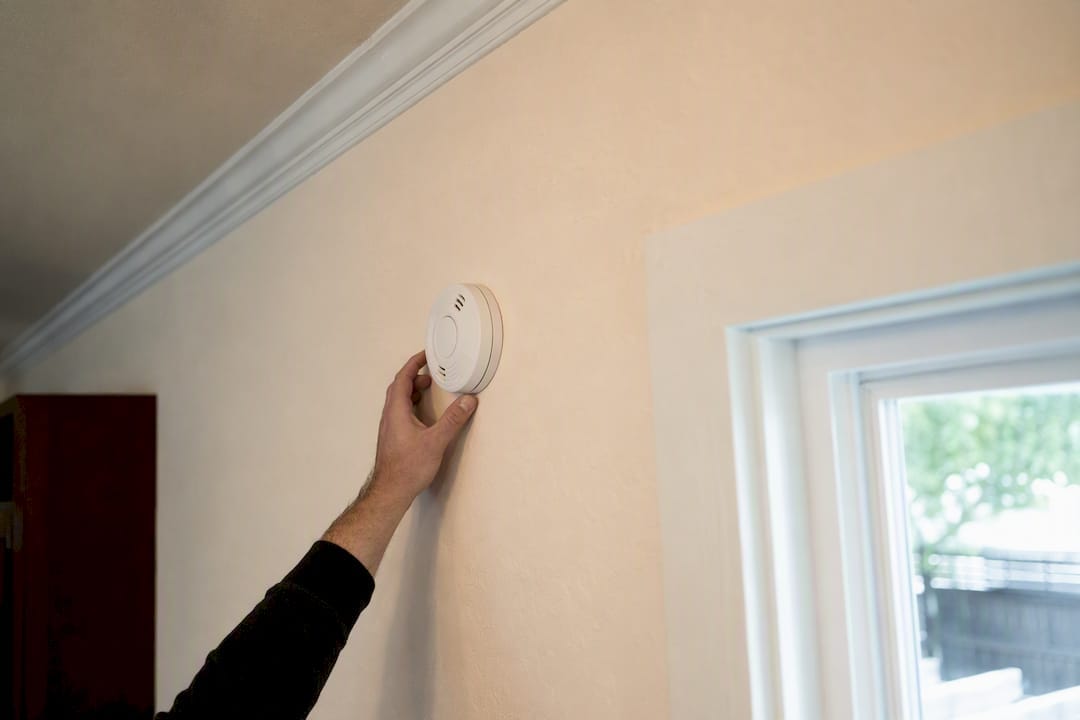
The same handful of problems show up over and over. Added bedrooms, whether from a finished basement or a converted bonus room, frequently have no alarm at all. Homeowners disable units after repeated nuisance trips and never replace them with a better sensor. Older homes have standalone battery units that don’t interconnect with anything else in the house. And wall-mounted alarms sometimes sit installed flush with the ceiling line or oddly low, outside the 4 to 12 inch window entirely.
Every one of those issues shortens the warning time occupants get, and warning time is the entire point of the system. A disabled alarm isn’t a maintenance oversight, it’s a gap in your escape plan.
If you’re dealing with a hardwired interconnect that won’t sync, a renovation that’s added sleeping rooms, or you’re just not sure what’s currently installed and where, that’s when it’s worth bringing in a licensed electrician for wiring issues or scheduling an inspection for a full placement and function review.
A Field Note From Holly
Most homes we inspect across Memphis and West Tennessee are missing at least one alarm or have one mounted wrong. It’s rarely intentional. If you’re not sure your bedrooms and basement are covered correctly, get it checked rather than guessing.
What Upchurch Inspection Checks on Smoke Alarm Placement
A home inspection isn’t a substitute for testing your own alarms monthly, but it catches what a homeowner walking through their own house tends to miss: the bedroom addition with no alarm, the wall-mount installed 18 inches down instead of 12, the battery unit that hasn’t interconnected with anything since 2016. Upchurch Inspection documents exactly that during residential inspections across Tennessee, Arkansas, Mississippi, Missouri, and Kentucky, with photos and written findings prioritized by safety impact, not buried in a 40-page checklist.
If you’re buying, selling, or just want a professional set of eyes on your current setup, our inspection services page outlines what’s included and how to get one scheduled.
Frequently Asked Questions
How many smoke detectors does a house need?
It depends on layout, not a fixed number. At minimum, one inside every sleeping room, one outside each sleeping area, and one per level. Homes with more than 1,000 square feet of interior floor area on a single level typically need additional units to keep travel distance under 30 feet.
Can I install a smoke detector too close to a ceiling fan?
Yes, and it’s a common mistake. Keep at least 36 inches of horizontal distance from the fan blade tips so airflow doesn’t delay smoke reaching the sensor.
Do smoke detectors need to be interconnected?
It’s strongly recommended and required in many new construction and major renovation projects. Interconnected alarms all sound together, which matters most when the fire starts far from where you’re sleeping.
What type of smoke detector is best near the kitchen?
Photoelectric or a unit specifically listed as nuisance resistant. Standard ionization alarms trip too easily on cooking smoke and steam, which leads many homeowners to disable them entirely.
How old is too old for a smoke detector?
Ten years from the manufacture date printed on the back of the unit, not the install date. Replace it at that point regardless of whether it still passes a test button check.


