
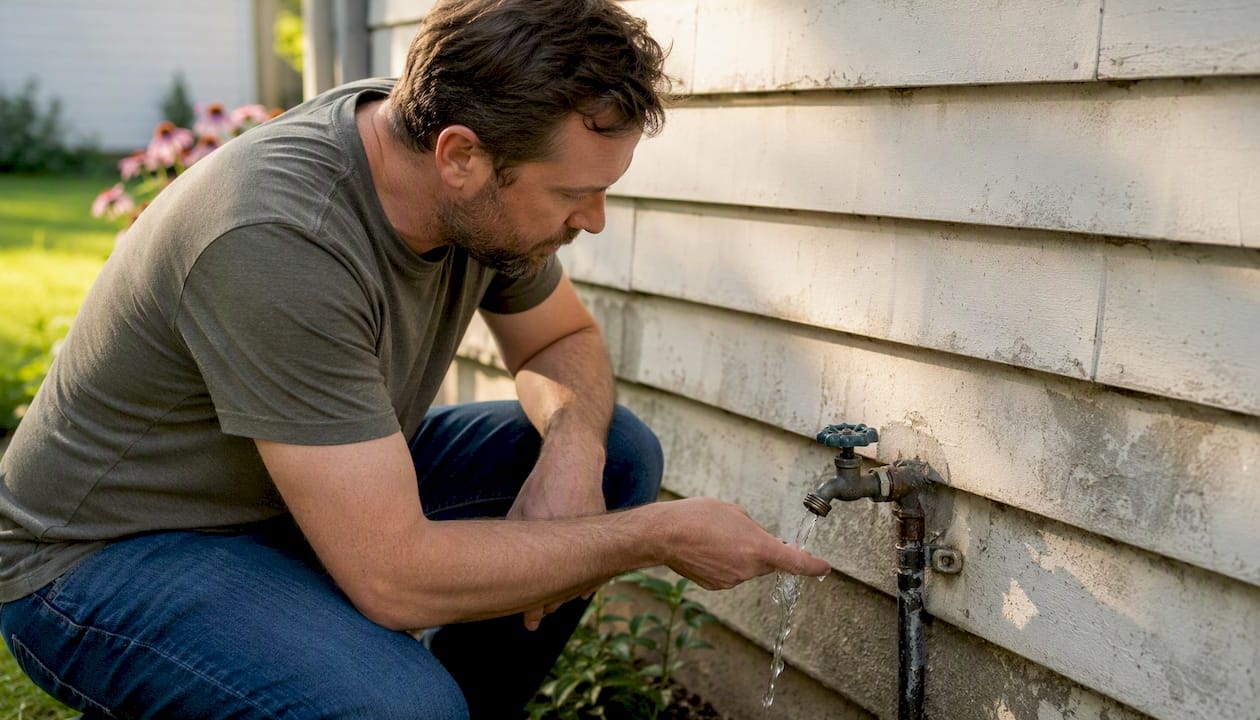
Low water pressure in a house usually traces back to one of four sources: a clogged fixture, a closed or failing valve, a faulty pressure-regulating valve (PRV), or a supply-side problem from the utility or well. Before you call a plumber, run three checks right now. First, thread a hose-bib pressure gauge onto an outdoor spigot with all other fixtures off and read the static pressure. Second, walk to your main shutoff valve and your water meter valve and confirm both are fully open. Third, unscrew a faucet aerator and run the tap bare. If flow improves immediately, the aerator is your problem and you’re done in ten minutes.
- Check static pressure at a hose bib (gauge costs about $10 at any hardware store).
- Confirm the main shutoff and meter valve are both fully open, not just mostly open.
- Remove the aerator from the lowest-flow faucet and test flow without it.
- If the whole house is affected, check whether neighbors have the same issue before touching anything inside.
Pro Tip: Before you troubleshoot a single fixture, run the shower, a sink, and the washing machine simultaneously for 60 seconds. If pressure collapses under combined load but reads fine at rest, you have a constriction problem, not a supply problem. That single test cuts your diagnostic time in half.
Key Takeaways
Low water pressure in a house almost always traces to one of four sources: a closed valve, a failing PRV, a supply-side problem, or a corroded or clogged pipe, and the diagnostic order you follow determines whether you spend $10 or $10,000.
| Point | Details |
|---|---|
| Test static pressure first | Attach a hose-bib gauge with all fixtures off; normal range is 40–80 psi, with 50–60 psi as the comfortable target. |
| Confirm valves before anything else | Check both the main shutoff and the meter isolation valve; a gate valve even slightly closed can drop pressure by 10–15 psi. |
| Functional flow reveals constrictions | A pressure drop over 20 psi under combined fixture load points to internal pipe restriction, not a supply problem. |
| PRV failure is a common whole-house cause | A PRV past 15 years of service should be tested; internal clogging can cause whole-house low pressure with no visible leak. |
| Upchurchinspection provides documented diagnosis | Our plumbing inspections cover static pressure, functional flow, pipe material review, and written repair recommendations across the Mid-South. |
Table of Contents
- How to Quickly Isolate Low Water Pressure in Your House
- How Do You Measure Water Pressure at Home?
- What Causes Low Water Pressure Throughout a House?
- Step-by-Step Fixes You Can Try Before Calling a Plumber
- Is the Problem Coming From Your Water Supplier?
- What Do Common Low-Pressure Repairs Actually Cost?
- When Should You Call a Plumber or Book a Home Inspection?
- An Inspector’s Honest Take on What Usually Matters
- Persistent Low Pressure? Upchurchinspection Can Give You a Clear Answer
- Sources
How to Quickly Isolate Low Water Pressure in Your House
Isolating the scope of the problem is the most productive thing you can do in the first ten minutes. Work through this checklist in order. Each step either confirms a scope or rules it out.
- Test one fixture against another. Turn on the kitchen faucet and note the flow. Then check a bathroom faucet on a different floor or wing. If one is weak and the other is normal, the problem is localized to that branch or fixture.
- Check every fixture type. Run a hose bib, a toilet fill valve, and a showerhead. If all are weak, the problem is whole-house. If only hot water is weak, the restriction is on the hot side, often at the water heater shutoff or inside the heater itself.
- Inspect the main shutoff valve. This is usually near where the service line enters the house, often in a basement, crawl space, or utility closet. A gate valve (round wheel handle) that is even one turn from fully open can cut pressure noticeably. Turn it counterclockwise slowly until it stops, then back a quarter turn to prevent seizing.
- Check the meter isolation valve. This valve sits at or near the water meter, often in a box at the curb. If it was recently serviced or partially closed by a utility worker, it can restrict the entire supply. Turn it fully open if accessible.
- Use fixture shutoffs to isolate branch problems. The quarter-turn stops under sinks and behind toilets let you cut off individual fixtures. Close one, test the next, and work backward toward the main. A branch that shows normal pressure when isolated but low pressure when open alongside others points to a shared-line restriction.
- Turn valves slowly and never force an old gate valve. Older gate valves can shed internal parts or seize if forced. If a valve feels stuck, stop. Forcing it can break the stem and create an emergency. A stuck gate valve is itself a finding worth noting for a plumber.
How Do You Measure Water Pressure at Home?
A $10 hose-bib pressure gauge is the single most useful diagnostic tool a homeowner can own. Attach it to any outdoor hose bib, close all other fixtures in the house, and read the static pressure. That number tells you what the supply is actually delivering before your plumbing touches it.
What you need: a hose-bib pressure gauge, a five-gallon bucket and a timer for flow rate, adjustable pliers, and thread-seal tape if the gauge threads feel loose.
Static pressure test procedure:
- Turn off all fixtures, appliances, and irrigation inside and outside the house.
- Thread the gauge onto the hose bib hand-tight, then snug it with pliers. Do not overtighten.
- Open the hose bib fully and read the gauge. Wait 30 seconds for the needle to stabilize.
- Record the number. This is your static pressure.
Functional flow test: With the gauge still attached, turn on a shower, a sink, and flush a toilet simultaneously. Watch the gauge drop. A drop of 10–15 psi under combined load is normal. A drop of 20 psi or more under light demand suggests a downstream constriction, often from mineral buildup or corroded pipe, as Inspectapedia’s clogged-pipe diagnosis guide explains in detail.
Portland’s municipal water utility also recommends this two-step approach, distinguishing static pressure from flow rate as separate measurements that point to different problems.
| Test point | What to attach | Normal reading | Interpretation |
|---|---|---|---|
| Outdoor hose bib (static) | Hose-bib pressure gauge, all fixtures off | 45–80 psi | Below 40 psi: supply or PRV problem; above 80 psi: PRV needed |
| Outdoor hose bib (functional) | Same gauge, multiple fixtures running | Drop of 10–15 psi | Drop over 20 psi: internal constriction suspected |
| Under-sink supply stop | Inline gauge adapter | Within 5 psi of hose-bib reading | Larger gap: restriction between meter and fixture |
According to home inspection standards, the normal residential pressure range is 40–80 psi, with 50–60 psi considered the comfortable operating range for most household fixtures. Readings below 40 psi typically produce the weak shower and slow-fill complaints homeowners describe. Readings above 80 psi accelerate wear on valves, supply lines, and appliances.
Statistic callout: Most plumbing professionals and inspection standards cite 50–60 psi as the target range for comfortable residential performance. Below 40 psi, fixture performance degrades noticeably. Above 80 psi, supply lines and appliance connections are under stress.
What Causes Low Water Pressure Throughout a House?
The causes split cleanly between whole-house problems and single-fixture problems. Matching your symptoms to the right category prevents wasted repairs.
Whole-house causes
Partially closed main or meter valve is the most common cause we find that homeowners overlook. Always verify both the house-side main and the curb-side meter valve.
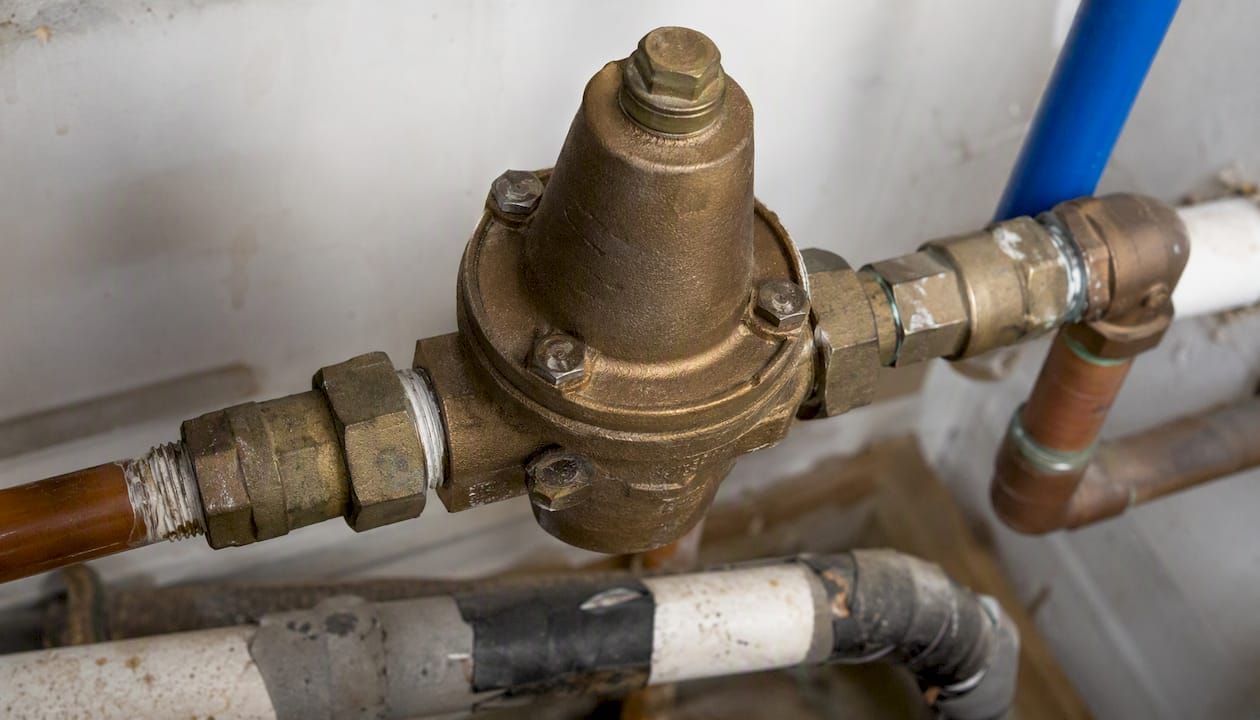
Faulty pressure-regulating valve (PRV). Most homes built after the 1970s have a PRV on the service line, usually near where it enters the house. PRVs fail gradually. They may be set correctly but internally clog or seize, causing whole-house low pressure that looks like a plumbing problem when it’s actually a single component failure. A PRV that has failed closed can drop pressure to nearly zero across the entire house.
Municipal supply problems. The utility’s main pressure fluctuates with neighborhood demand, main breaks, and seasonal usage. The EPA’s WaterSense data on household water use shows that simultaneous demand across a neighborhood during morning peak hours can reduce available flow to individual services. This is a supply-side issue, not a plumbing defect.
Leaky or corroded service line. A slow leak in the buried service line between the meter and the house wastes pressure before it reaches your fixtures. Signs include wet spots in the yard, a meter that spins with all fixtures off, or a persistent musty smell near the foundation.
Undersized service or branch piping. Older homes, particularly those built before 1960, sometimes have ¾-inch or even ½-inch service lines that cannot support modern fixture loads. This is a structural plumbing limitation, not a maintenance failure.
Well pump and pressure tank problems. For homes on private wells, a failing pump, a waterlogged pressure tank, or a tripped breaker can cause sudden or gradual pressure loss. A pressure tank that has lost its air charge will cause the pump to short-cycle, producing pressure that surges and drops rather than holding steady.
Single-fixture causes
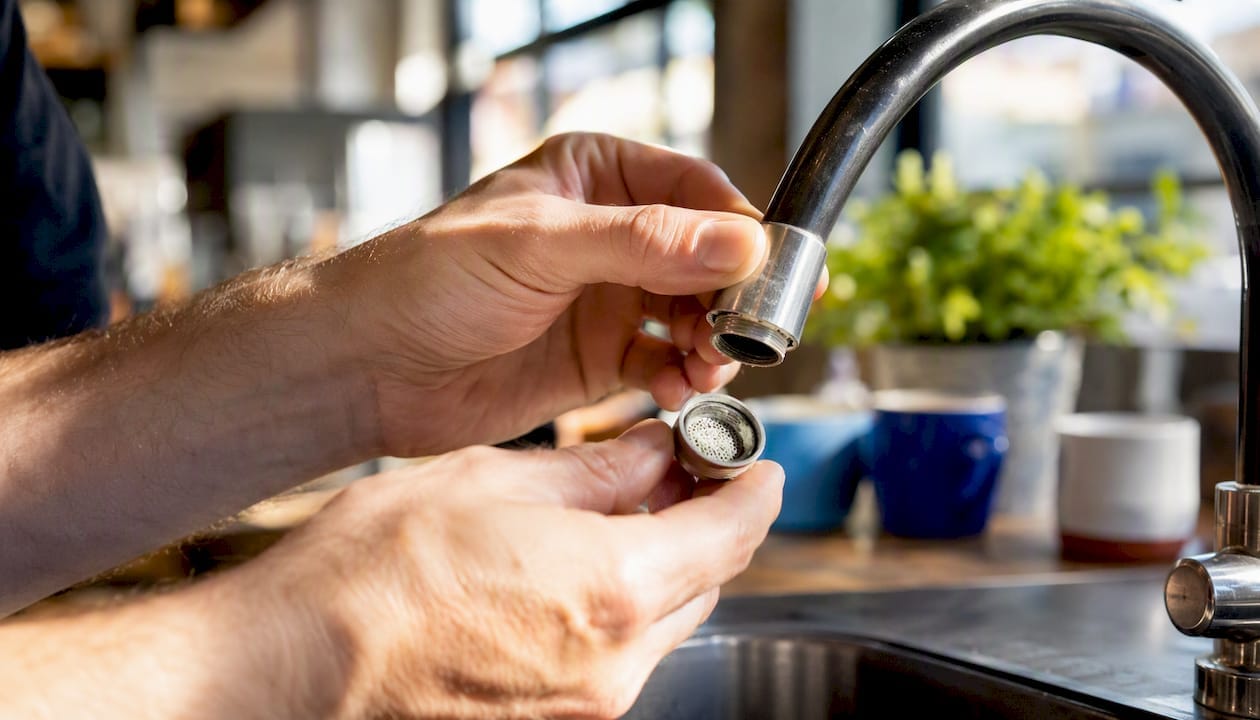
Clogged aerators and showerheads are responsible for a surprising share of “low pressure” complaints. Mineral scale, particularly in hard-water areas like much of West Tennessee, builds up inside aerator screens and showerhead nozzles over months. Flow drops, but pressure at the supply stop is fine. Removing the aerator and testing bare flow confirms this in 30 seconds.
A failing faucet cartridge or worn valve seat restricts flow even when the supply stop is fully open. This is common in older single-handle faucets. A partially closed isolation valve under a sink or behind a toilet is easy to miss, especially after recent plumbing work.
How pipe material changes the diagnosis
Galvanized steel pipe corrodes internally over decades, narrowing the bore from the inside out. A galvanized system may show acceptable static pressure at the hose bib but collapse under load because the internal bore is reduced to a fraction of its original diameter. Copper and PEX do not corrode this way, though copper can develop pinhole leaks and PEX fittings can accumulate scale at connections. Branch pipe diameter matters too: a ½-inch branch feeding multiple fixtures will always underperform a ¾-inch branch under simultaneous load.
Pro Tip: If you have galvanized pipe and pressure reads fine at rest but drops sharply when two fixtures run simultaneously, the pipe itself is the restriction. A functional flow test is the fastest way to confirm this, and it’s one of the first things we check during a plumbing inspection.
Low hot-water pressure only, with cold pressure normal, almost always points to the water heater shutoff valve being partially closed, a failing dip tube, or scale buildup inside the heater’s cold-water inlet. Check the shutoff on top of the heater before assuming a pipe problem.
Step-by-Step Fixes You Can Try Before Calling a Plumber
Work from the simplest and cheapest fix toward the more involved ones. Most fixture-level problems are genuinely DIY-friendly. PRV work and anything involving the service line or well system requires more judgment.
- Clean or replace aerators and showerheads. Unscrew the aerator (counterclockwise), soak it in white vinegar for 30 minutes, scrub with a toothbrush, and reinstall. For showerheads, fill a plastic bag with vinegar, secure it over the head with a rubber band, and leave it overnight. If the screen is damaged or the flow restrictor is broken, a replacement aerator costs under $5.
- Open all isolation valves fully. Check every supply stop under sinks, behind toilets, and at appliances. Quarter-turn ball valves should be parallel to the pipe when open. Gate valves should be turned fully counterclockwise, then backed off a quarter turn.
- Adjust the PRV. The PRV has a lock nut and an adjustment screw on top. Loosen the lock nut, then turn the screw clockwise to increase pressure (typically ¼ turn at a time), checking the hose-bib gauge after each adjustment. The target is 50–60 psi. If the PRV does not respond to adjustment, or if it has been leaking, it needs replacement. PRV replacement is within reach for a confident DIYer with basic plumbing skills, but it requires shutting off the main and working on a pressurized line. If you are not comfortable with that, call a plumber.
- Flush sediment from the water heater. Connect a garden hose to the drain valve at the base of the heater, run it to a floor drain or outside, shut off the cold supply, and open the drain valve. Let it run until the water clears. This removes sediment that can restrict the cold-water inlet and reduce hot-side pressure.
- Check and service the water softener or filtration system. A clogged softener resin bed or a bypass valve left in the wrong position can cut whole-house pressure. Check the bypass valve position and the salt level. If the system is in bypass mode, pressure should return to normal, which confirms the softener is the restriction.
- For well systems: Check the pressure tank’s air charge with a tire gauge on the Schrader valve (tank must be depressurized first). The air charge should be 2 psi below the pump cut-in pressure. Check the breaker for the pump. If the pump is running but pressure is low, or if it short-cycles every few seconds, the tank or pump needs professional evaluation. Electrical work on well pump systems should always involve a licensed electrician or well contractor.
Do not attempt: torching or pressing fittings on live lines, forcing a stuck gate valve, cutting or excavating a buried service line without utility locating (call 811 first), or adjusting municipal pressure-reducing equipment at the meter.
The Inspectapedia clogged-pipe guide notes that if pressure is good at initial turn-on but immediately falls off under demand, the problem is almost always a downstream constriction, not low supply pressure. That distinction matters for deciding whether to repipe a branch or simply clean a fixture.
Is the Problem Coming From Your Water Supplier?
Before spending money on interior plumbing, confirm whether the issue is on your side of the meter or the utility’s. This is one of the most common misdiagnoses we see, and it’s an easy one to avoid.
Knock on a neighbor’s door. If two or three neighbors on the same block report the same pressure drop at the same time of day, the problem is almost certainly the utility main or a shared service line. Inspectapedia’s municipal pressure diagnosis guide recommends this neighbor check as the first step before any interior investigation.
Watch for timing patterns. Pressure that drops every morning between 6:00 and 8:00 AM and recovers by mid-morning is a demand-driven supply issue, not a plumbing defect. The utility’s distribution system is simply undersized for peak load in that area.
Check the meter. With all fixtures off, watch the meter’s low-flow indicator (usually a small triangle or dial). If it spins, you have a leak between the meter and the house. If it is still, your supply line is intact and the problem is inside.
Contact the utility. Call with your gauge reading, the time of day you measured it, and a list of affected fixtures. Most utilities will send a technician to check main pressure at the curb. Document everything in writing.
| Situation | Short-term fix | Long-term remedy |
|---|---|---|
| Utility main pressure low neighborhood-wide | Pressure booster pump on service entry | Utility main upgrade or service upsizing (utility’s responsibility) |
| Shared service line restriction | Booster pump, reduce simultaneous demand | Service line replacement or upsizing (licensed contractor, permit required) |
| House-only pressure drop, meter reads fine | PRV adjustment or replacement | Repipe undersized branches |
| Leak between meter and house | Temporary pressure booster | Service line repair or replacement (permit required in most jurisdictions) |
Permits are typically required for any work on the service line between the meter and the house. In Tennessee, Arkansas, and Mississippi, that work must be performed by a licensed plumber or utility contractor. Lead times for municipal main repairs can run weeks to months depending on the utility’s backlog.
For every foot of vertical rise in your home, effective pressure drops by approximately 0.434 psi. A two-story home with fixtures 20 feet above the service entry loses roughly 8–9 psi at those upper fixtures before accounting for any pipe friction. That physics is worth keeping in mind when upper-floor pressure is consistently lower than ground-floor readings.
What Do Common Low-Pressure Repairs Actually Cost?
Repair costs vary significantly by scope, local labor rates, and whether permits are involved. The ranges below reflect typical contractor pricing in the Mid-South market; coastal or high-cost-of-living markets will run higher.
| Repair | Typical cost range | Typical timeline |
|---|---|---|
| Aerator or showerhead clean/replace | $5–$30 DIY; $75–$150 with plumber | Same day |
| PRV adjustment | DIY (gauge + time); $100–$200 with plumber | Same day |
| PRV replacement | $150–$500 including parts and labor | Same day to 1 day |
| Minor leak repair (accessible pipe) | $150–$400 | Same day to 1 day |
| Water heater flush and service | $75–$200 | Same day |
| Pressure booster pump installation | $800–$2,000 installed | 1–2 days |
| Partial repipe (one branch or floor) | $1,500–$4,000 | 1–3 days |
| Full house repipe | $5,000–$15,000+ | 3–7 days |
| Service line replacement (meter to house) | $3,000–$10,000+ | 3–10 days, permit required |
| Well pump service or replacement | $500–$2,500 | 1–3 days |
A consumer advisory on plumber costs for low water pressure notes that simple fixes like aerator cleaning or PRV replacement often run $150–$500, while repiping and service-line work are substantially more. Get at least two written quotes for any job over $500. When requesting quotes, provide your static pressure reading, photos of the pipe material visible in the basement or crawl space, the year the house was built, and a list of affected fixtures. That information lets a contractor scope the job accurately without a paid site visit.
Weather and contractor availability affect lead times in the Mid-South. After a hard freeze, plumbers are booked out for days. If you are dealing with a burst or leaking service line in January, expect to wait or pay a premium for emergency service.
When Should You Call a Plumber or Book a Home Inspection?
Some pressure problems are straightforward maintenance. Others are signals of something more serious. Knowing which is which saves money and prevents damage.
Call a plumber now if:
- You have an active leak, water seeping from a wall, floor, or foundation, or a meter spinning with all fixtures off.
- Pressure dropped suddenly and completely, with no obvious cause like a recently closed valve.
- The well pump is running continuously or tripping the breaker.
- You smell sulfur or notice discolored water alongside the pressure drop, which can indicate pipe corrosion or a failing anode rod.
- A gate valve broke or seized during troubleshooting.
Book a home inspection when:
- You are buying a home and want an objective assessment of the plumbing system’s condition before closing.
- Pressure is intermittently low and you cannot reproduce the problem consistently enough to show a plumber.
- You suspect corroded supply lines but cannot see the pipe material throughout the house.
- A plumber has quoted a major repair and you want an independent second opinion on scope and necessity.
A home inspector’s plumbing scope typically includes: static pressure measurement at a hose bib, functional flow testing at multiple fixtures simultaneously, visual review of accessible supply piping material and condition, water heater inspection (age, condition, temperature and pressure relief valve), PRV location and visible condition, visible leak search at supply connections and drain lines, and written recommendations for specialist follow-up such as a sewer scope or thermal imaging scan. Per national home inspection standards, inspectors document pressure readings and note pipe materials, but they do not open walls or perform destructive testing.
A plumber, by contrast, will diagnose and repair specific defects, pull permits for code-required work, and provide a written estimate. The two roles complement each other: an inspection tells you what the system looks like and what risks exist; a plumber fixes the specific defect.
Before either professional arrives, have your gauge reading written down, photos of any visible pipe in the basement or crawl space, a list of which fixtures are affected and when, and notes on any recent plumbing work or utility service in the area. That preparation cuts the diagnostic time significantly and often reduces the service call cost.
The Spruce’s homeowner guide to low water pressure also recommends noting whether the problem is hot-only or cold-only before calling, since that distinction immediately narrows the plumber’s search.
An Inspector’s Honest Take on What Usually Matters
The most common mistake homeowners make is spending money on interior plumbing before confirming the supply side is sound. We have seen homeowners repipe entire branches only to discover the PRV was the culprit, or replace a PRV when the meter valve was simply half-closed. The diagnostic order matters more than the speed of the repair.
In the Mid-South, galvanized pipe is still common in homes built before 1970, and it is the single most frequent cause of functional flow failure we document. The pipe may look fine on the outside and read acceptable static pressure at the hose bib, but the interior bore is often reduced to the diameter of a pencil after decades of mineral scale accumulation. Hard water in the Memphis metro area accelerates this process. If your home has galvanized supply lines and you are seeing pressure that collapses under load, the pipe is the problem. Cleaning aerators will not fix it.
PRV failures are the second most common finding. A PRV that has been in service for 15 or more years is past its typical service life and should be tested even if pressure seems adequate. We routinely find PRVs set at 45 psi that were once set at 65 psi, with no one aware the setting had drifted. Adjusting or replacing a PRV is one of the highest-return plumbing investments a homeowner can make.
Prioritize in this order: stop any active leak first, then address supply-side issues (PRV, meter valve, utility contact), then tackle interior branch restrictions, and handle fixture-level maintenance last. Cosmetic low pressure at one faucet is a nuisance. A slow leak in a service line or a PRV that has failed open is a structural and water-damage risk.
For Memphis and West Tennessee homeowners specifically: water hardness in this region means aerators and showerheads need cleaning every 6–12 months, not every few years. If you have not cleaned yours recently, start there before assuming a larger problem. And if you are buying a home with galvanized supply lines, budget for repiping as a near-term capital expense, not a maybe.
Persistent Low Pressure? Upchurchinspection Can Give You a Clear Answer
When DIY checks do not resolve the issue or you need a documented assessment before a major repair, a professional plumbing inspection from Upchurchinspection delivers the clarity you need. We measure static pressure at the hose bib, run functional flow tests at multiple fixtures simultaneously, review all accessible supply piping for material and condition, inspect the water heater and PRV, and document findings in a written report with prioritized repair recommendations.
For homeowners in Tennessee, Arkansas, Mississippi, Missouri, and Kentucky, our inspectors bring field experience with the specific pipe materials, water chemistry, and contractor conditions common in this region. The benefits of a professional inspection go beyond a single pressure reading: you get a complete picture of your plumbing system’s condition, written documentation for contractor quotes, and an independent assessment that protects your investment. If you are buying a home with suspected plumbing issues, or if a plumber has quoted a major repair and you want a second opinion, schedule an inspection with Upchurchinspection before committing to the work.
Sources
The sources below informed this article and are worth reading directly if you want deeper technical detail on any specific area.


