
This checklist walks a residential property system by system, the same order a working inspector uses, so nothing gets missed and nothing gets re-checked twice.
- Exterior and roof: siding, flashing, gutters, grading
- Structure and foundation: cracks, settlement, floor level
- Electrical, plumbing, HVAC: panels, fixtures, run cycles
- Interior, attic, garage: finishes, insulation, safety
- Appliances: operation, leaks, ventilation
A full inspection typically runs 2 to 4 hours on-site, with a written report following in 24 to 48 hours. The sequence below tracks the scope defined by ASHI and InterNACHI Standards of Practice, and it’s the same workflow Upchurch Inspection runs on jobs across the Mid-South.
Key Takeaways
A thorough property inspection follows a fixed system order, tags every finding by severity, and matches high-risk items to the right specialist before repairs are estimated.
| Point | Details |
|---|---|
| Inspect by system, not room | Follow exterior/roof, structure, mechanicals, then interior to avoid backtracking and missed connections. |
| Tag every finding | Label items cosmetic, maintenance, safety, or major so priorities are clear in the report. |
| Expect 3 to 4 hours on-site | Reports typically follow within 24 to 48 hours, per NAR guidance. |
| Know when to call a specialist | Structural, electrical, and combustion red flags need a licensed professional’s diagnosis, not a guess. |
| Upchurch Inspection follows this exact workflow | Residential and commercial reports across the Mid-South use the same system-first process with annotated photos and priority tags. |
Standards and Guides Behind This Checklist
- ASHI’s Standards of Practice
- InterNACHI’s Standards of Practice
- System-by-system checklist reference
These define the minimum scope and reporting standard behind every item above.
Table of Contents
- Step-by-Step Property Inspection Checklist by System
- How Do You Record Findings and Build a Report?
- How Long Does an Inspection Take and What Does It Cost?
- What Red Flags Mean You Should Call a Specialist?
- How Should You Prepare for the Inspection Day?
- Sources
Step-by-Step Property Inspection Checklist by System
You inspect in the order that follows the building, not the order that follows a form. Start outside, work your way up and down the exterior, then move to structure, then mechanicals, then interior. Doing it any other way means you’re walking back and forth across a property, and that’s how items get skipped.
Here’s why the sequence matters: a drainage problem you spot at the foundation in step one often explains a stain you’ll find in the basement in step three. Catch the pattern early and you inspect faster and write a clearer report.
Exterior, grading, and drainage. Walk the full perimeter before you touch the door. Check siding for cracking, rot, or impact damage. Look at flashing around windows and doors for gaps. Check gutters for pitch and debris, and look at where downspouts discharge, ideally at least a few feet from the foundation. Note grading that slopes toward the house instead of away from it, and flag vegetation or tree roots close enough to threaten the foundation or a sewer line. Photograph any grading issue from a distance that shows the slope relationship to the foundation, and caption it with the location, what you observed, and the date.
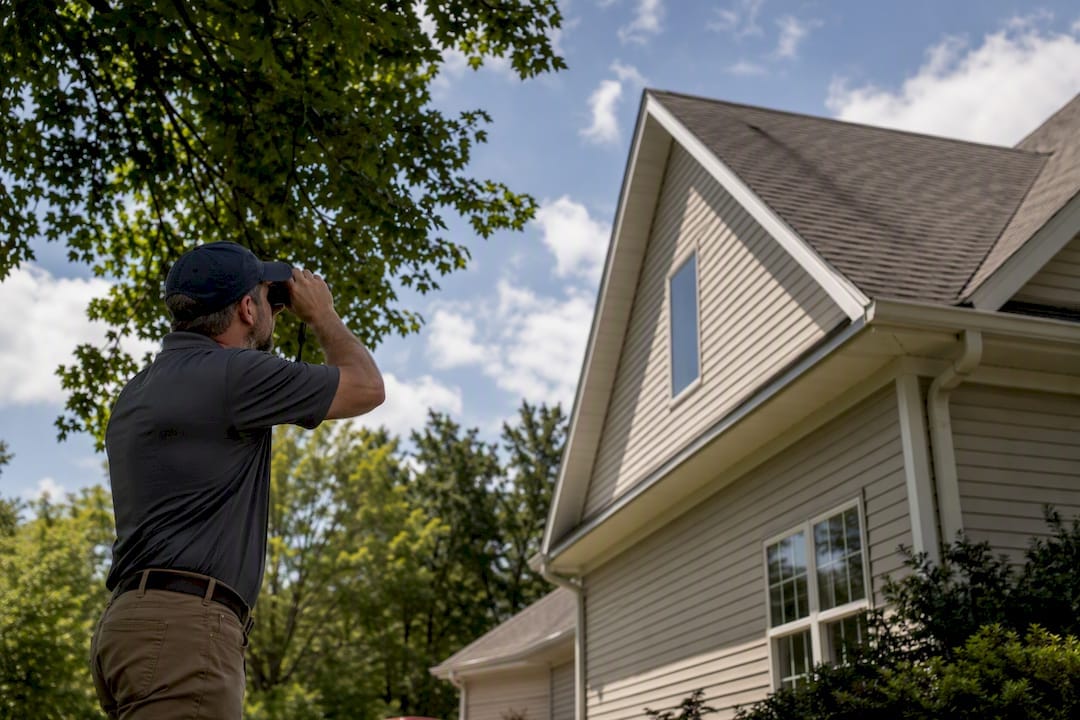
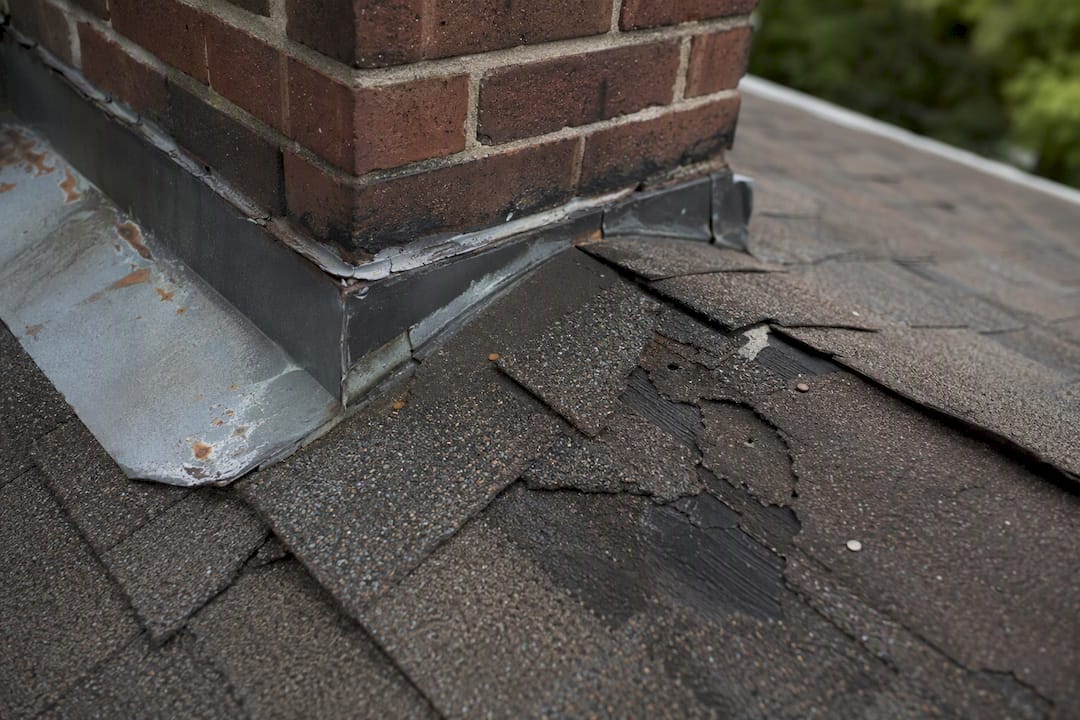
Roof. Covering condition, flashing at penetrations (chimneys, vents, skylights), and visible sagging or ponding all matter here. If you can’t safely walk the roof, a pair of binoculars from the ground or a ladder-assisted look at the eaves tells you most of what you need. Photograph any missing shingles, exposed nail heads, or damaged flashing close up, with a wider shot for location context.
Structure and foundation. This is where judgment counts most. Diagonal cracks wider than a hairline, especially near corners or openings, deserve a closer look. So does floor level. A slight dip near a load-bearing wall isn’t automatically bad, but combined with door frames that no longer sit square, it’s worth flagging for a structural engineer rather than guessing. Note any visible settlement at the crawlspace or basement wall line.
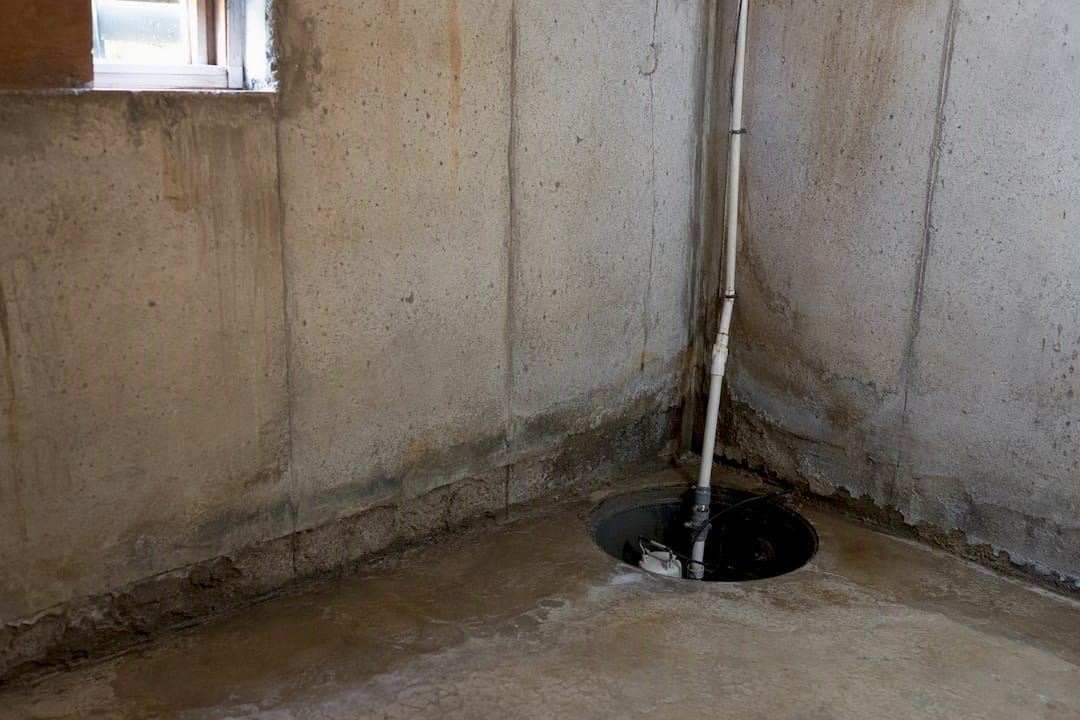
Basement or crawlspace. Check for moisture staining, efflorescence (that white powdery mineral deposit), standing water, and foundation cracks from the inside. Musty odor is a real data point, even without visible mold. Note insulation condition and any daylight visible through the foundation.
Plumbing. Run two fixtures at once, a sink and a shower, for example, and check whether pressure drops noticeably. Look under sinks for active leaks or old water stains. Check the water heater’s age (there’s usually a manufacture date on the label), its temperature/pressure relief valve, and whether it has a drain pan if located above living space. Locate and note the main water shutoff. You’ll want that documented for the buyer regardless of what else you find.
Electrical. Open the main panel and check for double-tapped breakers (two wires under one breaker slot, a common and fixable issue that still needs noting), signs of scorching, and whether the panel is labeled. Test a sample of outlets, especially GFCIs in kitchens, bathrooms, and garages, using a simple outlet tester. Note aluminum wiring in homes from the 1960s and 70s; it’s not automatically dangerous, but it changes the maintenance conversation. Note the location of the main electrical shutoff too.
HVAC. Run the furnace and the AC, even in a season where you wouldn’t normally need one running. Listen for unusual noise, check filter condition, and note the age of both units, typically stamped on a data plate. Look at visible ductwork for disconnection or crushed sections in the attic or crawlspace.
Interior rooms. Doors and windows should open, close, and latch properly. Check floors for soft spots, especially near bathrooms and kitchens. Walk every set of interior stairs and check handrail stability.
Kitchen and appliances. Run the dishwasher through a short cycle, check the range and oven for operation, and inspect under the sink for leaks. Note appliance make, model, and approximate age where the data plate is visible; that’s useful information for the buyer even when nothing’s wrong.
Garage, decks, and porches. Check the garage door auto-reverse safety feature, deck ledger board attachment, and handrail stability on any stairs over a few steps.
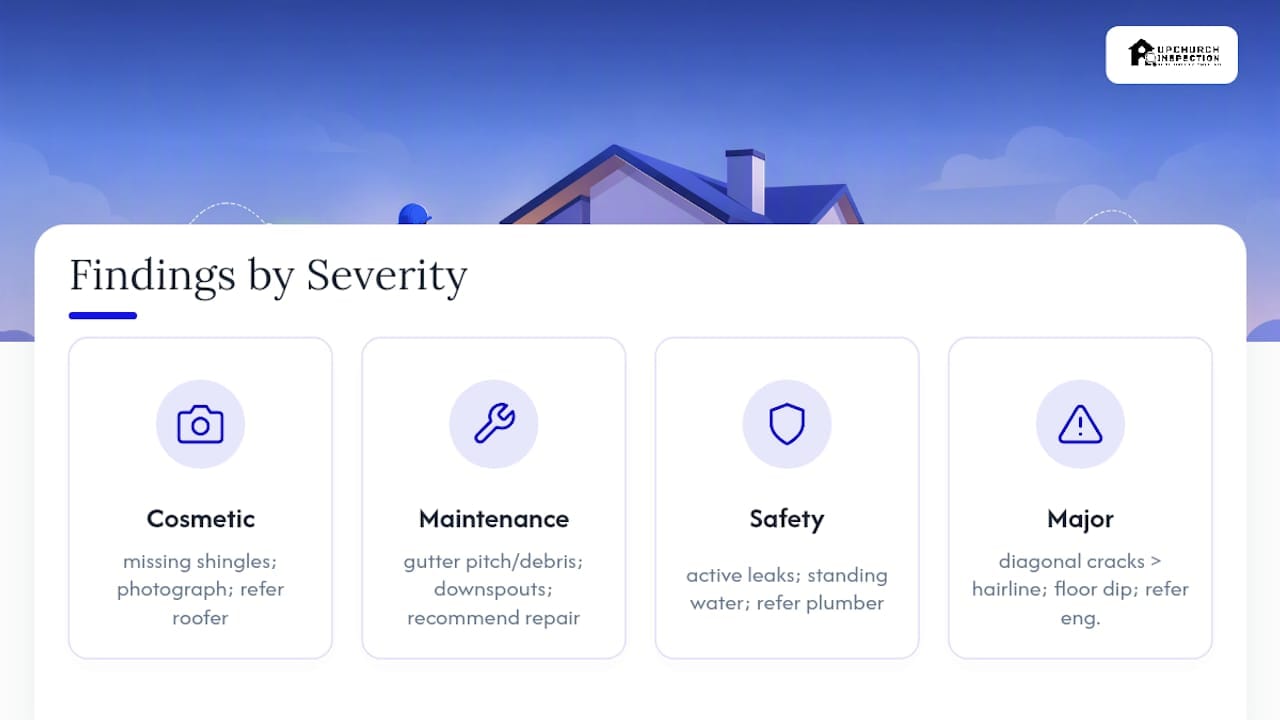
As you go, tag each finding: cosmetic (peeling paint), maintenance (dirty filter, caulking gap), safety (missing GFCI, loose handrail), or major (structural crack pattern, active leak). That tag drives everything that happens next in the report.
Pro Tip: Start the HVAC and run water fixtures in the first ten minutes on-site. Systems need time to cycle, and if you wait until the end of the inspection to turn them on, you’re standing around waiting when you could be checking the attic.
How Do You Record Findings and Build a Report?
Every line item needs the same fields: system/area, observed condition, severity tag, a photo filename with caption, a recommendation, a timeframe, and whether a specialist is needed. Consistency here is what makes a report usable instead of just a pile of notes.
| Field | Example Entry |
|---|---|
| System/Area | Roof, rear slope |
| Condition | 3 tabs missing, exposed nail heads |
| Severity | Maintenance |
| Photo/Caption | IMG_014, “rear slope, missing shingles, 3/14/26” |
| Recommendation | Replace missing shingles |
| Timeframe | Short-term |
| Specialist | Roofer (if damage exceeds 2 sections) |
Photo captions should always include location, what you saw, and the date. Prioritize with plain language: immediate for anything like a gas smell, short-term for a roof flashing gap, monitor for a hairline crack with no other signs, and cosmetic for peeling paint. A buyer’s guide on reading these reports can help translate the tags into next steps.
How Long Does an Inspection Take and What Does It Cost?
Plan on 2 to 4 hours on-site for a typical single-family home, with the written report following in 24 to 48 hours. Larger homes, older construction, and crawlspace access all add time. Base pricing covers the 10 core systems; specialty testing is priced separately.
Common add-ons and when they make sense:
- Radon testing: any home with occupied lower levels, especially in areas with known radon activity
- Mold testing: visible growth, musty odor, or past water intrusion
- Sewer scope: homes over 20 years old, especially with mature trees near the line
- Thermal imaging: suspected moisture intrusion or insulation gaps not visible to the eye
- Foundation engineer review: cracking patterns beyond hairline, or floor level issues
ASHI and InterNACHI Standards of Practice set the baseline for what’s included in a standard scope and what falls outside it, which is why specialty testing carries a separate line item rather than getting folded into the base price.
What Red Flags Mean You Should Call a Specialist?
Some findings are routine maintenance. Others need a phone call before you go further:
- Structural: diagonal cracks over a quarter inch, visible foundation settlement, floor slope paired with misaligned doors
- Plumbing: active leaks, sewage odor or backup, corroded supply lines
- Electrical: double-tapped breakers, exposed conductors, scorch marks in the panel
- HVAC: combustion odor, visible smoke, or a cracked heat exchanger
- Moisture: recurring stains in the same spot, musty odor without a clear source
Match the finding to the right specialist: a structural engineer for foundation concerns, a licensed plumber or electrician for their respective systems, an HVAC technician for combustion issues, and a mold or radon specialist for air quality concerns. Structural and electrical issues generally warrant a call within two weeks; a hairline crack with no other symptoms can often just be monitored.
If you smell gas, see active arcing, or notice sudden structural movement, leave the property and call emergency services before anything else. An inspector identifies these conditions; a licensed specialist provides the diagnosis and repair estimate.
Pro Tip: Don’t ask the inspector to guess at repair costs on major items. A good inspector will tell you what they see and who to call, not quote you a number they can’t back up.
How Should You Prepare for the Inspection Day?
- Clear access to the attic, crawlspace, electrical panel, and water heater.
- Have utilities on, gather appliance manuals if available, and locate spare keys.
- Confirm past service records for HVAC or roof work, if you have them.
- Ask questions during the walkthrough rather than saving them for the end.
Buyers get more value from attending in person; you’ll learn where the main shutoffs are and what routine maintenance looks like, not just what’s broken.
Pro Tip: Keep pets secured and hold detailed negotiation talk until the written report is in hand. Chasing the inspector with questions about resale value slows down the one thing you’re paying for: a thorough look at the property.
Field Note: What Pros Watch That a Checklist Alone Won’t Catch
A hairline crack by itself usually means nothing. That same crack next to a door that won’t latch and a slab that pools water after rain tells a different story entirely.
Age isn’t a defect. A 20-year-old water heater that’s dry, quiet, and holding pressure is doing its job. Context, not the calendar, decides what gets flagged.
A Note From Upchurch Inspection on How We Work
We build every report around clear photos and a fast turnaround, because Mid-South buyers and sellers need decisions, not paperwork. Bring your completed checklist to any specialist referral. It saves everyone time.
How Upchurch Inspection Fits Into Your Next Move
Upchurch Inspection runs this exact system-first process on residential and commercial properties across Tennessee, Arkansas, Mississippi, Missouri, and Kentucky, and it shows in the paperwork: annotated photos, priority tags, and a report you can actually act on instead of a checklist buried in jargon. Buyers get a pre-purchase inspection built around the same 10-system sequence covered above; sellers get a pre-listing inspection that catches issues before they show up in negotiations. If a finding points toward something outside standard scope, thermal imaging, mold testing, a sewer scope, that gets scheduled as an add-on rather than guessed at. Reports typically land within 24 to 48 hours as a straightforward PDF with photos tied to each line item. If you’re weighing whether a property needs a broader look than a standard walkthrough, the commercial inspection services page outlines what expanded scope looks like, and it’s the right place to start scheduling.


