
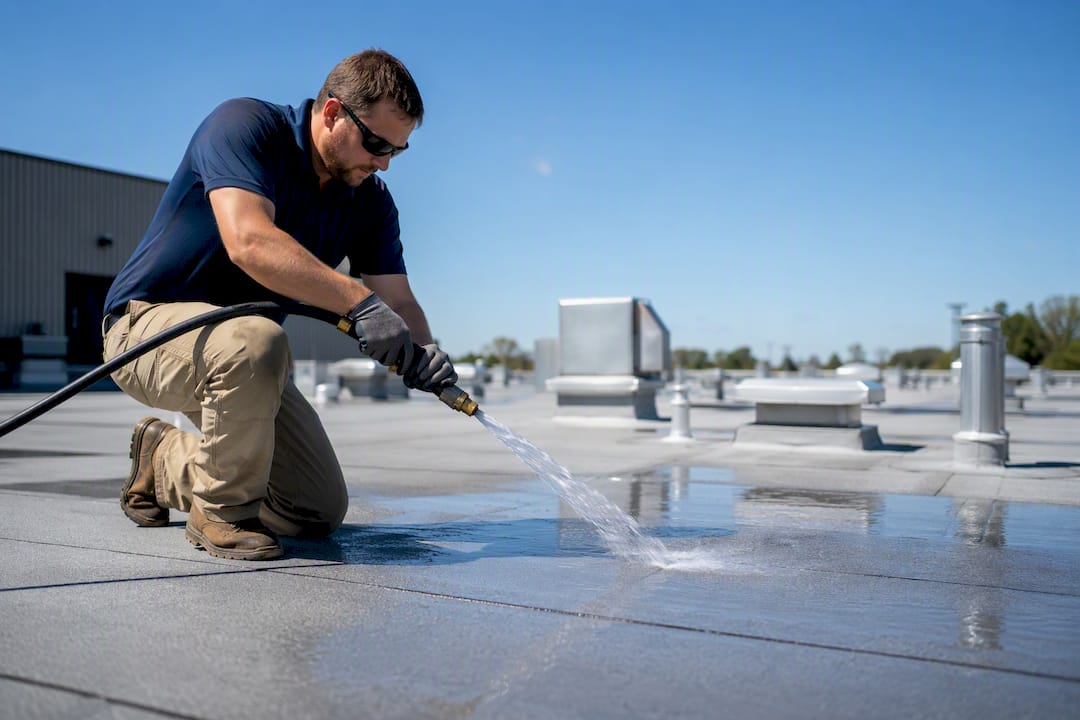
Found water coming through a ceiling under a flat roof? Stop the interior damage first, buckets, tarps, moved furniture, then apply a temporary patch only as triage, not a fix. The actual breach is almost always uphill of that drip, sometimes ten or twenty feet away, and finding it requires roof-side testing, not guesswork. Call a qualified inspector or roofing contractor who uses real diagnostic tools before anyone climbs up with a bucket of roof cement.
TL;DR:
- Most flat roof leaks originate from ponding water, seam failure, flashing issues, or initial poor installation, requiring proper diagnosis before repair.
- Water travels along the underside of the membrane, often far from the actual breach, making mapping and targeted inspection critical for effective repairs.
- Confirm the leak source with hose tests, infrared scans, or electronic leak detection to avoid repeated patching of the same failure point.
- Temporary patches are only short-term solutions; permanent repairs must match the membrane type and be professionally applied to last until the roof’s end of life.
- Signs such as recurrent leaks, sagging, mold, or soft spots indicate when full replacement is necessary over patching, with proper documentation essential for warranty or insurance claims.
Table of Contents
- Signs Your Flat Roof Is Leaking, Inside and Out
- What’s Actually Causing the Leak
- Tracing the Leak: How to Find Where It’s Really Coming From
- Fixing It: Triage Now, Permanent Repair Matched to the Membrane
- Repair or Replace? Reading the Warning Signs
- Keeping the Roof Dry: A Maintenance Schedule That Actually Works
- What a Real Inspection Actually Checks
- The Mistakes We See Over and Over
- Need a Straight Answer on Your Roof? Here’s What We Do
- Sources
Signs Your Flat Roof Is Leaking, Inside and Out
Interior clues show up first because that’s where people live and work. Water stains that grow a little wider after every rain. A drip that starts twenty minutes into a storm and stops an hour after it ends. Sagging ceiling tiles, a musty smell in a storage room nobody’s checked in months, or a utility bill that crept up because insulation is holding water instead of air. None of these tell you where the roof failed. They tell you where the water finally gave up and came down.
The roof surface itself usually holds better evidence, if you know where to look:
- Ponding water that sits more than a day or two after rain, especially near drains or in the middle of a low bay
- Blisters or bubbles in the membrane, which often mean trapped moisture or a bad bond underneath
- Open or separated seams, particularly on older single-ply systems
- Torn or lifted flashing around HVAC curbs, pipes, and roof edges
- Punctures from foot traffic, dropped tools, or storm debris
Here’s the part most homeowners get wrong: water doesn’t fall straight down through a roof deck. It travels along the underside of the membrane, follows a rafter or purlin, and drips at the low point, which can be well away from the actual hole. Interior stains are often far from the membrane breach, and treating the ceiling stain as the target is the single most common reason repeat repairs fail. Mapping the drip location on a floor plan matters more than most people realize.
What’s Actually Causing the Leak
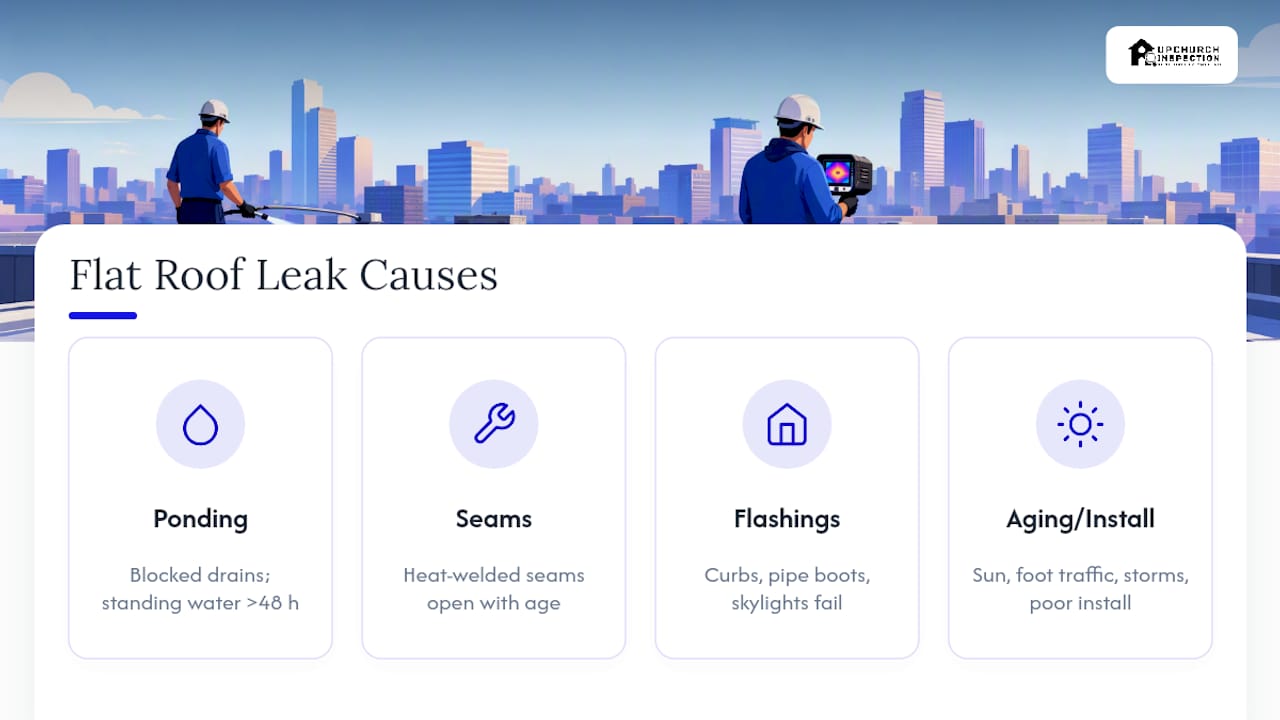
Most flat roof leaks trace back to one of four root problems, and figuring out which one you’re dealing with changes the whole repair approach.
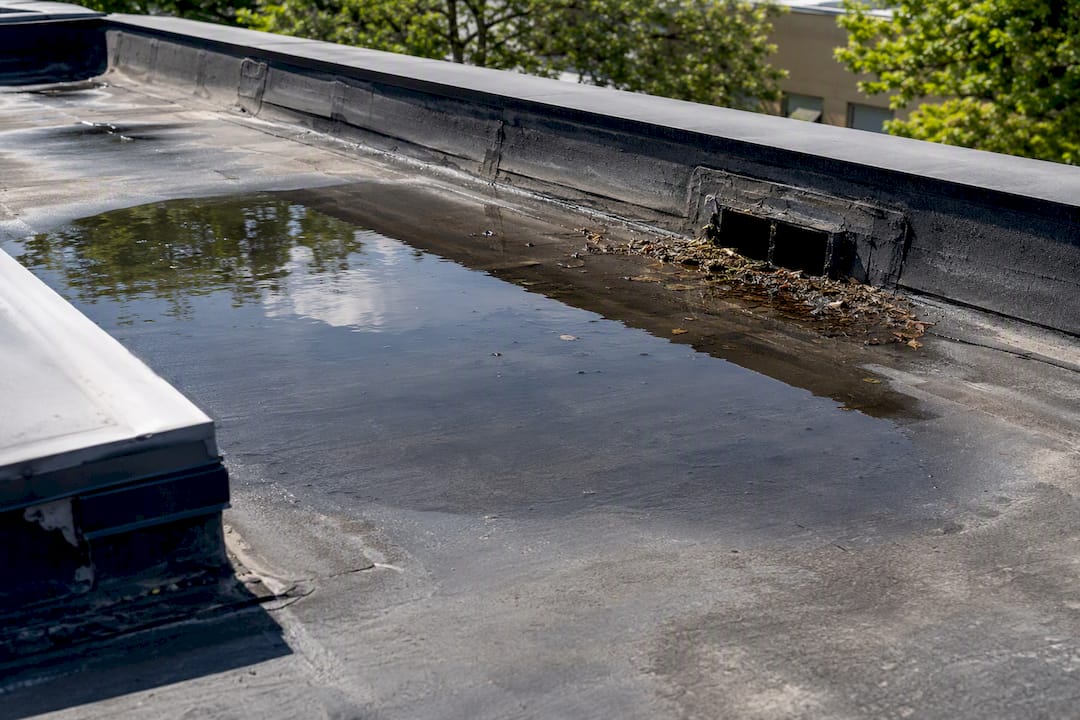
Ponding and drainage failures top the list in our experience. Blocked drains, scuppers clogged with leaves, or a roof deck that’s settled and created a low spot all lead to standing water. Ponding that lasts more than about 48 hours accelerates membrane breakdown through repeated UV and thermal cycling, and it adds real weight to a deck that wasn’t necessarily designed to carry it long-term.
Seam and membrane failures come next, especially on single-ply systems where a heat-welded or adhesive seam has separated over time. Adhesive breaks down with age and thermal movement, and a seam that looked fine five years ago can open up without any obvious trigger.
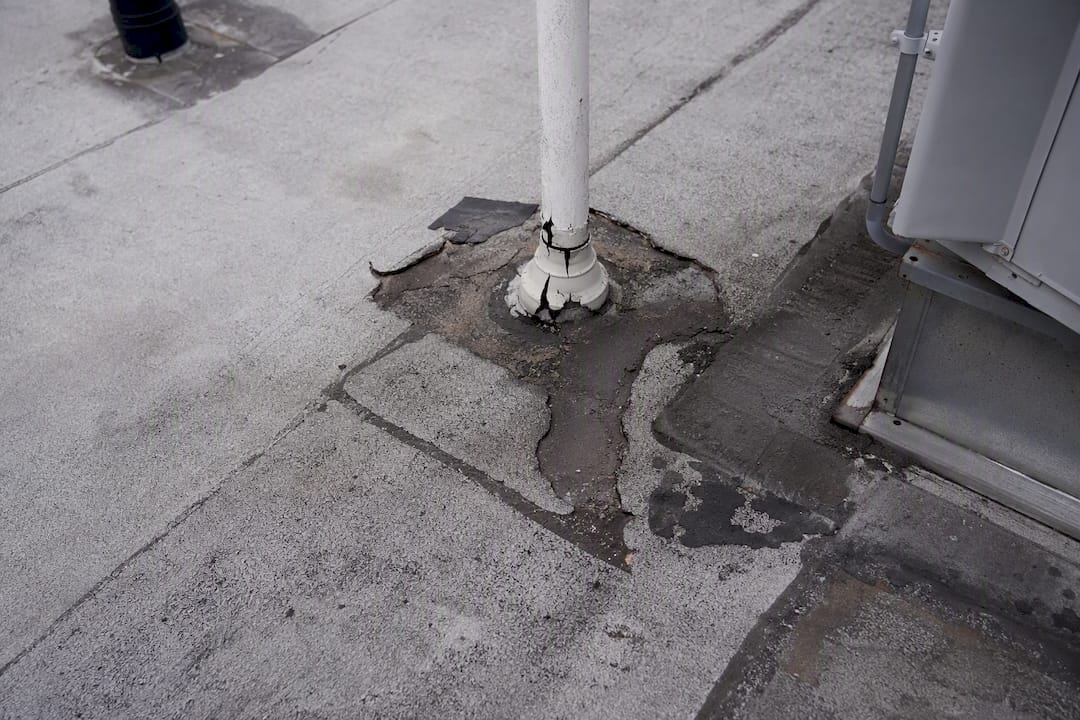
Flashing and penetration failures are the ones we find constantly on commercial roofs with rooftop HVAC. Every curb, pipe boot, and skylight is a seam waiting to fail, and HVAC service techs walking the roof for maintenance are notorious for putting a boot through a compromised area. Coordinating routine HVAC inspections with roof condition checks catches a lot of this before it becomes a leak.
Round out the list with plain aging, sun exposure, foot traffic wear, storm damage, and, more often than owners want to admit, a poor original installation that never had a fighting chance.
Tracing the Leak: How to Find Where It’s Really Coming From
Skipping straight to a patch without confirming the source is how you end up patching the same roof three times in one summer. Here’s the sequence that actually works:
- Map the interior drip. Note the exact ceiling location relative to walls and fixed points, then walk the roof directly above and about 20 to 40 feet uphill from that point, accounting for slope and structural members that redirect water flow.
- Do a visual inspection. Check every seam, penetration, drain, and piece of edge metal in that zone. Photograph anything that looks suspect, standing water, lifted flashing, a seam that flexes when you press on it.
- Run a controlled hose test. Flood one zone at a time with a garden hose while someone watches inside. This is the cheap, reliable confirmation method most contractors should be using before they touch a membrane, and a systematic approach often finds the breach in under an hour.
- Escalate to infrared if the hose test comes up empty or leaks keep recurring. An infrared moisture scan under ASTM C1153 maps wet insulation across the whole roof, which is invaluable on larger commercial buildings with multiple leak reports. It works best on dry nights after a sunny day and is less reliable on ballasted or heavily shaded roofs.
- Use electronic leak detection for membrane systems where IR is inconclusive. ELD applies a low-voltage charge across the membrane to pinpoint breaches that don’t show up as obvious moisture pockets.
Pro Tip: Don’t authorize a patch based on a hunch. If a roof has leaked more than once in the same general area, that’s usually a sign of a design or drainage flaw, not bad luck, and it deserves a hose test or IR scan before anyone reaches for a caulk gun.
A tool like a moisture meter can help track interior water damage back toward its source as part of that mapping step, though it confirms wet material rather than locating the breach itself.
Fixing It: Triage Now, Permanent Repair Matched to the Membrane
A temporary patch buys time. It does not solve anything. Self-adhesive tape, a dab of sealant, a rubber boot pressed over a pipe penetration, these are legitimate short-term stops, but every temporary patch needs a dated follow-up for a permanent fix, and that follow-up should happen within about 30 days, not “whenever.”
Permanent repairs have to match the membrane, and this is where a lot of well-meaning repair work goes sideways:
- TPO or PVC single-ply: requires hot-air welded patches or manufacturer-approved compatible material, not general-purpose sealant
- EPDM: needs a primer plus an EPDM-specific patch or seam tape, since standard adhesives won’t bond properly to the rubber
- Modified bitumen or built-up roofing: takes a compatible asphaltic patch, either torch-applied or a cap sheet, depending on the existing system
The correct sequence is always clean, prep, prime if the membrane calls for it, patch, then seal the edges with the patch extending well past the damaged area in every direction. Mismatching repair chemistry to the membrane is one of the most common and most damaging DIY mistakes we see, and asphalt-based products on a single-ply membrane are a textbook example. Asphalt attacks the plasticizers in TPO and PVC and can turn a small leak into a much bigger membrane failure within a season.
A properly diagnosed and correctly installed repair should hold until the rest of the membrane reaches end of life, not just until the next storm. Repairs that fail early almost always patched the symptom instead of the source, or used the wrong material for the membrane type. Get a written one to two year repair warranty from whoever does the work.
Repair or Replace? Reading the Warning Signs
One confirmed leak on an otherwise sound roof is a repair job, plain and simple. Multiple leaks in different areas, or the same leak coming back after two or three attempted fixes, is a different conversation. Recurring or widespread leaks with significant wet insulation typically point toward replacement rather than another round of patching rather than continuing to chase individual failure points.
Call a professional immediately if you see any of these:
- A soft or spongy spot on the roof deck when you walk it
- Visible sagging in the roof structure itself
- Mold growth on interior ceilings or in attic/plenum spaces
- Multiple leaks appearing after a previous repair was completed
On cost and timeline, expect repairs priced by service visit plus materials, often a same-week fix once diagnosed. Full replacement gets quoted by scope and square footage and typically runs weeks, not days, once permitting and material lead times enter the picture. Treat any number you hear as a starting estimate; pricing varies by region and by how much of the deck and insulation need replacing. Whatever gets done, insist on a written inspection report documenting the moisture findings, photos, and recommended scope. That paperwork is what supports a warranty claim or an insurance dispute later, and its absence is the single biggest reason those claims get denied.
Keeping the Roof Dry: A Maintenance Schedule That Actually Works
Flat roof maintenance isn’t complicated, but it does need to be routine, not reactive.
- Inspect quarterly and after any major storm. Look for debris in drains, new punctures, and lifted flashing.
- Do a full seasonal check each spring and fall. Spring catches winter damage; fall clears leaves before they clog drains for winter.
- Clean drains, scuppers, and gutters on that same schedule. Add strainer screens if debris is a recurring problem, and consider tapered insulation to correct chronic low spots that pond.
- Schedule an IR scan or professional evaluation any time you’ve had more than one leak in a season, or before a big lease turnover on a commercial building.
- Leave anything involving welding, membrane cutting, or roof access safety to a licensed contractor. DIY membrane work voids most manufacturer warranties and isn’t worth the liability.
What a Real Inspection Actually Checks
A proper flat roof inspection isn’t a walk-around with a flashlight. It covers the roof surface itself, a drainage assessment looking at slope and standing water patterns, thermographic scanning where warranted, and targeted core samples when insulation condition is in question. Everything gets documented with photos tied to specific roof zones.
Upchurchinspection structures findings as prioritized, actionable items, not a vague “roof needs attention” line, so contractors know exactly what to fix and insurers have documentation that holds up. That’s the difference between a report that sits in a drawer and one that actually supports a warranty or insurance claim when you need it.
The Mistakes We See Over and Over
Cosmetic interior patches, painting over a stain, re-taping a ceiling, fix nothing because the water source is still active on the roof. The biggest red flag in a contractor bid: no hose test, no photos, no moisture readings, just a quote. That’s a guess dressed up as a repair.
Follow up on temporary patches fast, and keep drains clear year round. Both habits save real money.
— Holly
Need a Straight Answer on Your Roof? Here’s What We Do
Diagnosing a flat roof leak by eye is how owners end up paying for the same repair twice. Upchurchinspection runs the testing that actually finds the breach, hose tests, thermographic moisture scans, and targeted physical checks of drains, seams, and flashing, so the repair crew fixes the real problem instead of chasing the ceiling stain. Every inspection ends with a documented moisture map, photos tied to specific roof zones, and a prioritized list of what needs fixing and in what order, the kind of paperwork that holds up with a contractor or an insurance adjuster. If your roof has leaked more than once, or you just want a straight answer before you sign a repair invoice, schedule a commercial roof inspection and get the moisture map before the next patch goes on.


