
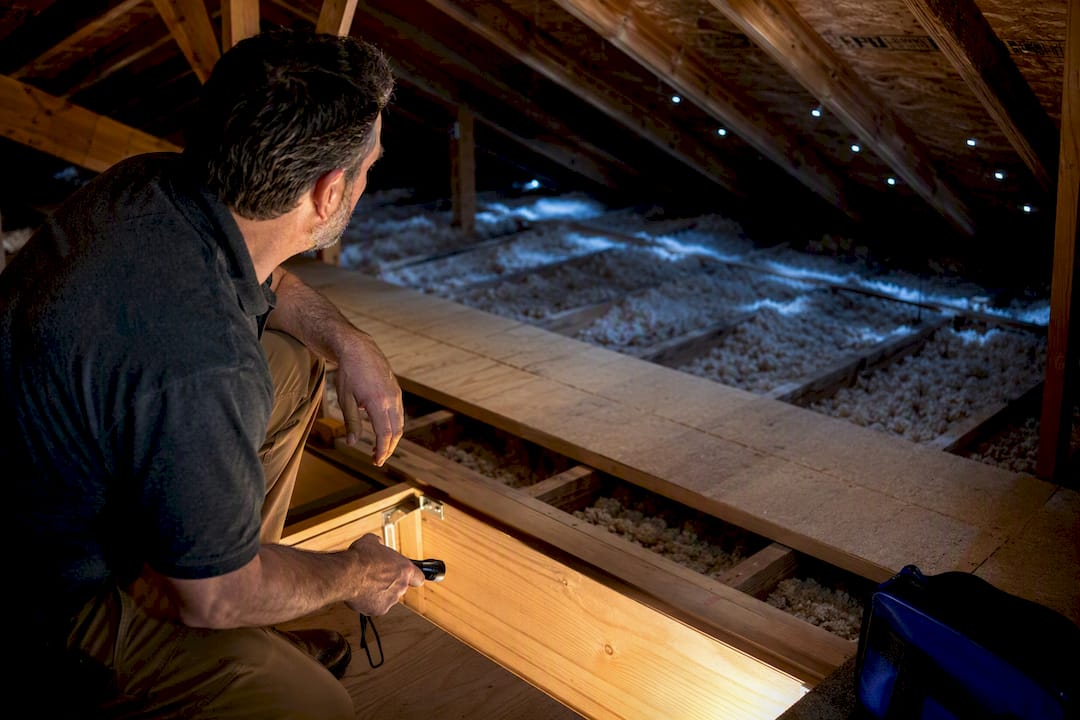
A thorough attic inspection checklist covers six areas: insulation type and depth, intake and exhaust ventilation, active or past moisture intrusion, pest evidence and contamination, structural framing condition, and electrical or mechanical hazards. Document every finding with photos and measurements, flag safety-critical issues immediately, and bring in a licensed inspector, contractor, or engineer for anything beyond a visual check.
TL;DR:
- Most attic inspections reveal blocked soffit vents, insulation settlement, and signs of moisture or pests that require professional assessment.
- Safety hazards such as exposed wiring, structural damage, and active leaks need immediate professional attention before proceeding.
- Proper ventilation requires balanced inlet and outlet airflow, with blocked vents and dead-end ducts often causing moisture buildup.
- Insulation depth measurements are estimates that should guide upgrades, especially when wet, damaged, or contaminated materials are present.
- Attic inspections should be supplemented with professional services, especially when high-risk issues like mold, asbestos, or structural failure are suspected.
Table of Contents
- Getting Ready: Safety Prep Before You Go Up
- What Should You Scan For First?
- How Do You Check Attic Insulation Properly?
- Is Your Attic Ventilation Actually Working?
- What Do Water Stains and Moisture Signs Mean?
- What Pest Evidence Should You Look For?
- Are the Rafters and Roof Deck Structurally Sound?
- What Electrical and Mechanical Hazards Hide in Attics?
- What Attic Odors Signal Mold or Pests?
- Are Your Attic Door and Hatch Seals Doing Their Job?
- Is the Attic Floor Safe to Walk On?
- Documenting What You Find
- When Should You Call In a Licensed Professional?
- A Field Note From Holly
- Book an Attic-Focused Inspection
- Sources
- FAQ
Getting Ready: Safety Prep Before You Go Up
Before you touch the pull-down ladder, look at what you’re working with. A scuttle hole barely wide enough for your shoulders and three feet of headroom is a different job than a walk-up attic with permanent stairs, and that changes what you can safely check yourself.
Bring the right gear:
- N95 mask or better, to keep insulation fibers and dust out of your lungs
- Safety goggles and gloves, plus long sleeves for fiberglass or blown-in cellulose
- A headlamp (both hands matter more than you’d think), a camera or phone, a folding ruler or tape measure, and a moisture meter if you have one
Certified inspectors following the InterNACHI Standards of Practice inspect insulation and ventilation visually but are not required to move insulation, activate systems, or determine an exact R-value. That’s a useful boundary for a homeowner too. Look, measure, photograph, but don’t start pulling batts apart looking for problems, and don’t flip on attic-mounted equipment you’re not familiar with.
Pro Tip: Turn off your headlamp and wait 30 seconds after entering. Daylight leaking through the roof deck at gaps, nail holes, or flashing shows up far more clearly once your eyes adjust to the dark.
If the attic has no safe walking surface, visible sagging, or a smell strong enough to make you back out, stop. That’s a job for a professional, not a checklist.
What Should You Scan For First?
Give yourself a fast 60 to 120 second sweep before diving into details. This first pass catches the obvious hazards and tells you whether a deeper inspection is even safe to continue.
- Check the hatch itself: is the insulation on the back of the cover intact, and is there weatherstripping around the frame?
- Test the pull-down ladder for wobble, cracked hinges, or a spring that’s lost tension.
- Do a 360-degree visual scan for daylight coming through the roof deck, active dripping, or heavy dark staining on wood.
- Look for obvious roof penetrations, plumbing stacks, and chimney chases that could be entry points for water or pests.
- Note anything blocking your path: stored boxes sitting directly on insulation, plywood decking that only covers part of the floor, or ductwork you’d have to climb over.
Write down anything that limits access. If a commercial property has HVAC platforms or catwalks up there, that’s worth noting separately since it usually means the space was built for equipment access, not casual storage.
How Do You Check Attic Insulation Properly?
Start by identifying what’s actually up there. Most attics have fiberglass batts, blown-in cellulose, or loose-fill fiberglass, and each behaves differently over time. If you see loose-fill insulation with a gray, popcorn-like texture and gold or silver flecks, stop and don’t disturb it. That could be vermiculite, which sometimes contains asbestos, and it needs professional sampling, not a flashlight inspection.
Measure depth at three representative spots, not just the first pile you see near the hatch. The Department of Energy recommends attic R-values within a specified range for colder climate zones, and depth is your rough proxy for that number. Fiberglass batts run about R-3 per inch and loose-fill cellulose runs slightly higher, so a 12-inch attic floor is generally in the R-30 to R-38 range depending on material, well short of DOE’s upper recommendation for northern climates.
What the depth check actually tells you: A measured depth gives you an estimate, not a certified R-value. Composition, settling, and installation quality all affect real performance, so treat your number as a starting point for budgeting insulation upgrades, not a final answer.
While you’re measuring, look for these common defects:
- Thin or missing insulation at the eaves, where it matters most for heat loss
- Batts that are compressed, torn, or shoved aside from wiring and duct work
- Insulation piled thick in the center of the attic but nearly bare at the perimeter
- Loose-fill blocking the soffit vents, which chokes off the intake airflow the whole ventilation system depends on
Wet, matted, or visibly pest-contaminated insulation should be documented and flagged for removal. Once insulation gets wet or fouled, it loses R-value and can hold moisture against the roof deck, which is exactly what invites the mold problems common in humid Mid-South attics. For more on why depth and coverage matter for resale and comfort, see this breakdown of attic insulation inspection benefits.
Is Your Attic Ventilation Actually Working?
Insulation only does half the job. Airflow does the rest, and a blocked vent system undermines everything you just measured.
Check these points in order:
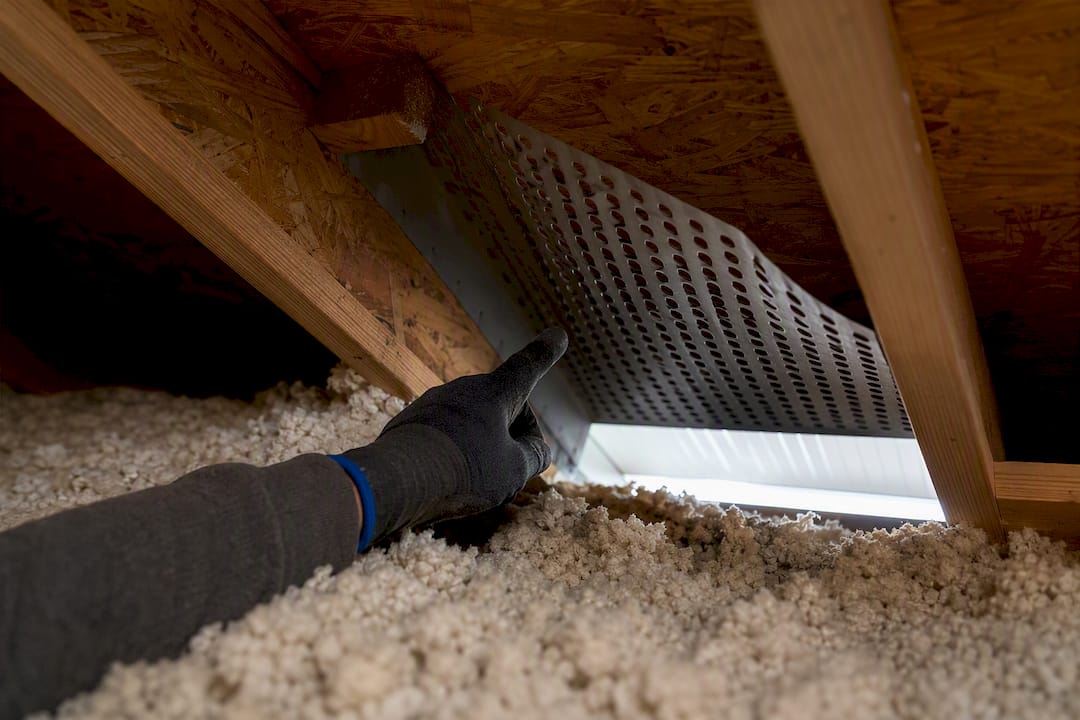
- Soffit vents at the eaves: confirm they’re open and that baffles (the cardboard or foam channels near the eave) are holding insulation back from blocking the airway
- The path from eave to ridge: put your hand or a flashlight near the soffit and look for a clear channel all the way up the roof slope
- Ridge vents, gable vents, or box vents at the top: check for paint clogging the louvers, bird nests, or debris buildup
- Signs of heat buildup, like warped shingles seen from inside or extreme attic heat that seems disproportionate to the outside temperature
The Department of Energy’s ventilation rule of thumb requires a certain net free vent area relative to attic floor area, with a reduced rate possible when intake and exhaust are balanced. You won’t calculate exact net free area without vent specs, but the practical check is simpler: if soffit vents are visibly blocked while the ridge vent looks clear, or vice versa, the system is unbalanced no matter what the math says. Balanced airflow between eave and ridge is one of the biggest levers against condensation, and blocked soffits are a recurring issue in attics across the region.
Also look for bathroom, kitchen, or dryer exhaust ducts that dead-end in the attic instead of venting outside. That’s a moisture and mold setup waiting to happen, and it needs to be rerouted, not just noted.
Pro Tip: Check for insulation baffles at every soffit vent you can see, not just one or two. It’s common to find half the eave vents properly baffled and the rest buried under loose-fill that got raked in during a re-insulation job.
What Do Water Stains and Moisture Signs Mean?
Moisture damage in an attic tells a story, and reading it correctly matters more than just spotting it. Active leaks look different from long-term condensation, and mixing them up leads to the wrong repair.
Look for:
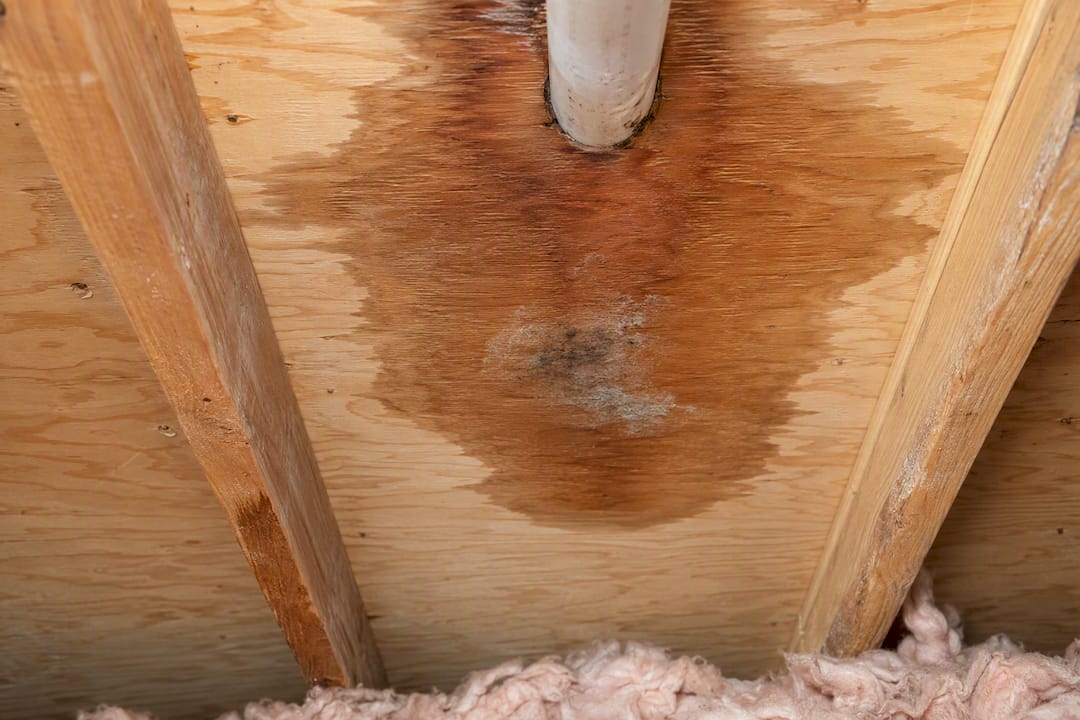
- Dark or tan water stains on the underside of the roof deck, especially near valleys, chimneys, and plumbing vent penetrations
- Rusted nail tips poking through the sheathing, which usually points to widespread condensation rather than a single leak
- Frost or visible moisture beading on the underside of the deck during cold weather
- Active dripping, wet insulation, or standing moisture anywhere on the attic floor
A single dark stain around one roof penetration usually means a localized leak, maybe a cracked boot or lifted shingle. Rust on nail heads scattered across the whole roof deck points to condensation from poor ventilation or a bathroom fan venting into the attic instead of outside. That distinction changes who you call: a roofer for the first, an HVAC or ventilation fix for the second.
If you see fuzzy, discolored growth on sheathing or insulation, document the extent with photos rather than calling it “mold” outright. Describe what you observe (apparent growth, size, location) and leave the diagnosis to a lab or remediation specialist, especially if the affected area is larger than a few square feet.
Pro Tip: If you’re inspecting during a rainy stretch, a quick trip to the attic while it’s actively raining can confirm or rule out a leak on the spot, something you can’t always do on a dry, sunny inspection day.
What Pest Evidence Should You Look For?
Rodents, birds, and insects leave fairly obvious calling cards once you know what to look for, and their damage often affects insulation performance as much as it affects your peace of mind.
- Droppings, tunnels through insulation, and matted nesting material near the eaves or around chimney chases
- A sharp urine odor, especially noticeable in warmer weather
- Gnawed or stripped wiring insulation, which is a fire hazard as much as a pest problem
- Entry points at soffits, roof vents, gaps around plumbing stacks, or gable vents with damaged screening
Insulation that’s been used as nesting material or soiled with droppings generally needs to be removed and replaced rather than left in place, since it holds odor and can harbor bacteria. If you find active infestation, get pest control handled before any insulation replacement. Redoing insulation over an active rodent population is a wasted job.
Are the Rafters and Roof Deck Structurally Sound?
Structural issues in an attic are the findings that most directly affect a purchase decision or a CapEx budget, so this is where a careful eye pays off.
- Sight down the length of several rafters or truss chords. A visible sag, dip, or wave in an otherwise straight line is worth flagging.
- Look closely at truss members for cracks, splits, or, worse, a cut chord where someone modified the truss for duct work or storage access. Cut trusses are a common and serious defect in older attics.
- Examine the roof sheathing (the deck itself) for delamination, soft or spongy spots, dark staining consistent with rot, or actual daylight showing through gaps.
- Note any water-stained or sagging sheathing near valleys and penetrations, since that’s often where structural and moisture problems overlap.
Don’t attempt to repair or reinforce anything you find. Photograph it, measure the affected area if you can do so safely, and refer it out. A sagging ridge beam or a cut truss chord is a call to a structural engineer or a licensed contractor, not a weekend fix.
What Electrical and Mechanical Hazards Hide in Attics?
Attics are full of wiring, ductwork, and vent terminations that homeowners rarely think about until something fails, and several of these issues are genuinely safety-critical.
- Look for open wire splices without a junction box, chewed or cracked insulation on cables, and wiring buried directly under insulation, which is a recognized fire risk
- Confirm recessed lighting fixtures are IC-rated (rated for direct insulation contact) before insulation covers them; non-IC recessed lights covered by insulation are a frequently cited attic defect
- Check clearance around chimney chases and B-vent flues, since insulation or framing that’s too close to a hot flue is a fire hazard
- Verify that bathroom, kitchen, and dryer exhaust ducts actually terminate outside the building rather than dumping moist air into the attic, and confirm HVAC ducts are properly connected and insulated rather than leaking conditioned air into the attic space
Any exposed or damaged wiring should be treated as a call-an-electrician issue immediately, not a wait-and-see item.
What Attic Odors Signal Mold or Pests?
Smell is an underused diagnostic tool, and it’s one you can use before you even climb the ladder. Certain odors point reliably toward specific problems.
A musty, earthy smell, similar to a damp basement, usually signals mold growth or chronic moisture somewhere in the insulation or sheathing. It tends to get stronger on humid days, which is a useful tell in the Mid-South’s summer months. A sharp, ammonia-like odor almost always means rodent urine concentrated in one area, often near a nesting site. A sweeter, rancid smell can indicate a dead animal, which sometimes takes a day or two to track down to its exact location.
A faint chemical or plastic-like odor near HVAC equipment can point to an overheating component or a failing duct connection, worth a mechanical check rather than a mold test. If you smell any of these but can’t find a visible source during your walk-through, that’s reason enough to schedule a professional inspection rather than assume it will resolve on its own. Odor without a visible cause is one of the more common reasons buyers request a specialized mold test before closing, and it’s a far cheaper step than discovering the source after the sale.
Are Your Attic Door and Hatch Seals Doing Their Job?
The hatch or pull-down door is one of the biggest, most overlooked sources of energy loss in the whole house, mostly because it sits at the ceiling level and nobody thinks to check it.
Run your hand around the perimeter of the hatch frame on a windy or cold day. If you feel a draft, the weatherstripping has failed, is missing, or was never installed correctly. Look at the gasket material itself: compressed, cracked, or peeling foam and rubber strips no longer seal properly even if they look intact from a distance. Check whether the hatch cover itself has insulation attached to its back side, matching the depth of the surrounding attic floor. A bare plywood hatch door in an attic insulated to R-40 is a thermal weak point that undercuts everything else you measured.
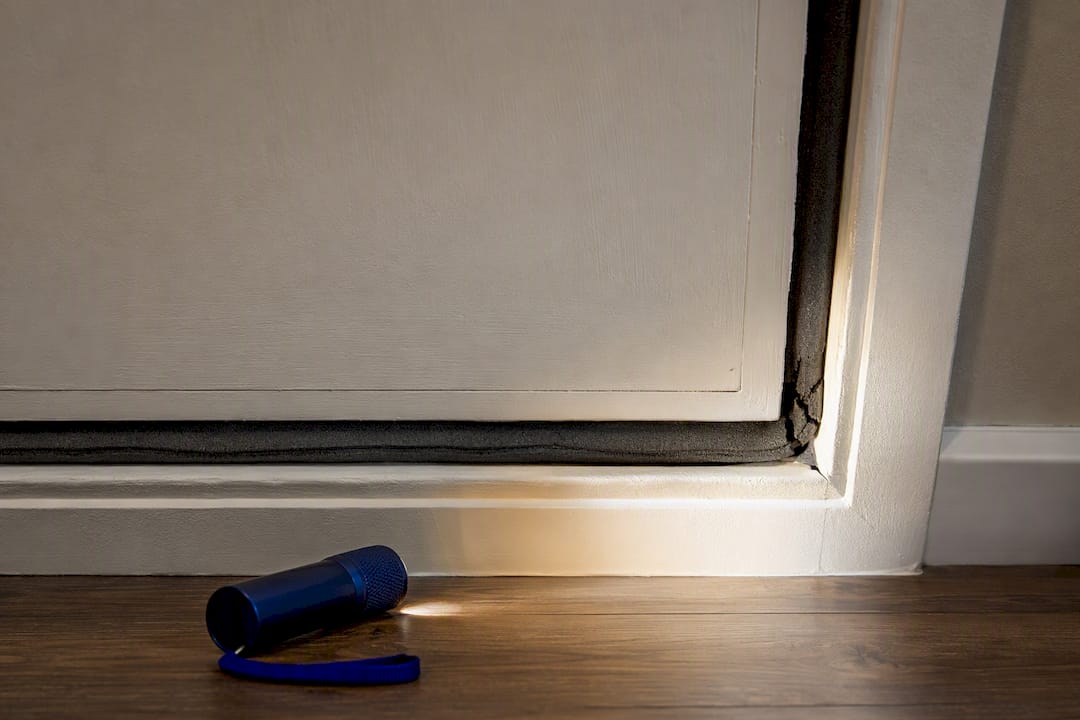
For pull-down ladder doors specifically, check that the door closes flush against the frame without gaps at the corners, since these units are notorious for warping over time. Guidance on properly winterizing and sealing doors applies just as well to attic hatches as it does to exterior doors, and a fresh bead of weatherstripping foam is one of the cheapest fixes on this entire checklist.
Is the Attic Floor Safe to Walk On?
Not every square foot of an attic is meant to hold your weight, and figuring that out before you step wrong matters more than any other item on this list.
Look first for a walkway of plywood or dimensional lumber laid across the ceiling joists. If one exists, stay on it. If it doesn’t, step only directly on top of the joists themselves, never on the insulation or drywall between them, since that ceiling is not built to support a person’s weight. Insulation hides the joists in a loose-fill attic, so probe gently with your foot or a flashlight to confirm you’re on solid framing before committing your full weight.
Watch for soft, springy, or visibly sagging sections of decking, which can indicate water damage or rot beneath the surface. Storage boxes stacked in one area sometimes compress the insulation and obscure the joist lines entirely, so move carefully around cluttered zones rather than assuming the floor underneath is consistent. If you’re not confident about where the safe walking path is, that’s a legitimate reason to stop and let a professional finish the visual sweep with proper footing and lighting.
Documenting What You Find
Findings only become useful once they’re recorded in a way a contractor, buyer, or inspector can act on. Photograph every defect with a wide shot for context and a close-up for detail, and lay a ruler or tape measure in the frame whenever you photograph insulation depth.
- Log moisture meter or thermal imaging readings alongside the date, outdoor temperature, and recent weather, since a reading taken after three days of rain means something different than one taken during a dry spell
- Record exactly where each measurement was taken (near the hatch, over the garage, at the north gable) so a follow-up visit can compare apples to apples
- Describe conditions objectively: “apparent water staining, roughly 12 by 18 inches, on sheathing above the bathroom vent” rather than diagnosing a cause you haven’t confirmed
- Sort findings into rough priority tiers: safety-critical issues (exposed wiring, structural sag), material defects that need correction soon (blocked vents, missing insulation), and maintenance observations worth monitoring
A buyer’s guide to reading inspection reports can help you translate this kind of documentation into negotiation leverage or a repair budget, especially in a transaction with tight timelines.
Pro Tip: Take your ruler photo of insulation depth at the exact same three spots every time you revisit the attic. Consistent measurement locations make it easy to prove insulation has settled or been disturbed between visits.
When Should You Call In a Licensed Professional?
Some findings simply outrun what a checklist and a flashlight can resolve safely. Active leaks near electrical wiring, any sign of structural failure like a cracked truss or sagging ridge, widespread apparent mold covering large sections of decking, and damaged or exposed wiring all call for an immediate professional referral rather than a wait-and-see approach.
Route the right issue to the right specialist: a licensed roofer for penetration leaks and shingle damage, a structural engineer for framing concerns, a licensed electrician for wiring hazards, and a pest control professional for active infestations. A certified home inspector plays a coordinating role here, documenting conditions across every system and helping a buyer or owner understand which referrals actually matter versus which are cosmetic. Keep in mind that inspectors working to the InterNACHI standard won’t move your insulation or hand you a lab-certified R-value; they’ll describe what’s visible and flag what needs deeper professional evaluation.
A Field Note From Holly
Working alongside licensed inspectors across the Mid-South, a few patterns show up again and again. Blocked soffit vents are probably the single most common defect I’ve seen documented, usually from insulation raked in during a re-insulation job with nobody checking the baffles afterward. Humid summers followed by cold nights produce condensation patterns that get misread as roof leaks more often than you’d expect, and insulation settlement under years of stored holiday decorations quietly erodes R-value nobody notices until an energy bill spikes. In a transaction, buyers and investors alike should treat the attic as a preview of deferred maintenance elsewhere in the property, not an afterthought room nobody visits.
— Holly
Book an Attic-Focused Inspection
A DIY checklist gets you a solid first read, but it can’t replace thermal imaging, lab-grade mold testing, or the liability protection a certified report provides in a real transaction. A professional inspection service is the practical next step when your own walk-through turns up something you can’t fully diagnose, whether that’s suspected vermiculite, a rusted nail pattern you can’t explain, or a truss that just doesn’t look right.
Our inspectors deliver a prioritized report with photos, measurement data, and clear next steps, not a vague pass or fail. For investors and property managers evaluating larger buildings, our specialized commercial inspection services go beyond a standard walk-through to cover the attic and roof systems that matter for CapEx planning. If you’re weighing which add-on service fits your situation, our guide to choosing the right specialized inspection breaks down thermal imaging and mold testing options. Ready to get eyes on your attic? Schedule an inspection with Upchurchinspection today.
Sources
FAQ
What Do Home Inspectors Look For in Attics?
Inspectors check insulation type and approximate depth, ventilation pathways, signs of moisture or roof leaks, pest evidence, structural framing condition, and visible electrical hazards, all without moving insulation or activating systems.
What Is the 7 and 7 Rule for Attics?
There’s no standardized “7 and 7” rule recognized in inspection standards or DOE guidance; if you’ve seen this term, treat it as informal shorthand rather than an industry benchmark, and rely instead on documented R-value and ventilation ratios like DOE’s 1:150 net free area guidance.
How Much Does an Attic Inspection Cost?
Cost varies by property size, accessibility, and whether specialty testing like thermal imaging or mold sampling is added, so it’s best to request a quote based on your specific property rather than assume a flat rate.
What Will Fail a Roof Inspection?
Active leaks, cracked or split truss members, sagging or rotted sheathing, blocked ventilation causing heat or moisture buildup, and exposed or damaged electrical wiring are the findings most likely to flag a roof or attic inspection as needing repair before closing.


