
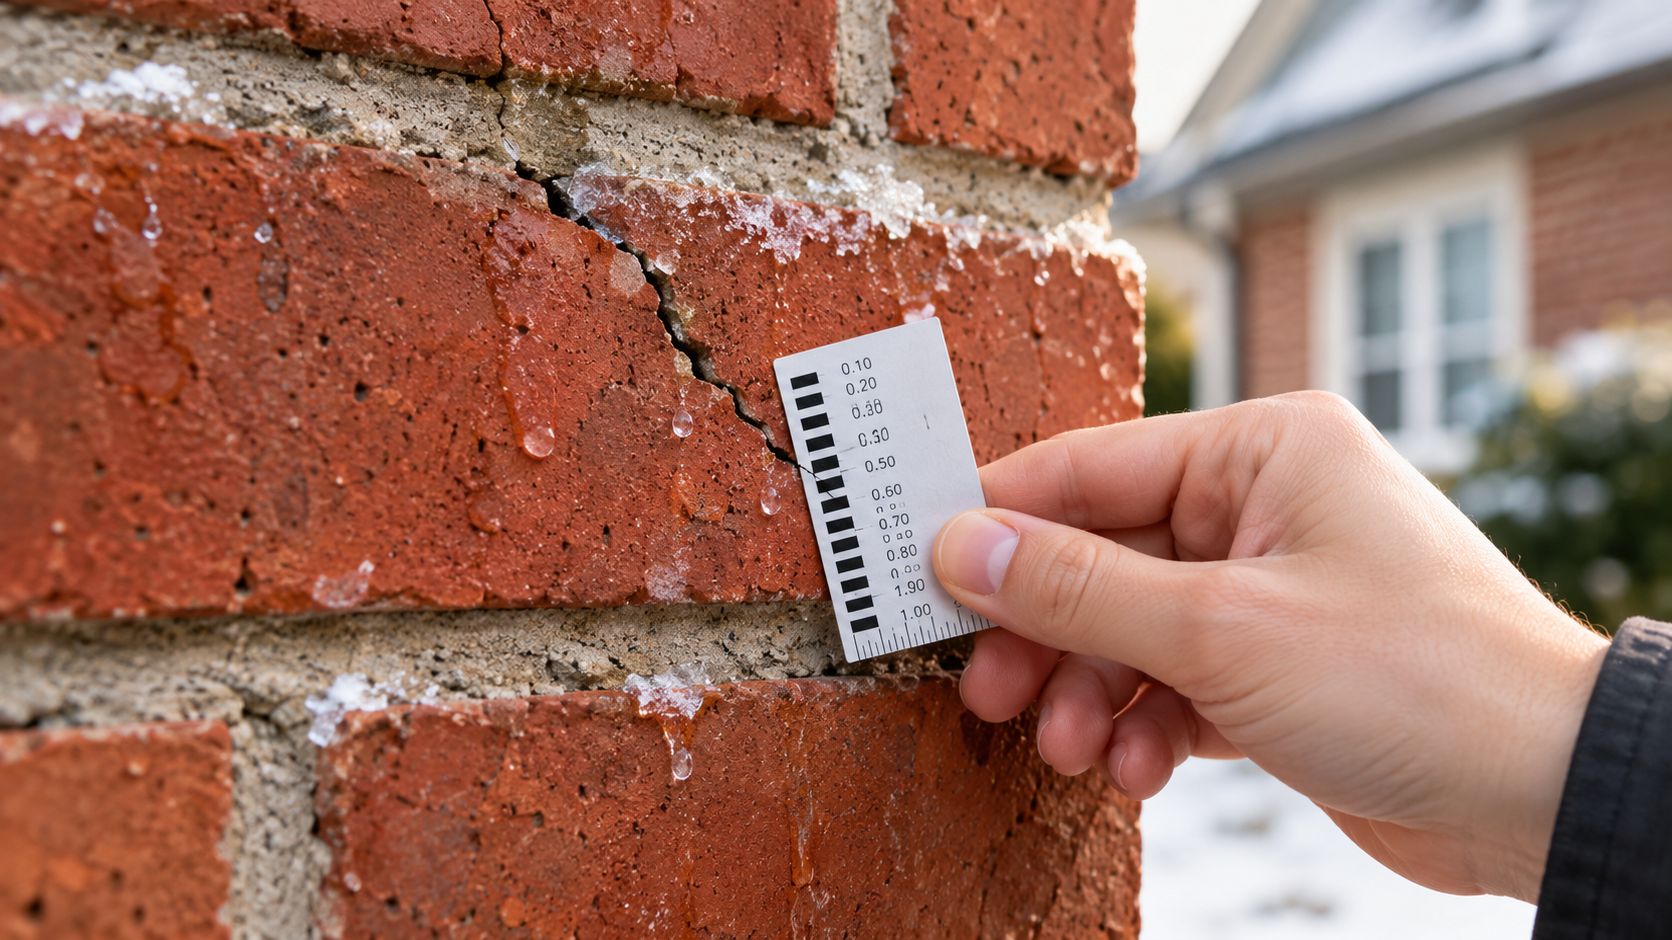
The first warm afternoon after a hard Missouri freeze is when many homeowners notice the change. A stair-step line has appeared along the mortar near a window, a brick face looks rougher than it did in the fall, or a thin crack runs diagonally above a door. In Cape Girardeau, Jackson, Columbia, Jefferson City, and communities across Southeast and Mid-Missouri, that timing raises a reasonable question: did the freeze cause the crack, or did winter only reveal movement that was already developing?
Masonry cracks after freezing weather need that distinction. Water trapped in porous brick or mortar can freeze, expand, and damage the material. Frozen ground can also shift a foundation, then relax during a thaw and make an older crack visible. A careful inspection looks at the crack's pattern, location, moisture signs, and whether the wall has moved, rather than assuming every new line is structural failure.
Table of Contents
- What New Cracks in Your Brick and Mortar Actually Mean
- How Freezing Weather Breaks Down Masonry Over Time
- Inspecting Your Home After a Winter Thaw
- Sorting Urgent Damage From Cosmetic Concerns
- Repair Options From DIY Patches to Professional Repointing
- Preventing Freeze-Thaw Damage Before Next Winter
- When a Homeowner Should Step Aside for a Professional
What New Cracks in Your Brick and Mortar Actually Mean
Walk the exterior after the thaw, but don't start with panic. Brick, mortar, and concrete foundations are rigid materials. They respond to moisture, temperature changes, settlement, and movement by cracking when the surrounding assembly can't accommodate the stress.
A crack confined to a mortar joint is often less serious than a crack cutting through the brick itself. Mortar joints can deteriorate and may be repairable through repointing. A broken brick face, loose brick, or crack that crosses several units suggests that the wall deserves closer evaluation, especially when you also see dampness, flaking, or displacement.
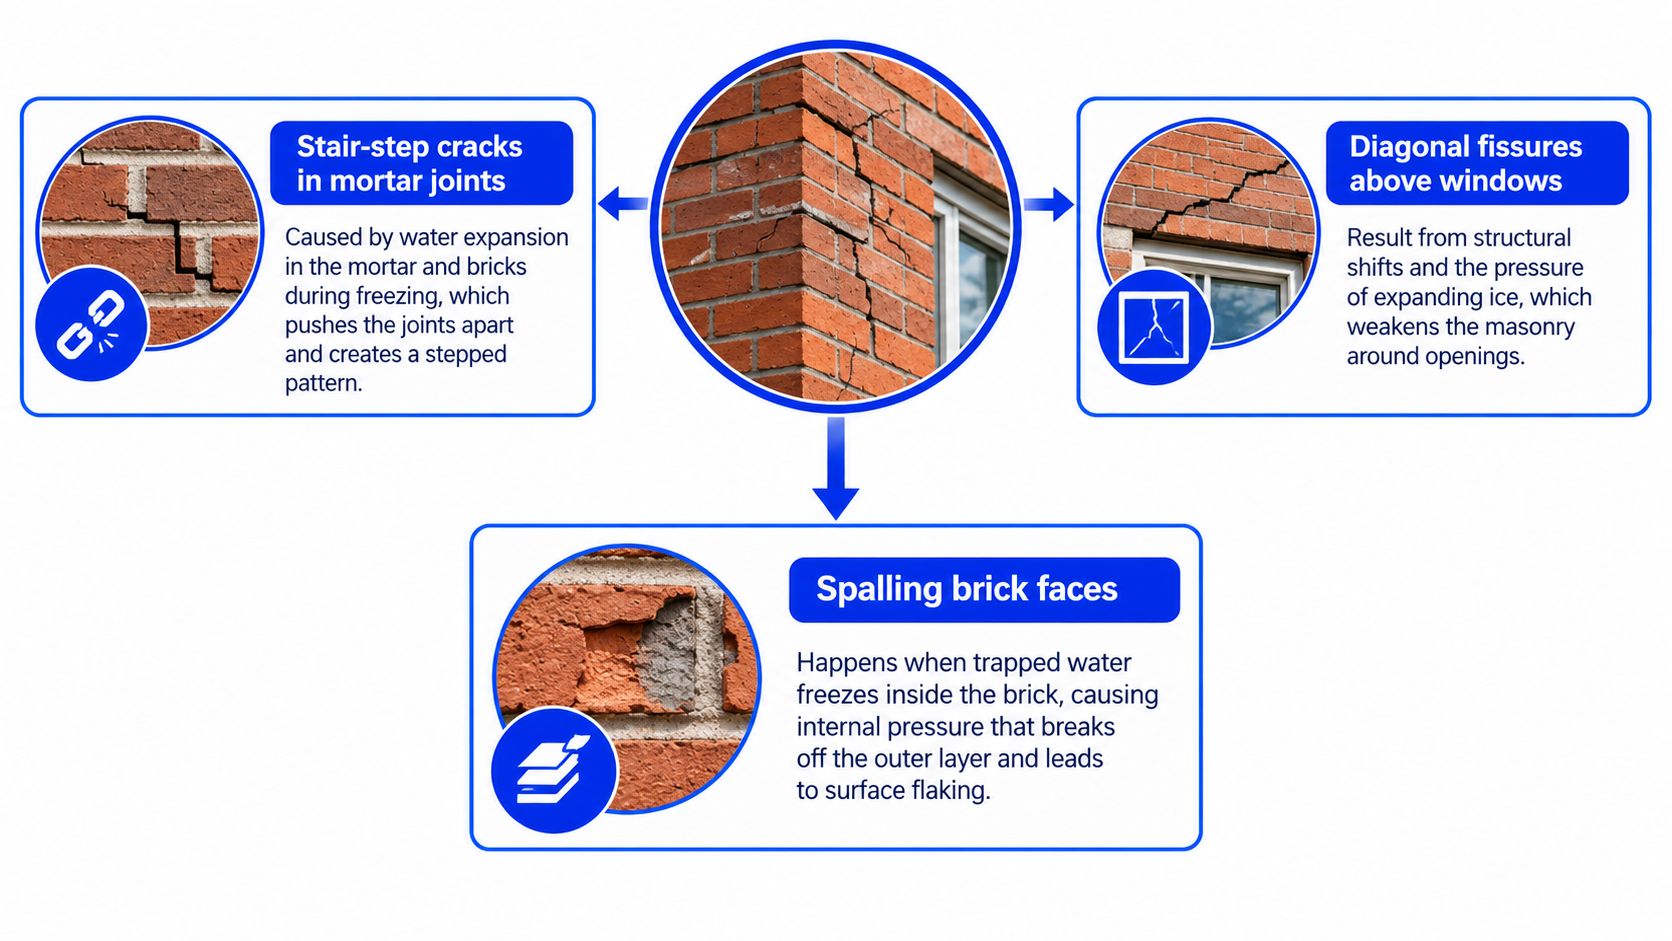
Read the pattern before judging the severity
Use the pattern as a starting point:
- Stair-step cracks follow mortar joints diagonally and horizontally. They can reflect movement in the wall or foundation, although the pattern alone doesn't prove a structural problem.
- Diagonal cracks above windows and doors may relate to movement around an opening, lintel distress, or seasonal shifting at the support below.
- Vertical cracks can occur where wall sections move differently or where a control joint is missing.
- Horizontal cracks deserve attention at foundation walls because lateral soil pressure, moisture, or bowing can push masonry inward or outward.
- Spalling means the brick face is flaking, chipping, or breaking away. That points toward moisture-related deterioration rather than a simple surface line.
A hairline mark in sound mortar isn't interpreted the same way as a widening crack with loose debris. If a crack passes through brick, repeats on the interior, or appears with bowing, sticking doors, or window-frame distortion, don't seal it before someone evaluates the cause. For additional background on common brick-veneer movement, see what causes cracks in brick veneer.
Winter may reveal, rather than create, the defect
Frozen soil can temporarily change the support beneath a porch, foundation, or wall. When that ground thaws, the base can move back or settle, exposing a crack that was difficult to see while the soil was frozen. Older homes in Poplar Bluff, Farmington, Perryville, and surrounding areas may also have several materials meeting at one opening, so seasonal movement can show up at joints before it becomes obvious elsewhere.
Practical rule: A new-looking crack is a clue, not a diagnosis. Photograph it, look for matching movement indoors, and check whether water is entering before deciding how serious it is.
How Freezing Weather Breaks Down Masonry Over Time
The basic mechanism is straightforward. When water inside porous brick, mortar, or concrete freezes, it expands by about 9%, creating pressure in the material's small pores and existing voids. Repeated pressure can open microcracks, weaken the bond between brick and mortar, and leave more room for the next round of water intrusion, as described in this engineering summary of freeze-thaw masonry research.
Saturation controls much of the outcome. A dry wall may tolerate cold better than a wall that repeatedly absorbs water from a failed gutter, blocked drainage path, leaking chimney crown, or poorly sealed joint. Research on brick weathering found that continuous water supply combined with repeated daily freeze-thaw cycles was a major driver of progressive microcracking and loss of cohesion. Exposed walls can experience many temperature reversals over a winter, and sun-facing elevations may thaw and refreeze differently from shaded elevations, as documented in this study of freeze-thaw brick weathering.
The visible damage usually lags behind the internal stress
The first cycle may leave only a fine line. Later cycles can enlarge that opening, loosen mortar, and break the outer face of a brick. Saturated cement-based mortars have shown about 26.0% strength loss after 120 cycles, while cement-lime mortars showed losses of up to 33.7% in laboratory work summarized by a systematic review of freeze-thaw effects in masonry materials.
Those figures don't mean your wall has lost the same amount of capacity. Laboratory materials and field assemblies differ. They do show why a damp wall with recurring cracks should not be treated as a purely cosmetic surface issue.
| Stage | Cycles Exposed | Condition | Visible Sign |
|---|---|---|---|
| Early exposure | Initial wet-freeze-thaw activity | Microcracks begin in pores and interfaces | Fine mortar lines or slight surface scaling |
| Developing deterioration | Repeated seasonal cycling | Mortar cohesion and brick faces weaken | Sandy joints, hairline cracks, or small flakes |
| Advanced moisture damage | Continued saturation and cycling | Cracks connect and sections lose material | Spalling, recessed joints, damp marks, or loose brick |
| Movement-related distress | Freeze-thaw acts on an already shifting assembly | Wall components displace or separate | Stair-step patterns, bulging, widening gaps, or interior leakage |
Missouri's winter weather can expose this progression on brick veneer, chimneys, porch columns, retaining walls, and foundation masonry. The repair decision should focus on the moisture source and the wall's stability, not just the newest visible mark.
Inspecting Your Home After a Winter Thaw
Choose a dry, bright afternoon and inspect one elevation at a time. Start with the north and east sides, then work around the south and west walls. That order helps you compare shaded and sun-exposed areas without jumping between unrelated defects.
Begin at grade. Look for cracks in the visible foundation, wet soil against the wall, mulch covering the masonry, and downspouts discharging beside the house. Then move upward to sill plates and band boards where they're visible, followed by every window and door lintel. Diagonal cracking above an opening deserves a closer look because the opening interrupts the wall's load path.
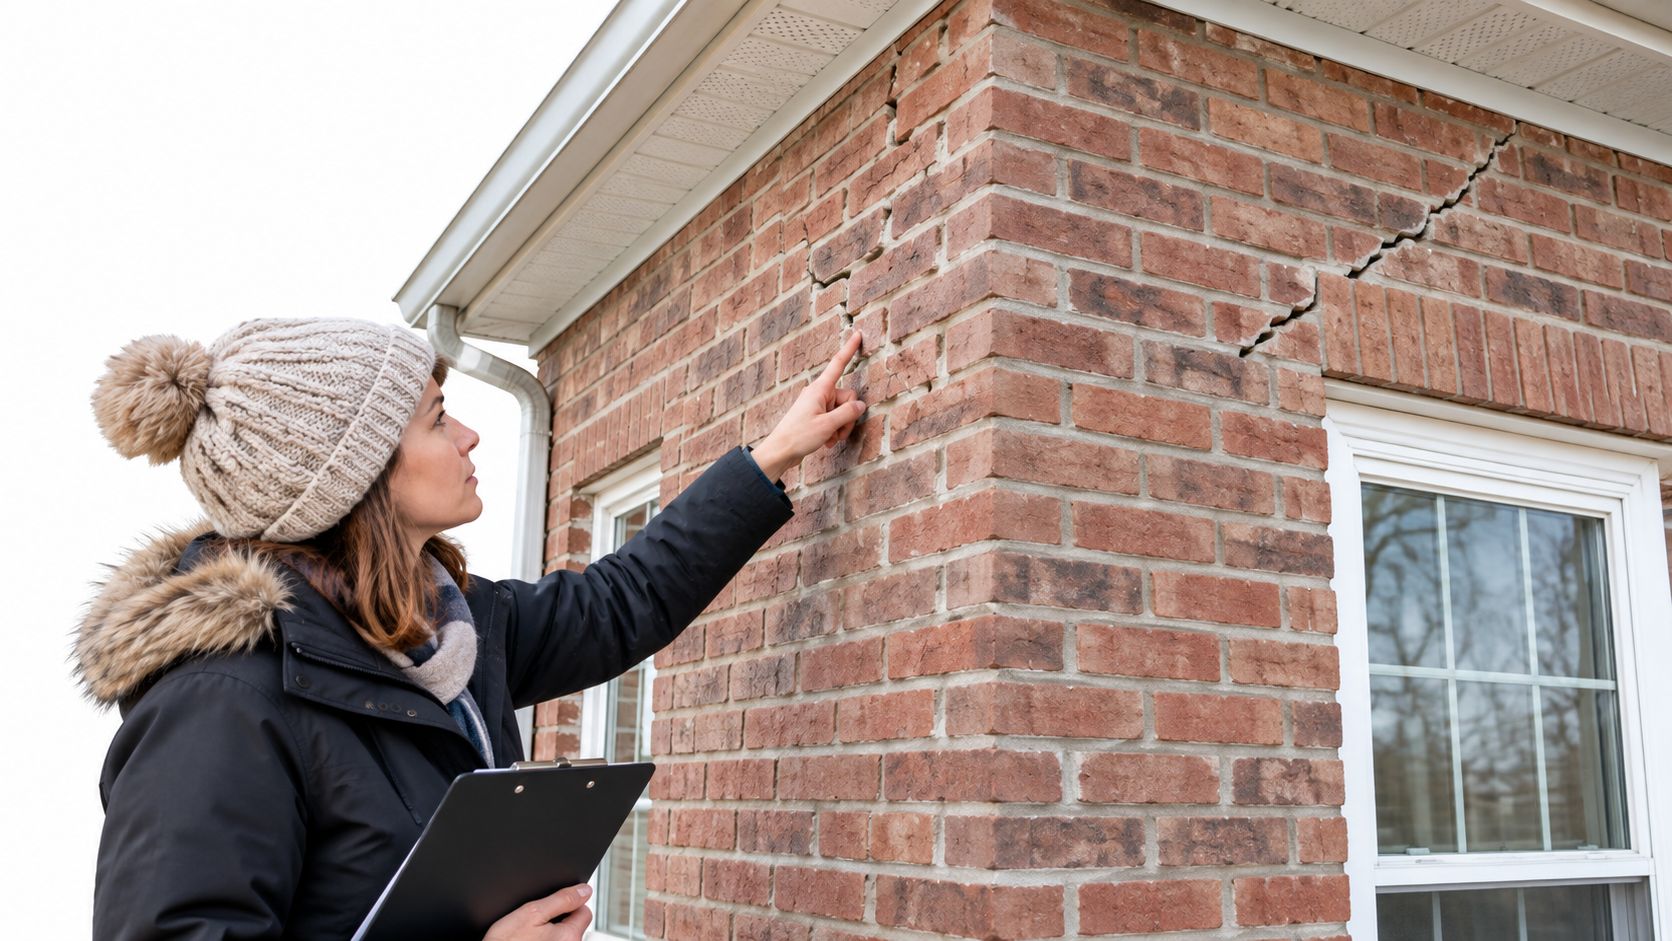
Map the wall instead of relying on memory
Use your phone to photograph each crack from a distance and close up. Place a ruler or coin beside it for scale, estimate the width, and note the date, elevation, weather, and whether the crack is in the mortar or brick. A simple crack-gauge card can help you compare the same location later.
Continue across the middle of the wall and look for stair-step joints, missing mortar, loose brick, and fresh fragments on the ground. Finish at the chimney shoulder and crown, then inspect retaining walls, porch columns, steps, and other masonry that holds back soil or supports a load.
- Look for efflorescence: White, powdery deposits often indicate that moisture has moved through the masonry.
- Follow the water: Check where each downspout discharges and whether the grade directs runoff toward the foundation.
- Check for active loss: Fresh flakes, sandy mortar, or damp bands after a thaw suggest the wall is still receiving moisture.
- Record interior clues: Look inside at basement and crawlspace walls, around window openings, and near door headers for matching cracks or water marks.
A broader seasonal building maintenance checklist can help you organize related exterior observations, including drainage and openings. If the wall looks sound outside but you suspect a temperature-related moisture path, home thermal imaging inspection may help identify temperature anomalies that require further investigation. Thermal imaging doesn't replace a masonry assessment, and it can't prove the cause of a crack by itself.
Sorting Urgent Damage From Cosmetic Concerns
Triage starts with three questions: Is the wall moving? Is water entering? Is material coming loose? A small stable line in a vertical mortar joint is treated differently from a crack that widens, exposes daylight, or appears with bowing.
Hairline cracks under 1/8 inch in otherwise sound mortar are often cosmetic or suitable for monitoring, but the measurement is only one part of the decision. A narrow crack at a foundation corner, above a window, or across multiple brick courses may matter more than a wider isolated surface nick. The National Park Service guidance on cyclical masonry cracking also explains why some cracks open in cold weather and narrow in hot weather, so one visit can give an incomplete picture.
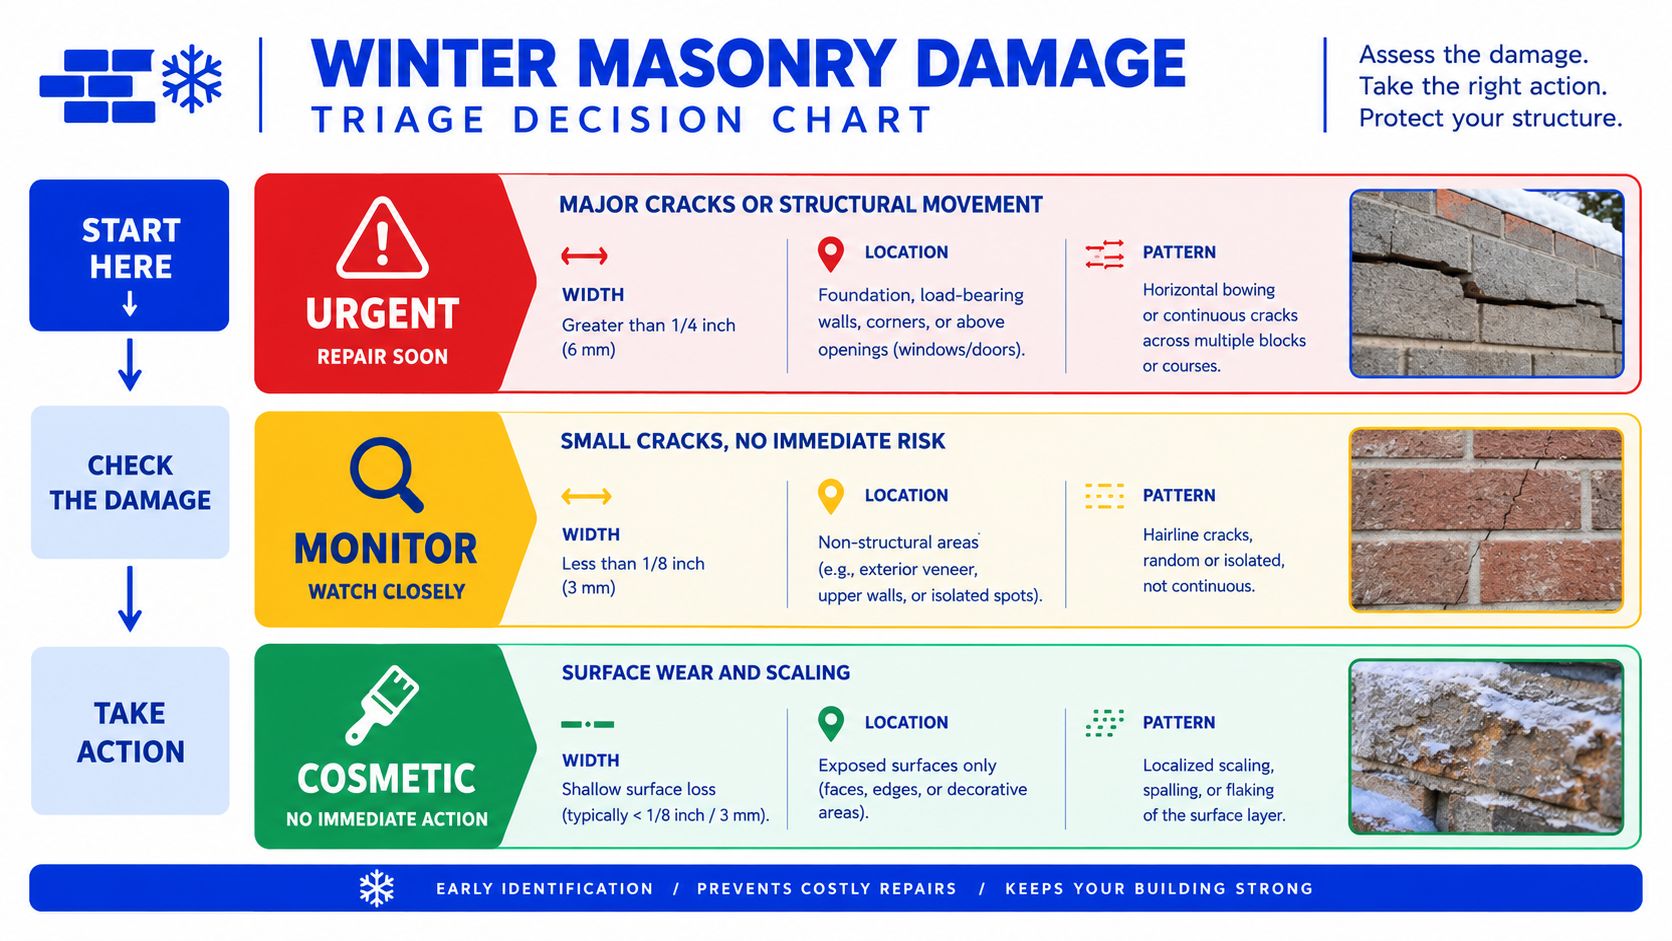
Use a simple priority ladder
Urgent evaluation is appropriate when you see:
- Wider stair-step cracking: Cracks wider than 1/4 inch, particularly when they cross multiple courses.
- Horizontal foundation cracks: A horizontal line paired with bowing, inward movement, or dampness needs professional attention.
- Displacement: Bulging brick, a leaning wall, loose units, daylight through the assembly, or mortar pushed out of alignment.
- Active deterioration: Fresh debris, rapidly widening cracks, significant spalling, or water entering living space.
Monitor and document a stable hairline crack under 1/8 inch when the surrounding brick is aligned, dry, and intact. Mark the ends lightly with pencil, write the date beside the mark, and photograph it with a scale. Don't use the pencil mark as an engineering test. It only helps you see whether the crack changes.
Cosmetic repair may fit a stable, narrow mortar line on a vertical wall above grade. Clean the joint gently, use a compatible breathable repair material, and stop if the joint crumbles or the crack continues into the brick. Guidance on why fix concrete cracks reinforces the practical point that an open crack can become a pathway for water, although the correct repair still depends on the material and cause.
Efflorescence usually feels powdery and wipes away, while water staining tends to remain dark or discolored. Neither observation identifies the source alone. If moisture, displacement, or widening is present, move the issue out of the DIY category.
Repair Options From DIY Patches to Professional Repointing
A patch can close a visible line without restoring the wall. That distinction matters. Acrylic or silicone caulk may seal a stable hairline mortar crack cosmetically, with materials commonly costing $10 to $30, but those amounts are not a repair estimate for your property and the sealant won't restore failed mortar strength.
Professional repointing removes deteriorated mortar to a consistent depth and installs compatible new mortar. A commonly quoted range is $8 to $25 per square foot, but access, height, brick condition, matching requirements, chimney work, and the amount of removal can change the scope substantially. Treat any range as a budgeting reference, not a proposal.
Match the repair to the failure
| Repair Method | Typical Cost | Best For | Lifespan |
|---|---|---|---|
| DIY breathable crack seal | $10 to $30 in materials | Stable, narrow mortar lines above grade | Variable, depends on movement and moisture |
| Professional repointing | $8 to $25 per square foot | Recessed, sandy, missing, or deteriorated joints | Depends on mortar compatibility and moisture control |
| Brick replacement | Project-specific | Individual cracked or spalled units | Depends on matching and surrounding conditions |
| Structural reinforcement | Project-specific | Bulging walls or ongoing displacement | Depends on engineering design and installation |
The right mortar matters, especially in older homes. A mortar that is harder or less permeable than the original can shift moisture into the brick and make future damage worse. A mason should identify the existing composition before selecting lime-based or Portland cement mortar, rather than choosing a product only because it looks similar.
Structural crack stitching, wall ties, or helical reinforcement may be appropriate when the wall is bulging or separating, but those methods don't correct poor grading, blocked drainage, failed flashing, or foundation movement. Larger repairs may also require a technical survey before a mason can price the work accurately.
A handyman patch may cover a narrow symptom. A masonry contractor's proposal should explain what gets removed, what gets replaced, how the color and joint profile will be matched, whether water management is included, and what warranty applies. Those details are more useful than comparing prices alone.
Preventing Freeze-Thaw Damage Before Next Winter
Most prevention happens before the ground freezes. Water management gives masonry a better chance to dry instead of entering old cracks and cycling through the wall. Fall maintenance should focus on the roof edge, discharge points, joints, and soil line.
Fall preparation
- Clear gutters: Remove leaves and sediment so overflow doesn't run down brick faces or saturate mortar.
- Extend downspouts: Carry discharge at least five feet from masonry and foundation walls, while confirming the outlet doesn't create a new drainage problem.
- Check the grade: Soil should direct water away from the foundation rather than funneling it toward a basement or crawlspace.
- Inspect chimney details: Look at the crown, cap, flashing, and visible mortar. Water entering at the top can travel through the chimney before the interior symptom appears.
- Seal carefully: Use a compatible, breathable masonry sealant on suitable control joints and known hairline cracks after the surface is clean and dry.
- Keep masonry above grade: Mulch and soil shouldn't remain piled against brick, block, porch columns, or other masonry surfaces.

Spring follow-up
After the thaw, repeat the exterior walk-around and compare new photographs with your fall record. Look for sealant separation, fresh efflorescence, loose mortar, spalling, and water marks. Trim vines and shrubs away from brick because they can hold moisture against the wall and hide changes that would otherwise be visible.
Use breathable products only when a sealant is appropriate. Film-forming sealers can trap moisture inside porous masonry, increasing the risk of spalling rather than solving it. The practical choice is often to correct the water source first, then repair the joint or brick once the wall can dry.
For Missouri homes, drainage work can be less expensive and more effective than repeated cosmetic patching. This guide to gutter and downspout extensions explains why keeping roof water away from the foundation belongs near the top of the maintenance list.
When a Homeowner Should Step Aside for a Professional
A homeowner can document a crack and correct simple water-shedding maintenance. A professional should take over when the evidence points to movement, hidden deterioration, or a repair that affects load-bearing masonry.
| Damage Indicator | First Call | Action Within |
|---|---|---|
| Stable hairline mortar crack, no moisture or displacement | Homeowner, then inspector if uncertain | Photograph and monitor through the next thaw |
| Crumbling or missing mortar without displaced brick | Masonry contractor | Request a repointing assessment after the wall is dry |
| Crack wider than 1/4 inch or stair-stepping through multiple courses | Qualified inspector or structural engineer | Arrange evaluation promptly |
| Bulging, leaning, loose, or separating masonry | Structural engineer first, mason second | Restrict contact with loose areas and arrange assessment |
| Diagonal crack from a window or door corner | Inspector, then appropriate specialist | Compare exterior and interior patterns during the spring thaw |
| Recurring drywall crack aligned with exterior masonry | Inspector or engineer, depending on movement | Document both sides and investigate the support and drainage |
| Damp basement, crawlspace, or wall line beside masonry cracking | Inspector or foundation professional | Correct water entry and evaluate movement before sealing |
Cracks above door headers, diagonal cracks from opening corners, and repeated interior cracks deserve more than surface filler. They can reflect lintel distress, settlement, seasonal movement, or a combination of conditions. Drainage-driven settlement is a separate diagnostic problem from freeze-thaw deterioration, even though winter can expose both at the same time.
Keep dated photographs, width estimates, weather notes, and a short timeline of when the crack appeared or changed. That record gives an inspector, engineer, mason, contractor, or insurance representative something concrete to evaluate during Missouri's spring thaw window.
If you're buying, selling, or maintaining a home in Southeast Missouri or Mid-Missouri, Upchurch Inspection can document visible masonry conditions, related moisture clues, and other inspection findings in a clear report. Visit Upchurch Inspection to schedule an inspection or discuss which evaluation fits the property and the concern.


