
Imagine having a pair of glasses that could see the invisible world of heat signatures in your home. That’s what a home thermal imaging inspection gives you, a non-invasive way to spot hidden problems before they become catastrophes.
An inspector armed with a high-tech infrared camera can scan the surfaces in your home and see temperature differences that are completely invisible to the naked eye. This process creates a color-coded ‘heat map,’ instantly showing where your expensive conditioned air is escaping, where moisture might be hiding, or where an electrical circuit is dangerously overheating.
How We Perform a Home Thermal Imaging Inspection
Before we ever call out a problem, we try to create conditions that make the building tell the truth. In practice, that means looking for a meaningful indoor-to-outdoor temperature difference, limiting moving air where possible, and scanning after we’ve considered recent sun exposure, shower use, cooking heat, and HVAC operation. In many homes, the clearest patterns show up when there is roughly a 10°F or greater temperature difference across the building enclosure, which is why thermography guidance often emphasizes temperature contrast as part of the setup process, not just the scan itself, as explained in this infrared mold-detection overview.
Our process is straightforward:
- Review the concern and conditions. We ask what prompted the inspection—musty odor, staining, high utility bills, a suspected leak, or concern about overheating electrical components.
- Walk the home visually first. We compare what we already see with what the camera later shows. Stains, patched drywall, cupping floors, and condensation-prone rooms often shape where we spend extra time.
- Scan room by room. We inspect walls, ceilings, floors, exterior-facing assemblies, and targeted systems with an infrared camera, looking for anomalies rather than jumping to conclusions.
- Verify suspicious areas. If we see a cold pattern that could be moisture, we confirm with a moisture meter or another secondary method instead of calling every cool spot a leak. That verification step is a standard best practice in professional thermography because infrared reads surface temperature; it does not identify the cause on its own, as the Infrared Training Center explains and as the International Association of Certified Home Inspectors notes.
- Document findings in the report. For each notable anomaly, we pair the thermal image with a regular photo, describe what was observed, note the likely interpretation, and recommend the next step.
We also use the camera selectively rather than theatrically. In our experience, the fastest way to get a bad result is to treat every color difference like a defect. Some anomalies are meaningful; others are just airflow, framing, reflective finishes, or a wall still holding afternoon heat.
Uncovering Your Home’s Hidden Secrets
Unlike a standard home inspection that relies on what the inspector can physically see, thermal imaging offers a much deeper, diagnostic look at your property’s true condition. The camera translates surface temperatures into a visual spectrum, where cooler areas typically show up as blue or purple, and warmer spots appear as red, orange, or yellow.
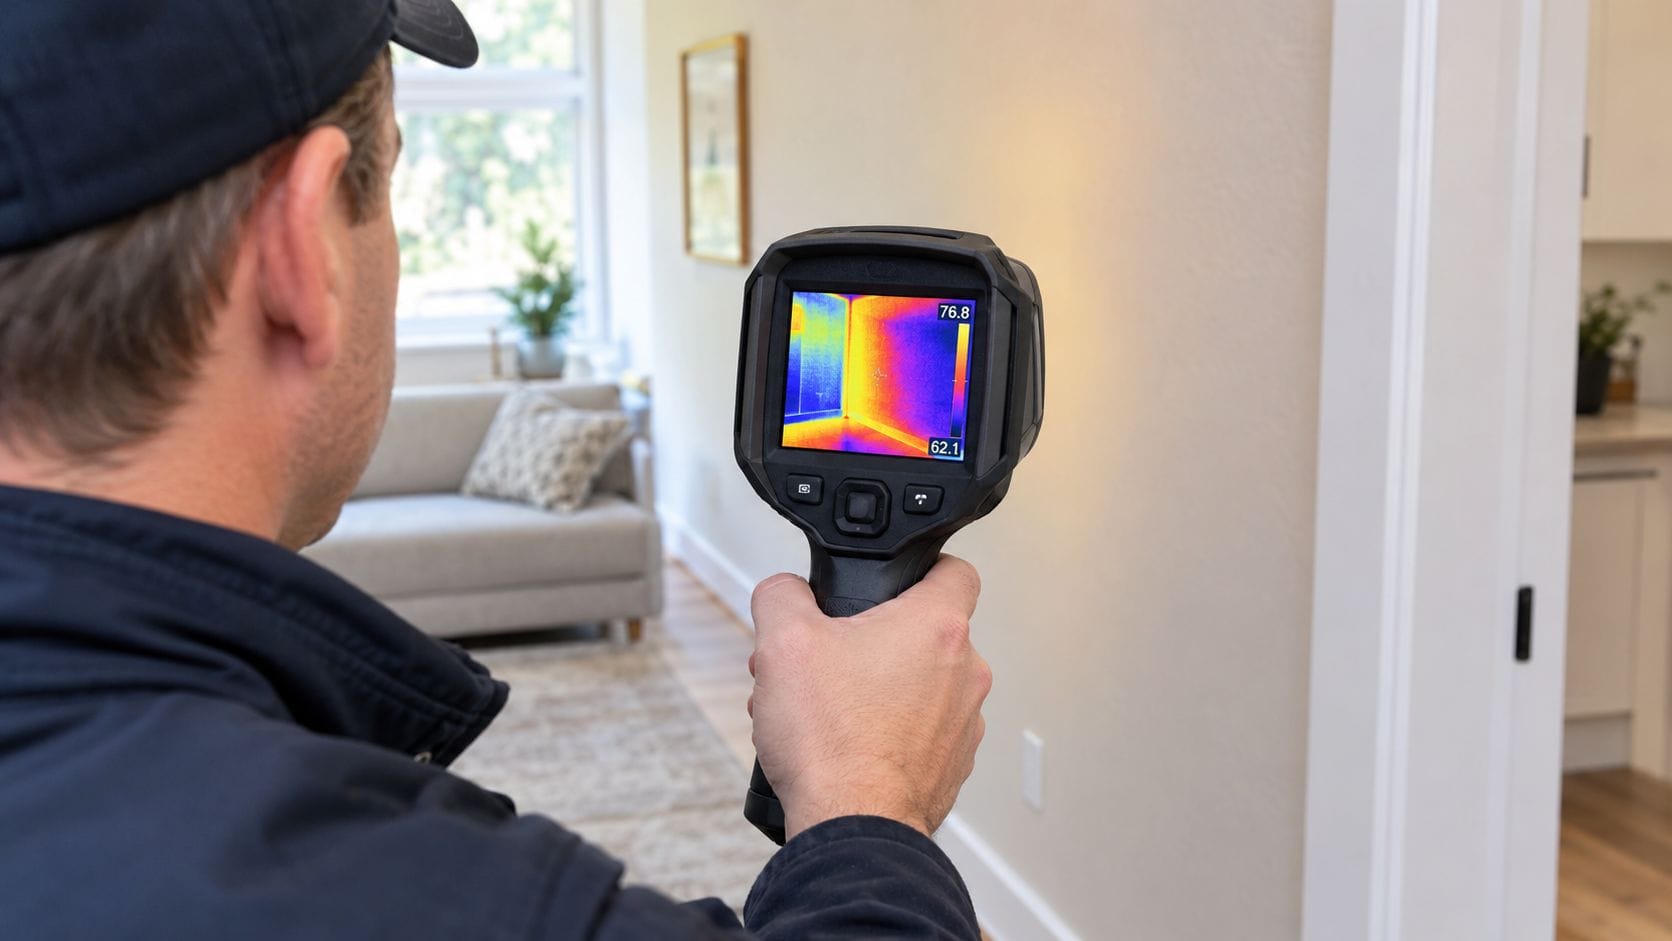
It’s important to understand this isn’t X-ray vision. An infrared camera can’t see through your walls. What it does, and does well, is read the subtle temperature changes on a wall’s surface that are caused by issues hidden behind it. This simple principle allows a trained inspector to find problems that would otherwise go completely unnoticed until they’ve already caused major damage.
Beyond a Standard Visual Check
A general home inspection is an absolutely vital part of the home-buying process, but its scope is limited to what’s visible. Think of thermal imaging as a powerful supplement—an extra sense that allows the inspector to detect unseen threats. While your standard inspection confirms the home’s visible health, a thermal scan tells the story of what’s happening underneath.
For homeowners, this means catching small issues like a minor insulation gap or a faint leak before they snowball into thousand-dollar repair bills. It’s a game-changing tool for maintaining your home’s health, safety, and efficiency for the long haul.
A thermal imaging inspection can pinpoint a wide variety of problems with stunning accuracy. Understanding what a home inspection includes is your first step; adding a thermal scan provides a whole new layer of diagnostic certainty.
Here are just a few of the key problems this technology helps us uncover:
- Energy Inefficiency: We can easily spot gaps in insulation, air leaks around windows and doors, and poorly sealed ductwork that are forcing your HVAC system to work overtime and driving up your utility bills.
- Hidden Moisture Intrusion: This is a big one. Thermal imaging is fantastic at detecting water leaks from plumbing, roofs, or foundations that can lead to wood rot and dangerous mold growth.
- Electrical Hazards: We can identify overloaded circuits, faulty breakers, and loose connections that generate excess heat—a serious fire risk that’s often completely invisible.
- Structural and Pest Issues: The camera can even reveal missing structural components (like a missing stud in a wall) or the distinct heat signatures created by hidden termite or rodent infestations.
How Infrared Technology Makes the Invisible Visible
Infrared cameras do not look through walls; they measure differences in surface temperature and translate those differences into a thermogram. That distinction matters, because the camera is showing a pattern that still has to be interpreted in context. The Infrared Training Center’s educational materials and this thermography primer from FLIR both make the same point: thermography detects emitted infrared energy from surfaces, not hidden objects directly.
How the inspection actually works
A useful thermal scan follows a sequence.
First, we try to create or take advantage of a temperature differential. If the interior and exterior are nearly identical, insulation defects and air leakage are harder to distinguish. Cooling the house in summer or heating it in winter helps weak areas stand out.
Second, we scan surfaces room by room. Walls, ceilings, around windows and doors, plumbing walls, attic access points, and HVAC-related areas usually tell the story fastest. In my own field experience, bathrooms, laundry rooms, and exterior wall corners produce more meaningful anomalies than large open living spaces.
Third, we compare the thermal image to visible conditions. A cool shape under a window may be an air leak; the same shape below a shower valve wall may suggest moisture. The camera gives us the clue, but the room context helps narrow the cause.
Fourth, we verify suspicious areas with a secondary tool. If a ceiling stain looks cool on the camera, we do not stop at the image. We confirm with a moisture meter, and in some cases the right next step is a borescope, plumbing evaluation, or more invasive opening by a contractor. Professional guidance has long stressed this workflow because wet-looking signatures can also come from air leakage, missing insulation, or thermal bridging, as summarized by the Infrared Training Center article on mold detection limits.
Finally, we document what was found. A solid report does more than drop in colorful photos. It identifies the location, explains what the thermal anomaly may represent, states whether it was confirmed, and recommends what to do next.
Conditions that can distort readings
Interpretation matters because several normal conditions can mimic defects:
- Solar loading: Exterior walls and roofs can stay warm for hours after direct sun.
- HVAC airflow: Supply registers and return paths can create cool or warm streaks that look dramatic but are expected.
- Reflective surfaces: Mirrors, glossy tile, metal, and some finished appliances can reflect other heat sources and mislead the camera.
- Recently used showers or appliances: A hot shower wall, oven, dishwasher, or dryer can temporarily create patterns unrelated to building defects.
- Furniture and rugs: Covered surfaces may read differently because they are shielded from room air.
One of the most common false positives we see is a cool patch near a supply register that homeowners assume is a hidden leak. Often, it is just conditioned air washing the drywall. That is exactly why training and confirmation tools matter.
The Right Tool for the Job
Of course, the quality of the inspection depends heavily on the quality of the equipment. For home thermal imaging, technical specs like resolution matter a lot. Most professional inspectors rely on cameras with at least a 320 x 240 pixel resolution, as this offers a great balance between capturing detailed images and keeping the service affordable for homeowners. Modern handheld cameras allow us to move efficiently through a property, spotting thermal anomalies from insulation gaps to faulty wiring.
Infrared technology is all about bringing the unseen to light. This isn’t just limited to what’s behind your drywall; specialists can learn a ton by examining the invisible layers of your home’s roof as well. Understanding the role of technology in modern home inspections helps homeowners see just how valuable these advanced tools are for getting a complete picture of a property’s health. Roof-related moisture pathways can be especially deceptive, which is one reason resources like this roof moisture article are useful background for homeowners trying to understand how hidden water damage develops.
What a Thermal Scan Can Uncover
The most useful way to think about a thermal scan is not as magic, but as a screening tool that reveals patterns worth acting on.
What it can detect reliably
When conditions are favorable and the images are interpreted correctly, thermal imaging is especially helpful for finding:
- Insulation gaps: Missing, compressed, or uneven insulation often creates clear temperature differences along ceilings, knee walls, and exterior walls.
- Air leakage patterns: Drafts around windows, doors, attic hatches, recessed lights, and duct penetrations often show up as streaks or localized cold and hot areas.
- Overheated electrical components: Loose connections and overloaded breakers can present as abnormally hot points that deserve prompt electrical follow-up. The U.S. Department of Energy’s overview of infrared audits also highlights thermography’s value for locating building-envelope defects and some system inefficiencies.
- Moisture-related cooling patterns: Leaks and damp materials can create cooler surface signatures, especially where evaporation is active.
What it cannot confirm on its own
A thermal image is not a diagnosis by itself.
It cannot identify mold species, prove that a leak is currently active without corroboration, or guarantee that no issue exists because the image looks normal that day. If conditions are poor, hidden problems may not separate enough thermally to stand out. And even a strong-looking anomaly may have more than one possible cause.
That is why a careful thermal inspection home workflow always combines visual evidence, thermal imaging, and verification tools before making a confident call.
A compact example of how a report reads
A homeowner usually sees two images side by side in the report: a thermal image and a standard photo of the same area. For example, the thermal image may show an irregular dark-blue patch at the lower corner of an exterior bathroom wall. The matching visual photo may show only slight paint bubbling or no obvious defect at all.
In the report, we would label that area something like "localized cool anomaly consistent with possible moisture intrusion" rather than calling it mold or a plumbing leak outright. If a moisture meter confirmed elevated readings, the next-step recommendation might be to evaluate nearby plumbing, sealant, or exterior penetration points and repair any verified source before replacing finishes. If the meter did not confirm moisture, the recommendation could shift toward checking insulation or air leakage instead.
That kind of wording matters. It keeps the report useful without overstating what the camera alone can prove.
Pinpointing Critical Energy Loss
One of the most common and financially draining issues we find is energy loss. It happens all the time. Small gaps in insulation, windows and doors that aren’t sealed properly, and leaky ductwork create thermal bridges where your heated or cooled air—and your money—slips right out.
On the thermal camera, these weak spots show up as distinct cold streaks in the winter (shades of blue and purple) or hot spots in the summer (bright reds and yellows). Finding these deficiencies allows for precise fixes, so instead of a costly, whole-home insulation overhaul, you can focus only on the areas that are failing. It makes your home more comfortable and can put a real dent in your monthly utility bills.
Detecting Hidden Moisture Intrusion
Thermal imaging does not detect mold directly. What it does very well is help locate temperature patterns consistent with moisture, and moisture is the condition that allows mold growth to develop. That difference is central to any responsible mold thermal imaging inspection.
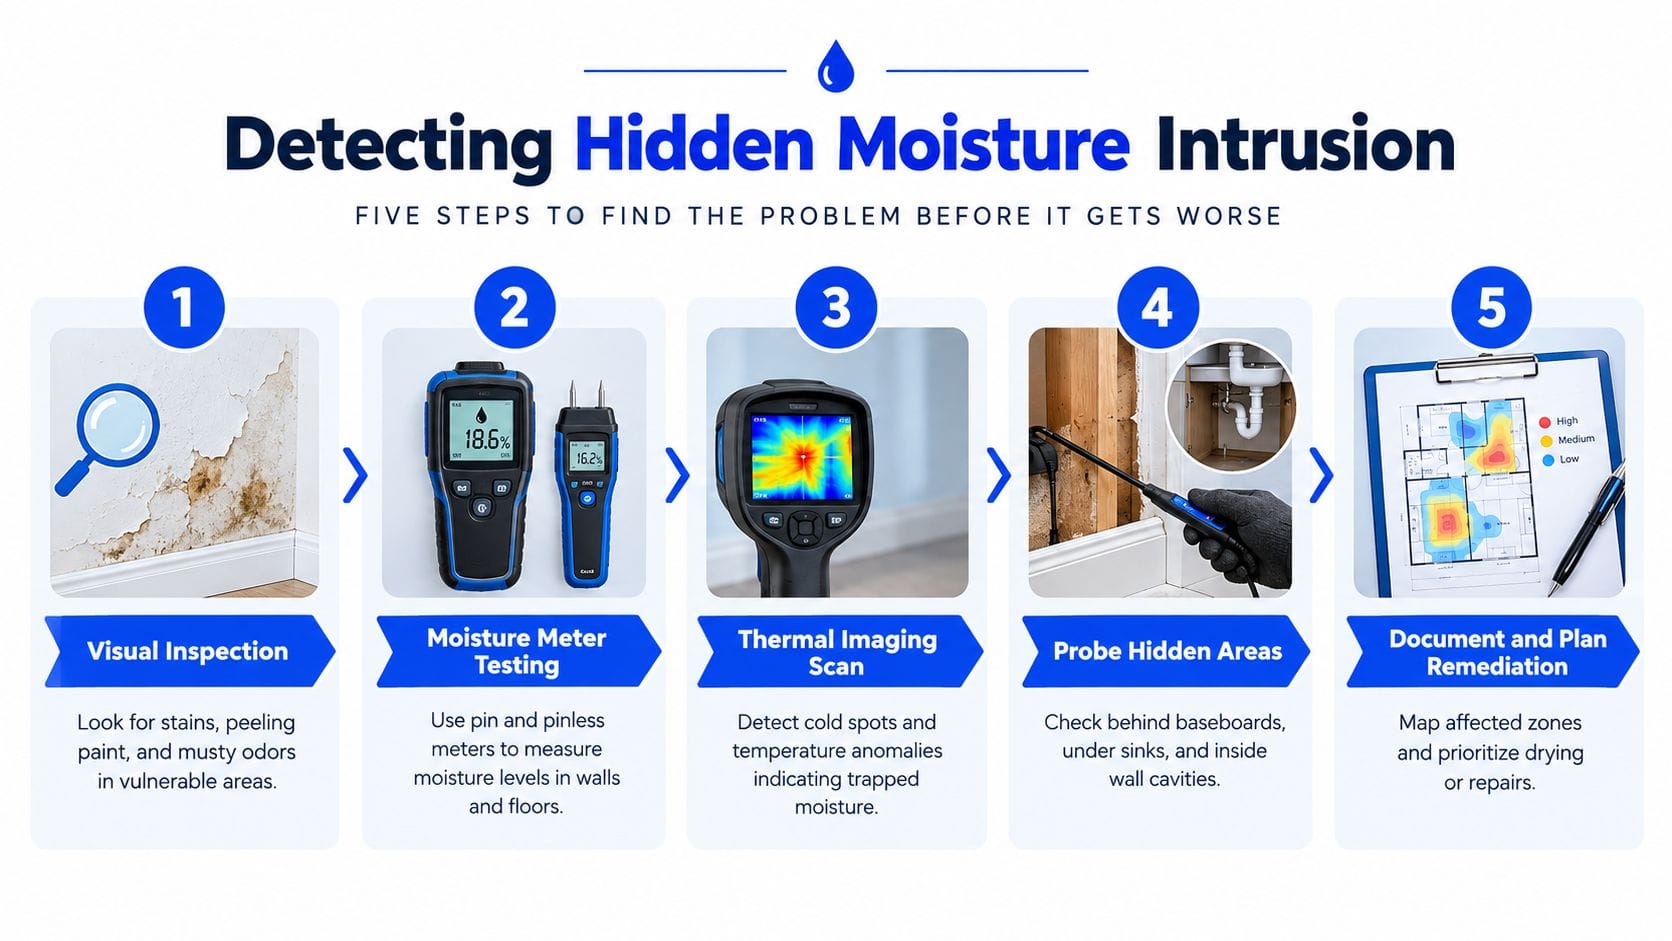
Professional guidance treats infrared as a non-invasive screening method, not a stand-alone mold test. The reason is simple: a cool signature on drywall may come from active moisture, but it may also come from air leakage, insulation voids, or thermal bridging. Infrared scans are most useful when paired with direct moisture measurement and, where warranted, additional investigation, as explained in this mold and infrared guidance article and in EPA moisture-control guidance through its mold resources.
When moisture-related mold risk is a concern, we commonly scan:
- around showers, tubs, and toilet bases
- under sinks and around supply and drain lines
- below roof penetrations and chimney intersections
- exterior walls with staining or musty odors
- around HVAC registers, air handlers, and condensate lines
- basements, crawlspaces, and finished lower-level walls
In our inspections, shower and tub surrounds are frequent problem areas because small failures at grout lines, escutcheons, or caulk joints can drive moisture into adjacent wall cavities long before obvious staining appears.
A thermal anomaly should lead to different next steps depending on what else is present:
- Use a moisture meter when the anomaly is accessible and the main question is whether the material is wet.
- Recommend selective intrusive testing when readings are elevated, finishes are deteriorated, or a concealed leak source needs to be pinpointed.
- Refer for mold sampling or specialized assessment when there is persistent musty odor, visible fungal growth, occupant sensitivity concerns, or a history of unresolved water intrusion.
The EPA consistently emphasizes that controlling moisture is the key to mold prevention and that visible mold growth or persistent dampness should be addressed at the source rather than masked cosmetically, as outlined in its mold cleanup and moisture guidance. In other words, the camera helps narrow the search area; it does not replace proper confirmation or remediation planning.
This diagram shows how a thermal camera works. It’s not an X-ray seeing through the wall, but rather a sensitive tool that reads subtle surface temperature changes caused by hidden conditions on the other side.
This ability to read surface temperatures is what makes thermal imaging such a powerful, non-invasive diagnostic tool for your home.
Here’s a quick guide to help you understand what those different colors and patterns might mean when you see a thermal image from your home inspection.
Interpreting Common Thermal Patterns
| Thermal Pattern (Color) | What It Typically Means | Potential Problem Area |
|---|---|---|
| Cool Blues/Purples | A colder surface temperature, indicating heat loss or moisture. | Missing/damaged insulation, air leaks around windows/doors, hidden water intrusion. |
| Hot Reds/Yellows/Whites | A warmer surface temperature, indicating heat gain or an active heat source. | Overheating electrical circuits, leaky HVAC ducts, pest nests, heat gain from outdoors. |
| Streaks or Geometric Shapes | A uniform pattern suggesting a structural element. | Air leaks along wall studs, uninsulated ceiling joists, or framing members. |
| Amorphous “Blobs” or Spots | An irregular shape that doesn’t follow the home’s structure. | Moisture intrusion from a plumbing leak, wet insulation, or a large pest colony. |
Remember, these patterns are clues, not definitive diagnoses. An experienced inspector uses these visual cues, combined with other tools and knowledge of home construction, to pinpoint the root cause of the problem.
Identifying Dangerous Electrical Hotspots
Faulty electrical systems are a major fire hazard, and the warning signs are often completely invisible until it’s too late. Things like overloaded circuits, failing breakers, and loose connections generate a lot of excess heat long before they fail.
A thermal scan of your electrical panel and outlets can instantly identify these dangerous hotspots. On the camera, these connections will glow brightly, appearing as intense red or yellow spots against a cooler background. Catching this early is absolutely critical for preventing electrical fires and keeping your family safe.
Uncovering Unwelcome Pest Intrusions
You might be surprised to learn that even pests can’t hide from an infrared camera. Large colonies of termites, carpenter ants, or even rodents generate their own metabolic heat. A significant infestation can create a subtle but detectable warm spot on a wall or ceiling.
While a thermal scan isn’t a substitute for a full pest inspection, this thermal clue can alert an inspector to a potential problem that warrants a closer look by a pest control professional. It’s just one more layer of diagnostic capability that a thorough home inspection should provide.
Thermal Imaging for Mold and Moisture Problems
For moisture investigations, thermal imaging is at its best when the question is not “Is there mold in this wall?” but “Where is the moisture pattern that explains the smell, staining, or repeated damage?” That is why it has become a common first-pass tool in water-intrusion and mold-related assessments.
The practical workflow is usually visual review first, then infrared scanning, then moisture confirmation, and only after that any decision about opening materials or recommending mold sampling. That sequence exists because the camera is fast and non-destructive, but it is still only a screening device. This industry explainer on infrared and mold detection does a good job laying out the same limitation: thermal imaging helps map temperature anomalies that often correspond to hidden moisture, but it does not confirm mold by itself.
For homeowners, the value is speed and focus. Instead of opening multiple walls based on guesswork, we can often narrow concern to one ceiling bay, one shower-adjacent partition, or one lower wall section below a window. In our work, that often means the difference between a targeted repair and broad exploratory demolition.
There are also times when the camera is less decisive. If a leak is intermittent, if materials have already dried, or if indoor and outdoor conditions are too similar, the thermal signature may be weak or absent. That does not mean the concern is imaginary; it means additional methods may be needed.
A few situations especially justify mold-focused follow-up after a thermal scan:
- persistent musty odor with no obvious visible source
- a history of roof, plumbing, or HVAC condensate leaks
- staining that keeps returning after cosmetic repainting
- occupant health concerns tied to one room or area
- prior remediation without documentation showing the moisture source was fixed
If you want a consumer-friendly explanation of how leak-focused infrared cameras are often used in practice, this short guide on DigiDevice's page is a helpful companion read before scheduling a targeted inspection.
What to Expect During Your Inspection
So, you’ve scheduled a home thermal imaging inspection. What happens now? Knowing what the process looks like from start to finish can make everything feel much smoother and easier to understand.
The good news is that the entire procedure is straightforward and completely non-invasive. We’re not drilling holes or tearing anything apart. We’re just giving you a clear, behind-the-scenes picture of your home’s performance without turning your day upside down.
The whole thing breaks down into three simple stages: prepping the house, the scan itself, and finally, the analysis and report. Each step is essential for getting you accurate results you can use.
Stage 1: Prepping Your Home for the Scan
To get the best results, we need a little teamwork. A bit of prep work on your end is key to getting the most accurate readings from our infrared camera.
The goal is to create a significant temperature difference between the inside of your home and the outside air—ideally, at least a 15-20°F variance. Think of it like this: this temperature contrast makes problems like air leaks or missing insulation “light up” on the camera, making them impossible to miss.
Here’s how you can help us get a crystal-clear picture:
- During Cooler Months: Before we arrive, crank up your heat to warm the inside of the house. Make sure all windows and exterior doors stay shut.
- During Warmer Months: Run your air conditioning to get the interior nice and cool. Again, keep everything sealed up tight.
It also helps to close your blinds and curtains and turn off any ceiling fans. This ensures we’re reading the true surface temperature of your walls and ceilings, not just picking up reflected heat or air being moved around by a fan.
Stage 2: The On-Site Thermal Scan
Once your home is ready, one of our certified thermographers will arrive to conduct the scan. This is the hands-on part of the inspection, where we methodically move through your property with a high-resolution infrared camera.
We’ll scan all the critical areas, including:
- Interior Surfaces: We meticulously scan walls, ceilings, and floors in every room to spot insulation gaps or signs of hidden moisture.
- Exterior Surfaces: The entire building envelope gets a once-over to find air leaks and spots where heat is escaping.
- Key Systems: We’ll examine your electrical panel, outlets, and HVAC components for dangerous hotspots that could indicate a fire risk.
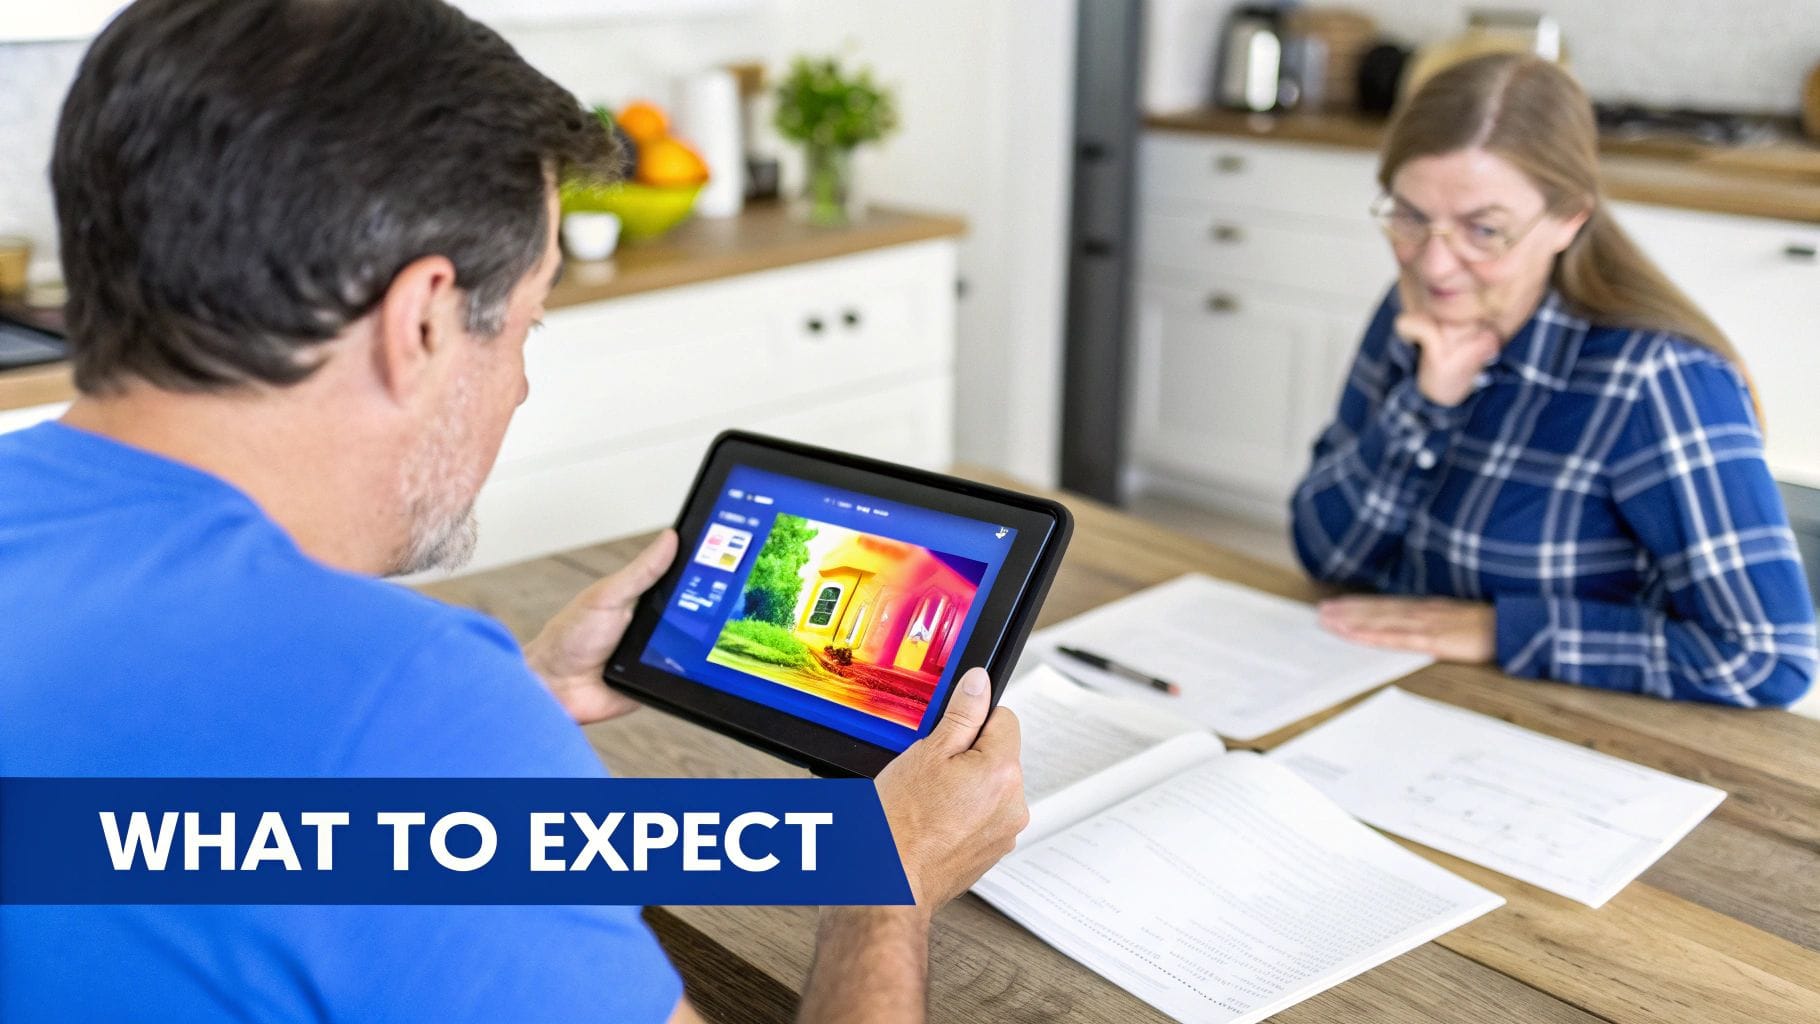
As we move through the home, we capture detailed thermal images of any anomalies we find. For every colorful thermal picture we take, we’ll also snap a regular digital photo. This side-by-side comparison gives you important context and makes the final report much easier to follow.
Stage 3: Analysis and Reporting
The on-site scan is really just the beginning. After we leave your property, the main work happens back at the office, where we interpret all that data. We analyze every single thermal image, carefully separating actual issues from potential false positives, like heat on a wall from recent sun exposure.
The final report isn’t just a collection of cool-looking pictures. It’s a detailed diagnostic tool. You’ll get the annotated thermal photos right alongside the standard ones, a clear explanation of what each finding actually means for you, and specific, actionable recommendations for what to do next.
This report is designed to turn complex thermal data into a simple roadmap for improving your home’s safety, comfort, and energy efficiency.
Why an Experienced Thermographer Is Essential
A high-tech thermal camera is an incredible piece of equipment, but it’s important to remember that it’s just a tool. In a home thermal imaging inspection, value comes from the certified professional interpreting what the camera sees. An infrared camera doesn’t spit out simple ‘yes’ or ‘no’ answers; it reveals complex thermal patterns that require an expert eye to make sense of.
Without proper training, it’s dangerously easy to get it wrong. An inexperienced operator might see a cool spot on a wall and immediately jump to the conclusion that it’s a water leak, causing a whole lot of unnecessary panic. A seasoned thermographer, however, knows to think through other possibilities, like an uninsulated pipe or a simple draft from a nearby outlet. That difference is everything.
This expertise is especially critical for distinguishing real problems from the common false positives that can easily fool an amateur.
Beyond the Pretty Pictures
An experienced thermographer brings a deep understanding of building science and thermal dynamics to the job. They can immediately recognize normal heat patterns that aren’t defects at all, saving you from spending money on pointless and costly “repairs.”
Here are a few common examples where inexperience leads to misinterpretation:
- Thermal Bridging: This happens when heat moves through wall studs, which are naturally less insulated than the wall cavity between them. An amateur might flag every single stud as an insulation problem, while a pro knows this is a perfectly normal characteristic of wood-frame construction.
- Solar Loading: A wall that’s been baking in the afternoon sun will hold onto that heat for hours. A trained inspector knows to account for this, preventing a false reading that looks like an internal hotspot.
- Air Currents: Even subtle drafts and convective loops can create thermal patterns that look just like moisture issues. An expert knows how to control the environment to get a clean, accurate reading.
A certified thermographer doesn’t just take pictures. They use their knowledge to analyze the context behind each image and confirm findings with secondary tools, like a moisture meter, to deliver an accurate diagnosis you can trust.
At Upchurch Inspection, our thermographers are trained to turn that raw thermal data into actionable, trustworthy insights. In practical terms, that often means slowing down rather than rushing to a dramatic conclusion. We would rather recommend a targeted follow-up than overstate what one image means. This ensures you get a precise understanding of your home’s condition—not just a collection of confusing images.
Scheduling Your Memphis Thermal Imaging Inspection
Investing in a home thermal imaging inspection is one of the smartest, most proactive moves you can make to protect your property. This isn’t just another item on a checklist; it’s a powerful diagnostic service that gives you a massive advantage. It’s invaluable whether you’re buying a new house in Germantown, mapping out a major renovation in Collierville, or just trying to hunt down a mysterious draft or a shockingly high energy bill in your Memphis home.
People sometimes hesitate at the initial cost, but that’s often shortsighted. The investment is quickly offset by significant long-term savings. When you catch energy leaks, you start lowering your utility bills every single month. When you find hidden moisture before it turns into widespread rot or mold, you avoid catastrophic repair costs down the road. For homeowners all across West Tennessee, a thermal scan delivers something you can’t put a price on: genuine peace of mind.
Taking the Next Step
So, how does it all work? The process is probably simpler than you imagine. Using portable, high-tech infrared cameras, certified professionals can quickly see what the naked eye can’t: heat loss, failures in your insulation, and hidden water leaks that are secretly driving up your heating and cooling costs. Modern cameras deliver high-resolution images and advanced analytics for crystal-clear, accurate results.
A thermal imaging inspection empowers you with knowledge, turning invisible threats into a clear, actionable report. It’s the difference between guessing about your home’s condition and knowing for sure.
If you’re ready to finally see what your eyes can’t, taking the next step is easy. A professional inspection gives you the clarity you need to make confident decisions, whether that means negotiating a better purchase price or planning your next big home improvement project.
For those in the Greater Memphis area, getting this vital information is just a click away. You can schedule your thermal imaging inspection with Upchurch Inspection to get a clear quote and talk through your home’s specific needs with our certified team.
Your Top Questions About Thermal Inspections, Answered
Thinking about adding a thermal imaging scan to your home inspection? You probably have a few questions. It’s a specialized service, after all.
Here are a few of the most common questions we get from homeowners, with straightforward answers to help you see the value hiding just beneath the surface.
Is Thermal Imaging Included In A Standard Home Inspection?
Typically, no. Your standard home inspection is a thorough visual assessment of the property, but it’s limited to what the naked eye can see.
Think of a home thermal imaging inspection as a specialized, diagnostic layer on top of that. It’s a powerful add-on that lets us find problems that are completely invisible otherwise, giving you a much deeper understanding of the home’s condition.
Can Thermal Imaging Detect Mold?
Not by itself. A thermal camera detects surface temperature differences, not mold organisms. What it can do is identify suspicious moisture patterns that may support mold growth behind finishes or around building components.
That is why a responsible answer is: thermal imaging is excellent for screening moisture risk, but mold confirmation usually requires visual evidence, direct moisture testing, and sometimes sampling or further invasive investigation when the situation calls for it.
Are Mold Inspections Worth It?
Often, yes—especially after a past leak, when there is a persistent musty odor, when staining keeps returning, or when occupants are reacting to one part of the home. In those situations, a mold-focused inspection can help answer the bigger question a general scan cannot: whether there is a moisture source, whether conditions are supporting fungal growth, and what type of follow-up is justified.
If there is no odor, no visible concern, no water history, and no suspicious thermal or moisture findings, a separate mold investigation may not add much. We usually recommend it when there is a clear reason to move beyond screening.
Is Mold-Inspection Pricing The Same As A General Thermal Scan?
Usually not. A general thermal scan is often priced around the size of the home and the scope of the building review. A mold-oriented inspection may involve more targeted moisture mapping, additional meter work, documentation of affected areas, and sometimes coordination for sampling or laboratory analysis.
In other words, the price structure can be different because the purpose is different. A general thermal scan looks broadly for anomalies; a mold investigation is more focused on moisture history, risk areas, and confirmation steps.
When Is The Best Time of Year For An Inspection?
We can perform a thermal inspection any time of year, but the results are sharpest when there’s a big temperature difference between inside and outside. We’re looking for a gap of at least 15-20°F.
This contrast is key. It makes the heat signatures from things like insulation gaps, drafty windows, or air leaks stand out in stark relief on the camera’s display.
The greater the temperature difference between inside and out, the clearer the thermal images become, making it easier for an inspector to pinpoint hidden problems with accuracy.
How Much Does A Thermal Imaging Inspection Cost?
The cost really depends on the size and complexity of your home and exactly what you need us to investigate. A full scan of an entire house will differ from a targeted scan looking for a specific roof leak, for example.
The best way to get a clear number is to reach out to a certified local inspector who can give you a quote for your property.
Ready to uncover your home’s hidden secrets? The certified team at Upchurch Inspection provides detailed thermal imaging services across Greater Memphis and West Tennessee. Schedule your inspection today and get the true peace of mind you deserve.


